.avif)
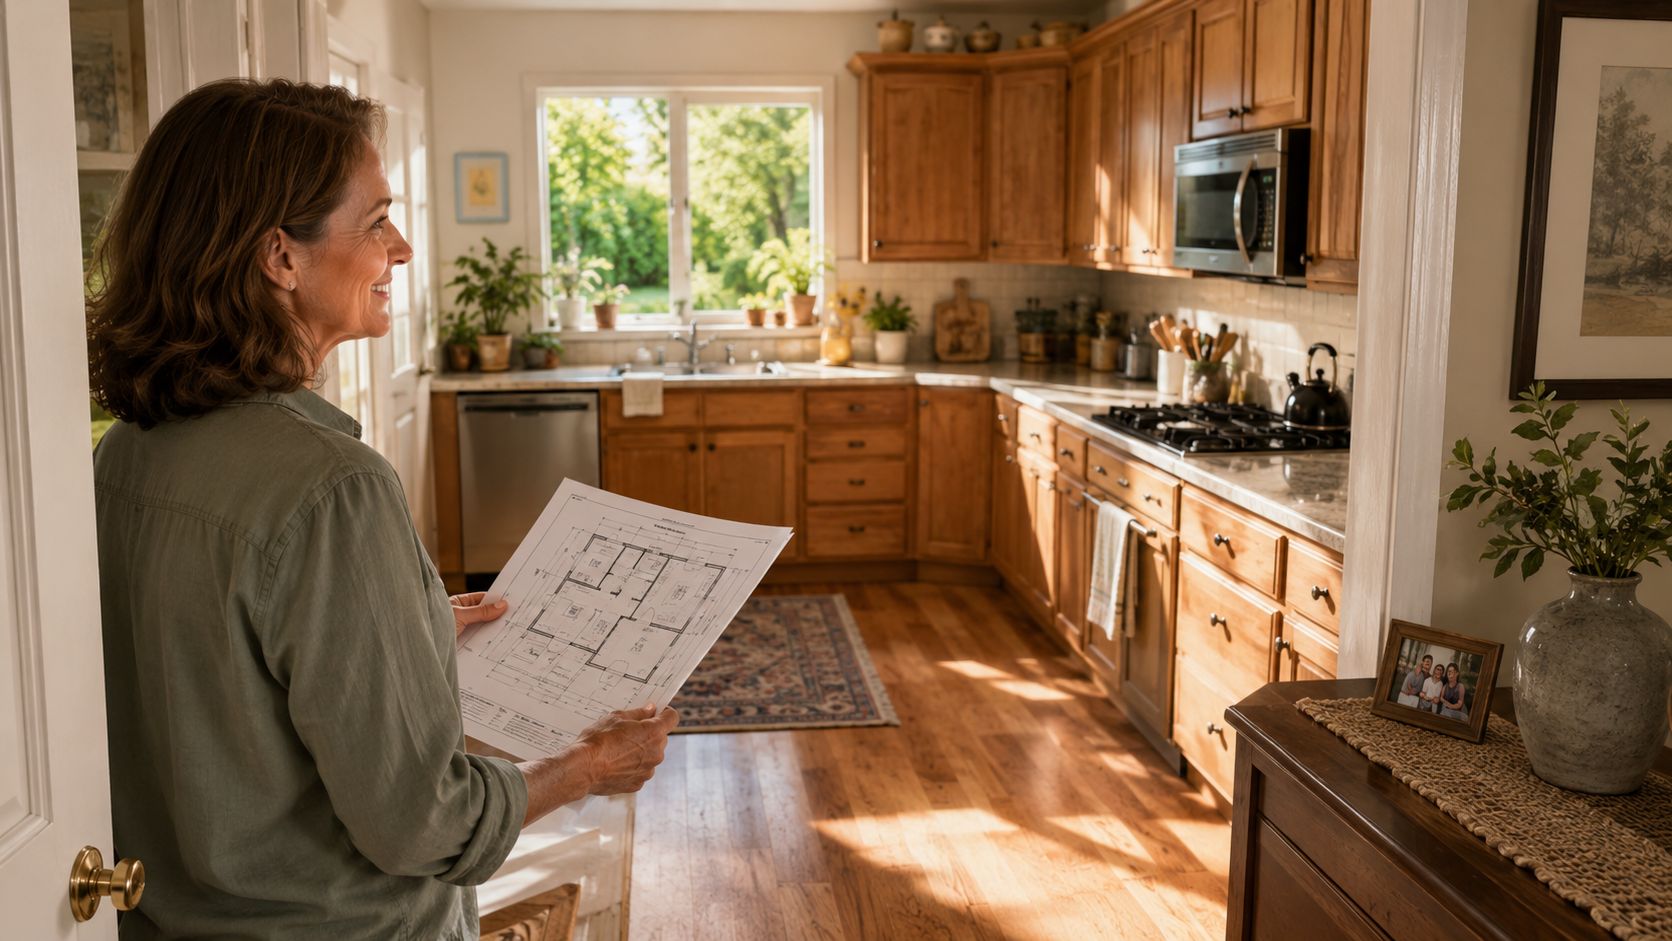
At the kitchen threshold, a homeowner studies a printed floor plan while morning light crosses the room she's lived with for twenty years. She can finally see two perpendicular runs of cabinetry replacing the closed galley she once accepted, but the drawing raises a more important question: will the new shape support the way her household moves?
Table of Contents
Imagining the L Before You Draw It
An L shaped kitchen design layout begins with two legs, not with an island, a cabinet door style, or a pantry wish list. Before drawing anything, mark the activities that happen every day. Coffee may begin at the refrigerator and end at a small appliance station. Lunch preparation may occupy the counter beside the sink. Dishes may travel toward the dishwasher while a dog bowl sits near the back door. A doorway, a favorite view, or the person who walks through the room on the way to work can matter as much as the cabinetry itself.
The L asks honest questions. Who cooks, and who passes through? Does one person prepare food while another unloads groceries? Do you want to face the garden, keep sight of the family room, or preserve a clear route to the exterior door? A layout that looks generous on paper can feel unsettled if its open ends collect traffic.
For homeowners comparing possibilities, this overview of different kitchen layout types is a useful starting point, but the final plan needs to respond to the specific room and household.
Give each leg a job
Think of the long leg as the primary work run. It often anchors the sink, dishwasher, and the main preparation stretch, giving cleanup and food preparation a shared countertop relationship. The short leg can carry the cooktop, tall storage, or a purposeful transition toward an adjacent room.
That division isn't mandatory, but it gives the plan a readable structure. Each leg should have a personality and a reason to exist. One might be quiet and practical, with drawers for knives, cutting boards, and everyday dishes. The other might be more architectural, terminating in a pantry cabinet or framing the view into an open living area.
The inside corner is where the layout earns or loses its reputation. It joins the two work runs, but it also concentrates circulation, plumbing and electrical decisions, and the most difficult cabinet in the room. A poorly resolved corner can turn an otherwise graceful kitchen into a place where drawers meet, cabinet doors compete, and the cook reaches around an obstruction.
Practical rule: Treat the corner as a design decision, not leftover square footage.
Read the open ends as traffic
The two open ends of an L are natural pinch points. One may meet a doorway, while the other may face an island, a breakfast table, or a passage to the family room. These edges need deliberate clearance because people don't move through a kitchen in straight lines. They pause, turn, carry plates, open refrigerator doors, and stand beside one another while talking.
A stage with two wings is a helpful mental model. The cabinetry forms the wings, while the center is the performance area. Countertop length matters, but the movement between those surfaces determines whether the room feels calm. The L succeeds when the corner supports the work rather than interrupting it, and when the open ends release traffic instead of catching it.
Its lineage supports that emphasis on movement. Lillian Moller Gilbreth's motion-study work in the 1920s was later folded into the kitchen work triangle model, and a widely cited demonstration at a women's exposition in 1929 showed an L-shaped arrangement reducing the steps required to make strawberry shortcake from 281 to 45. The example, documented in the history of the kitchen work triangle, illustrates the layout's potential to reduce wasted motion, not a guarantee that every modern kitchen will behave efficiently.
The next test is dimensional. Once the two legs are visible on paper, inches reveal whether the plan has room for real bodies, open doors, and simultaneous tasks.
Right-Sizing the Layout
Dimensions work best as thresholds, not commandments. They give you a practical way to challenge a plan that looks attractive on paper but asks too much of the room. An L-shaped kitchen succeeds or fails at the corner, where two runs, cabinet doors, drawers, and daily movement meet.
For a balanced starting point, keep each leg between 12 and 15 linear feet. That length provides useful work surface without sending the cook along an unnecessarily long route. Protect the aisle with the same care. Allow 42 to 48 inches where one person works alone, and at least 48 inches where two cooks regularly share the room or an island sits opposite the cabinets.
The following checks bring the main dimensional decisions together. These planning ranges are also summarized in the L-shaped kitchen layout reference.
| Element | Recommended Range | Why It Matters |
|---|---|---|
| Each cabinetry leg | 12 to 15 linear feet | Keeps the work area substantial without encouraging excessive travel |
| Main aisle | 42 to 48 inches | Supports comfortable movement and shared use |
| Island aisle | 48 inches minimum for frequent two-cook use | Protects circulation when doors and people occupy the same space |
| Refrigerator landing zone | 24 inches | Gives groceries and ingredients a place to rest |
| Sink landing zone | 18 to 24 inches | Supports rinsing, preparation, and dish handling |
| Cooktop active-side landing | 15 to 18 inches | Provides a safer place for hot cookware |
| Wall cabinet depth | 12 to 14 inches | Preserves headroom and visibility over standard base cabinets |
| Inside corner allowance | Roughly 24 by 24 inches | Prevents the corner from being absorbed by wishful cabinet planning |
Reserve the inside corner before assigning every inch of storage. If it vanishes from the drawing, adjacent drawers, doors, and appliance openings can collide. Standard base cabinetry is commonly planned at 24 to 26 inches in countertop depth, with circulation protected beyond it, as described in the L-shaped kitchen dimensions guide.
Use the numbers to argue with the plan. If a proposed island leaves only a narrow passage, test the clearance with door swings and two people moving through it. Hoping the room will feel larger after installation is not a workable adjustment.
Landing zones are small surfaces with large consequences. A refrigerator without nearby counter turns grocery unloading into a relay. A sink without counter beside it makes rinsing and plating compete. A cooktop without an active-side landing area pushes hot pans toward the corner or into the aisle.
The work triangle remains a useful check, even though real households rarely cook in straight lines. Keep the sink, refrigerator, and range path within a total perimeter of 13 to 26 feet, with each leg generally between 4 and 9 feet. These measurements, outlined in the smart L-shaped floor-plan guide, will not replace judgment. They can expose an L that has become storage-first, with the corner and everyday movement treated as afterthoughts.
Work Triangle and Work Zones in Practice
A weeknight exposes an L-shaped kitchen's strengths quickly. One person plates near the sink while another opens the refrigerator for ingredients. If the refrigerator sits at the end of a run with a clear approach, that trip can stay outside the main preparation area. If its door opens across the corner or into the aisle, the same movement creates a collision. The L succeeds or fails at these points of contact, not only on a floor plan.
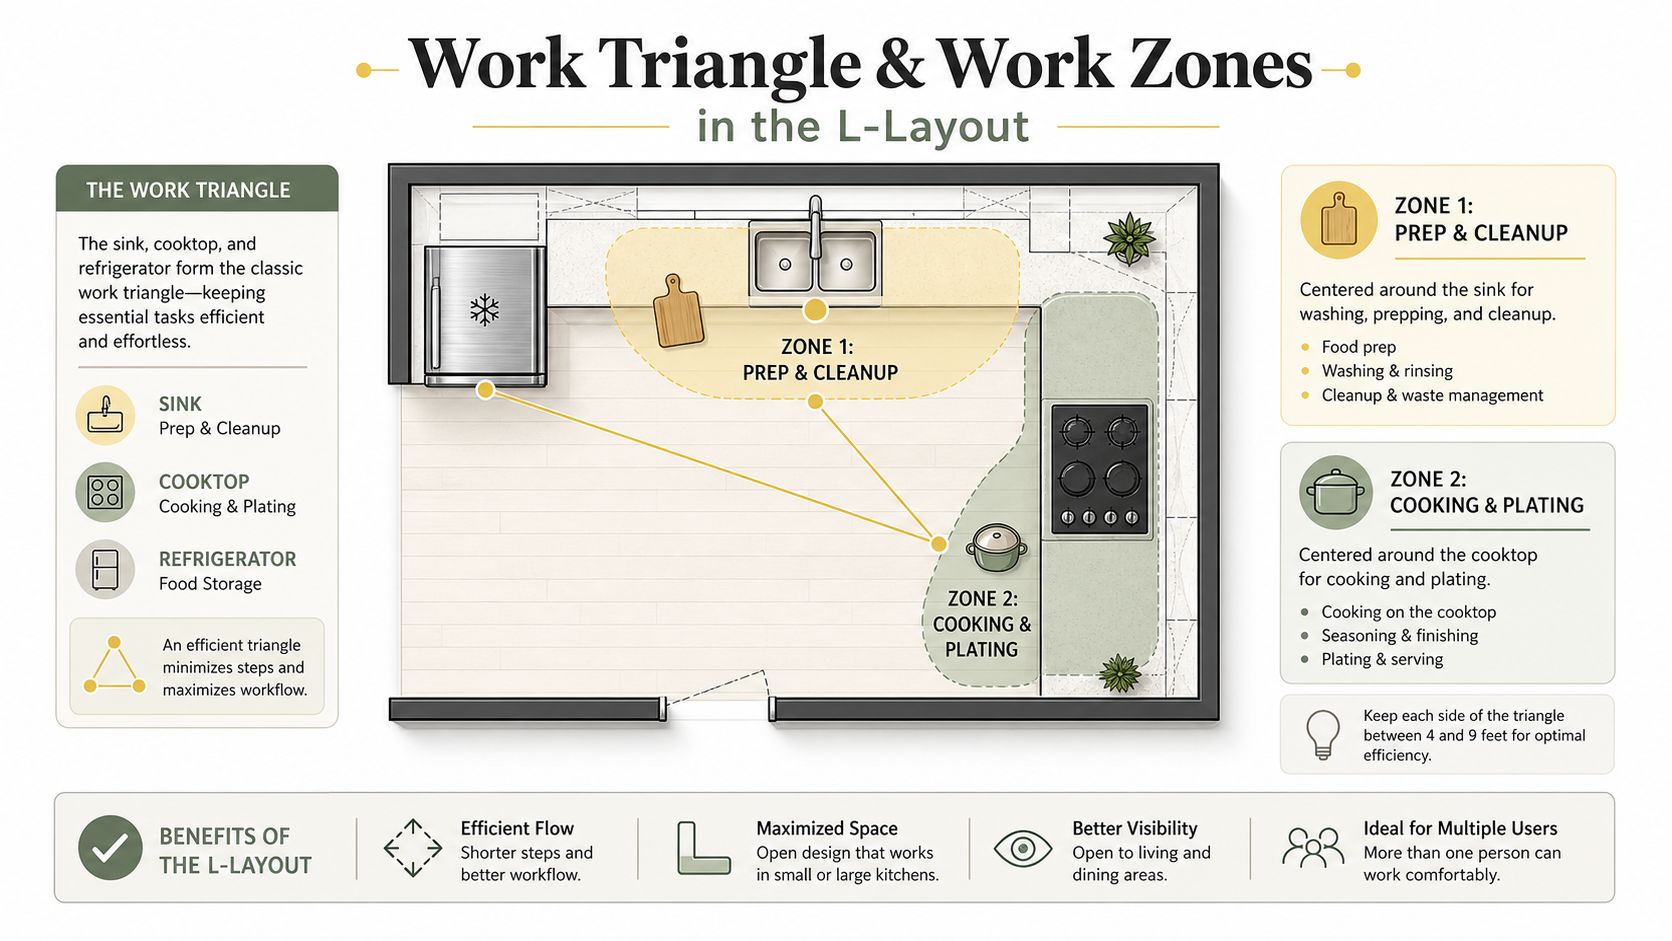
The classic work triangle connects the sink, cooktop, and refrigerator. Those destinations can sit naturally across the two legs, but the triangle measures travel between appliances. It does not show where chopping happens, where groceries land, or how two people share the room. Use it as a check, then assign the work each counter run must support.
Assign zones before cabinets
The hot zone belongs at the cooktop, with ventilation and a landing surface for cookware. The wet zone includes the sink, dishwasher, and adjacent preparation counter. The cold zone needs the refrigerator, a clear approach, and nearby surface for groceries or ingredients. A dry zone can hold pantry goods, everyday dishes, and small appliances.
Traditional planning keeps the triangle's individual legs roughly 4 to 9 feet and the total path around 13 to 26 feet. Those benchmarks provide a useful starting point, but they do not replace judgment. Zones add the practical detail that distance misses by connecting tasks to counter runs, drawers, outlets, and storage.
The triangle tells you how far people walk. The zones tell you what they're carrying while they walk.
Assign each leg a dominant zone before selecting cabinet widths. The long leg might handle preparation and cleanup, while the shorter leg supports cooking and pantry access. In a home where breakfast and entertaining matter more than elaborate cooking, the shorter leg may work better as a beverage and serving station.
For a broader planning perspective, this guide to planning a kitchen layout can help organize the conversation before detailed cabinetry begins.
The 2025 peer-reviewed study of lifestyle-based kitchen layout optimization questions whether one triangle can describe every household. That perspective fits the L particularly well. Its geometry should support actual routines, whether the kitchen serves one cook, a pair, or a multi-use open plan.
Cabinetry, the Corner, and Custom Pantry Options
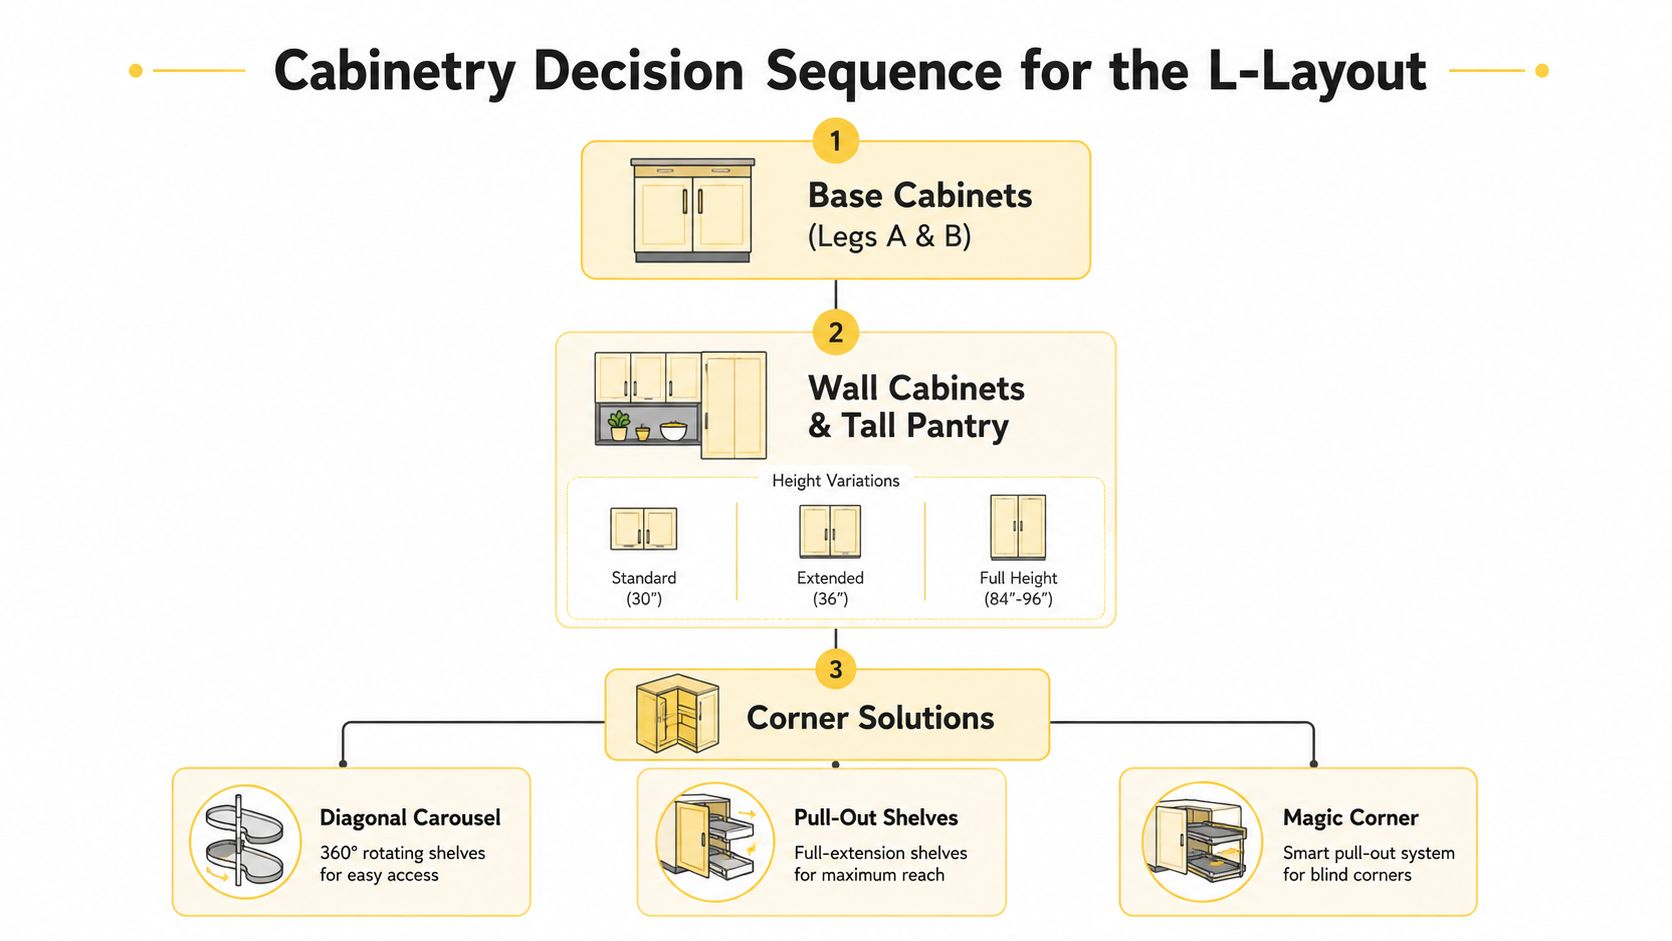
Cabinet decisions become easier when they follow a sequence. Start with the base runs on both legs, because those boxes establish countertop depth, appliance openings, and the corner relationship. Add wall cabinets next, then tall pantry storage, and only after the main architecture is sound should you refine the interior accessories.
The corner deserves a deliberate choice rather than a hopeful filler cabinet. A lazy Susan can make stored items more visible, while pull-out hardware can bring contents forward. Open shelving may be the better answer when the corner faces the room and display matters more than maximum enclosed storage.
Build the storage hierarchy
A standard pantry cabinet can anchor an open end of the L and provide a clear home for dry goods, trays, and small appliances. A custom walk-in or butler's pantry serves a different purpose, often moving bulk storage and secondary preparation away from the main work area. The right choice depends on whether the room needs more accessible daily storage or a separate support space.
Door style affects the visual weight of the two legs. Drawers often make everyday cookware easier to reach, while doors can suit wider storage or a quieter furniture-like appearance. Tray dividers, spice pull-outs, and dedicated organizers should follow the cabinet plan, not substitute for it. Interior accessories work well when they answer a known habit.
A useful sequence is:
- Set the cabinet boxes. Confirm leg lengths, corner treatment, appliance openings, and the relationship to walls and doors.
- Choose the visible fronts. Resolve door style, overlay, color, and the transition between base, wall, and tall cabinetry.
- Detail the interiors. Add dividers and pull-outs where they reduce reaching, stacking, or searching.
- Review the termination points. Make sure a pantry, panel, or open shelf gives each leg a composed ending.
Jennifer Gilmer Kitchen & Bath offers layout planning, custom and semi-custom cabinetry, and integrated storage solutions for residential projects in the Washington, DC, Maryland, and Virginia area, with work coordinated from concept through installation.
For more ideas about organizing a tall storage run, explore these kitchen pantry cabinet ideas. The most useful pantry is the one placed where the household naturally reaches for it, not just where an empty wall remains.
Appliance Siting and Island Decisions
Appliances and islands should be planned together. A cooktop on the longer leg can establish a clear hot zone, with 24 inches of landing space on each side as a practical planning target. The hood should relate to the cooktop width, while the sink often works across the corner when that arrangement supports plumbing economy and leaves a useful preparation stretch.
A refrigerator commonly belongs at a leg terminus, where it can serve the kitchen without pulling grocery traffic through the cooking center. Preserve a clear approach and at least a 36-inch aisle, using the kitchen plumbing guide to understand the broader coordination required before walls and floors are opened.
| Element | Minimum | Recommended | Notes |
|---|---|---|---|
| General aisle in front of the L | 36 inches | 42 to 48 inches | The minimum may function, but the wider range feels calmer |
| Island clearance | 36 inches | 42 to 48 inches | Use the wider clearance when doors swing into the aisle |
| Island for frequent two-cook use | 42 inches | 48 inches | Protects shared movement and appliance access |
| Refrigerator approach | 36 inches | Clear, direct route | Avoid placing the open door across the principal prep path |
| Dishwasher beside sink | 21 inches | More when possible | Check the open door against nearby circulation |
| Cooktop landing | Not less than the planned landing surface | 24 inches each side | Keeps hot cookware out of the corner and aisle |
An island should extend a zone, not appear because the room can technically hold one. It might add prep space, casual seating, or storage, but it can also close the open center of the L and turn a welcoming plan into a corridor.
Door swings need a full-scale review. Check the dishwasher beside the sink, wall ovens near hallways, and refrigerator doors near corners. Mark those arcs on the plan or floor before ordering cabinetry. A drawing can show every appliance in its intended location while concealing the moment when two doors open at once.
The island clearance guidance places 36 inches as a typical minimum, with 42 to 48 inches recommended in more active conditions and 48 to 54 inches offering greater comfort in higher-traffic kitchens. The island earns its place only when it preserves the movement that made the L appealing.
Lighting, Finishes, and Budget as Design Decisions
Lighting belongs on the layout from the beginning. An L creates two runs and an inside corner, so ambient light alone may leave the work surfaces unevenly illuminated. Under-cabinet lighting should follow the preparation and cooking counters, while the corner needs particular attention because it can become a dark pocket beneath wall cabinets.
Layer the plan in three passes:
- Ambient light establishes overall visibility and should support the room beyond the cabinetry.
- Task light follows the sink, preparation counter, cooktop area, and any small-appliance station.
- Accent light can give open shelving, a pantry termination, or a carefully selected tile surface a quieter presence.
Switch-leg circuits deserve early coordination. You want control over the two legs and their task lighting without creating a confusing collection of switches at the doorway. A practical step by step recessed lighting guide can help homeowners understand the planning questions before the electrical layout is finalized.
Finishes should respond to the corner geometry. A counter seam may be less distracting on one leg than at the joint. Tile pattern direction can reinforce the L or make the corner feel busier. Cabinet-to-counter contrast affects whether the two runs read as one continuous composition or as separate pieces joined reluctantly.
My firm opinion: Lock the lighting and appliance package first, then let the finishes follow. Swapping a cabinet pull is cheaper than relocating a junction box.
Budget decisions also belong beside the plan. A corner mechanism, custom pantry interior, lighting circuit, or appliance panel can change the character of the room, but each should answer a functional need. Choose the cabinet box and primary construction first, then compare visible finishes and organizers with the traffic pattern in view.
A restrained finish palette often gives the L more architectural clarity. That doesn't mean the room should be plain. It means the corner, appliance terminations, and sightlines should do the visual work instead of competing materials.
A Pre-Design Checklist for Your Showroom Visit
Bring more than inspiration photographs to a design consultation. Bring the evidence of how the kitchen behaves now, including the awkward moments you've learned to ignore.
Confirm the drawing
Ask the designer to mark these items directly on the plan:
- Leg lengths: Confirm the usable length of each run after corners, panels, and appliance openings are deducted.
- Aisle widths: Check the narrowest point, not only the average open area.
- Landing zones: Identify the counter beside the refrigerator, sink, and cooktop.
- Corner clearance: Show how the corner cabinet operates and whether adjacent drawers can open together.
- Door swings: Review refrigerators, dishwashers, wall ovens, and nearby room doors in their open positions.
- Island relationship: If an island is proposed, measure the space to the nearest counter edge and every active appliance.
The plan should also record lifestyle information. Tell the designer how many people cook at once, whether groceries enter through the kitchen, where lunches are assembled, and whether entertaining means guests gather around the work area or stay outside it. Mention the dog bowl, coffee equipment, recycling, baking trays, and the appliance you use most often. Those details reveal the zones more clearly than a preferred door style.
Ask the questions that protect the result
Use the showroom visit as a working session. Ask how the cabinetry is constructed, what corner solutions are available, and whether a pantry cabinet or separate pantry better suits your storage habits. Review appliance clearances, ventilation, electrical locations, lighting circuits, countertop seams, and the sequence for approving selections.
You should also ask when cabinet orders, appliances, surfaces, and installation need to be finalized. Lead times affect the order of decisions, while late changes can disturb plumbing, electrical work, and finished walls.
Bring a printed plan and mark it as you talk. A good consultation should leave you with clearer relationships between the two legs, the corner, and the people who use them, not just a collection of samples.
Visit Jennifer Gilmer Kitchen & Bath to discuss an L-shaped kitchen design layout with a team serving Washington, DC, Maryland, and Virginia. The firm can guide your project from concept through installation, including cabinetry, appliance placement, lighting, custom pantry storage, and finish selections.