.avif)
You're chopping vegetables at dusk, and the kitchen ceiling fixture is doing exactly what it was designed to do: lighting the room. Unfortunately, your head and shoulders are casting a shadow across the counter where your hands are working. The backsplash glows, the prep surface disappears, and the kitchen feels less comfortable precisely when you need it most.
That's the problem under cabinet lighting installation should solve. It isn't a row of lights attached beneath upper cabinets. It's a task-lighting layer that has to work with the room's ambient fixtures, cabinet geometry, electrical system, and daily routines. Jennifer Gilmer Kitchen & Bath approaches that decision as part of the whole kitchen plan, from concept through installation, for homeowners in Washington DC, Maryland, and Virginia.
Table of Contents
Why Under Cabinet Lighting Belongs in the Design Plan
Ambient lighting fills the room, but it rarely lands where the cook's eyes and hands need it. A ceiling fixture may illuminate the floor and cabinet fronts while leaving the countertop beneath the uppers in shadow. Under cabinet lighting places illumination at the working edge, where you chop, measure, read a recipe, plate food, or wipe down the counter.

Consider a kitchen with a sink run on one wall and a longer preparation counter beside the cooktop. If both areas rely on a central ceiling fixture, the person standing at the counter becomes the obstruction. A well-positioned under-cabinet layer restores the surface without asking the overhead lighting to become excessively bright.
The counter is the working plane
The strongest kitchen lighting plans separate three roles:
- Ambient light gives the room its general visibility.
- Task light follows the counters where work happens.
- Decorative light adds atmosphere to glass-front cabinets, pendants, or architectural details.
Under cabinet fixtures belong primarily to the second category, although careful dimming lets them contribute to evening atmosphere. Jennifer Gilmer Kitchen & Bath's guidance on kitchen lighting fixtures treats these layers as related decisions rather than isolated purchases.
Poor planning creates familiar problems. A fixture mounted too far back lights the backsplash instead of the counter. Gaps between cabinet runs create dark bands. An incompatible dimmer can produce flicker or audible buzz. A bright strip without a diffuser can expose individual diode points on a polished stone surface.
Design rule: The light should serve the work surface first. The fixture itself should be visually quiet.
Electrical planning matters just as much. In the United States, the National Electrical Code treats under-cabinet fixtures as luminaires under Article 410, requires listed fixtures to be installed according to manufacturer instructions, and distinguishes them from the two required 20A small-appliance branch circuits serving kitchen countertops under Article 210. Hardwired under-cabinet lighting will usually use a general lighting branch circuit rather than the countertop receptacle circuits, as outlined in this under-cabinet lighting wiring guidance.
That distinction is one reason the project deserves attention before drywall, backsplash material, and cabinet fillers are finalized. Layout, fixture family, wiring route, driver location, dimmer type, and nighttime comfort all affect one another. The cleanest result comes from resolving those relationships before anyone drills into the cabinetry.
Mapping the Work Before You Pick a Fixture
The right starting point is the kitchen after dark, not the product catalog. Walk through the room and identify the counters you use: the prep area near the sink, the landing space beside the cooktop, the main cleanup zone, and the surface where you make coffee or assemble breakfast. A short run that supports daily prep deserves more attention than a long stretch that rarely sees work.
Review the cabinet arrangement alongside this guide to planning a kitchen layout before specifying lights. Under-cabinet lighting should reinforce the kitchen's work zones. A fixture over unused counter space may look balanced on a plan and still feel irrelevant in daily life. Decide the lighting layer, switch location, dimmer compatibility, and wiring route as one plan, rather than treating the fixture as a standalone purchase.
Measure the underside and the leading edge
Record the length of every cabinet run, including corner breaks and changes in cabinet depth. Note whether each fixture will be recessed into the underside, surface mounted behind a face-frame lip, or attached to a valance. Favor the front underside of the cabinet for task lighting. Contemporary placement guidance commonly sets the fixture about 2 to 3 inches from the front edge, which improves illumination on the work surface and limits backsplash glare, as described in this under-cabinet lighting placement guide.
Measure the recessed opening, not just the cabinet width. A common fitting rule is to choose a fixture at least 2 inches shorter than the cabinet width and slightly less deep than the recessed underside. That keeps the housing from projecting beyond the cabinet edge, according to this installation guide from Home Depot.
Set brightness by task. A practical planning baseline for countertop lighting is 200 to 500 lumens per linear foot. Detailed food preparation may call for 500 or more lumens per foot, according to this under-cabinet lighting brightness guide. Use those figures to begin fixture selection, not to make every surface equally bright. Display cabinetry and beverage stations can use a softer layer.
Record the details installers need
Before ordering, make a simple field sheet. Include:
- Run lengths: Measure each uninterrupted cabinet span separately.
- Corner conditions: Note inside corners, blind corners, and changes in cabinet depth.
- Obstacles: Mark outlets, face frames, hinges, dividers, appliances, and open shelving.
- Power access: Identify the nearest outlet or possible switch-leg location.
- Driver location: Reserve a ventilated, serviceable cabinet, attic, basement, or other accessible space.
- Control points: Decide whether the lights will share a switch, use a separate dimmer, or join a larger lighting scene.
Organize these measurements into a checklist for budgets and permits before purchasing. Confirm the planned control method can operate with the selected driver and dimmer, and identify any wiring that must be completed before drywall, backsplash, or cabinet fillers are installed.
Record color temperature on the same sheet. Warm residential kitchens generally suit 2700K to 3000K, while a crisper modern appearance may use 3500K. Keep the under-cabinet layer compatible with ceiling fixtures and decorative lighting. Otherwise, white cabinetry, stone, and food colors can appear unrelated even when each fixture looks attractive alone.
Choosing the Right Fixture for Each Cabinet Run
There isn't one universally correct under-cabinet fixture. The cabinet run decides. A long, uninterrupted span needs continuity. A short display cabinet may benefit from discrete pools of light. A curved shelf, drawer interior, or toe-kick needs flexibility that a rigid bar can't provide.
| Fixture Type | Best Cabinet Run | Typical Lumens/Ft | Installation Note |
|---|---|---|---|
| LED strip | Long, uninterrupted cabinet spans | Varies by product specification | Pair with a diffuser when diode dots would be visible |
| Puck lights | Short runs, display cabinets, focused task areas | Varies by product specification | Space consistently to control scalloping |
| Linear bar | Straight runs and retrofit layouts | Varies by product specification | Rigid housing creates a clean seam and protects the light source |
| Tape light | Curves, drawers, shelves, and toe-kicks | Varies by product specification | Requires a compatible, well-sized driver and careful termination |
Continuous light for long runs
An LED strip or linear bar is usually my first choice for a cabinet span longer than 24 inches, because continuous coverage looks calmer and reduces bright pools between fixtures. LED strip offers flexibility and can be cut at designated points. Linear bars use a rigid aluminum housing, often with a frosted lens, and can be easier to align across a retrofit where a precise, straight seam matters.
Tape light is the more adaptable cousin. It can follow curves, tuck inside drawers, and continue into architectural details, but it's more dependent on driver quality, heat management, connectors, and clean installation. Don't bury it where it can't shed heat or be serviced.
Pucks for deliberate points of light
Puck lights create concentrated pools. That can be useful over a small prep area or inside display cabinetry, but the pattern needs discipline. Pucks are commonly spaced 8 to 12 inches apart, and consistent measurements help prevent a patchy rhythm, according to Lowe's installation guidance. Another placement approach uses pucks every 6 to 10 inches when a more pronounced dotted accent pattern is intentional, as discussed by Green Building Advisor.
The geometry matters more than raw wattage. Mounting toward the rear tends to brighten the backsplash while leaving the countertop underlit. Dry-fit the fixtures, stand at the counter, and inspect the shadow line before fastening anything.
Specify the quality of the light
For kitchens, choose CRI 90 or higher when you want food, stone, wood, and painted cabinetry to read accurately. Check the beam angle as well. A narrow beam can create hotspots, while a wider distribution usually produces a more even wash across the work surface.
A diffuser is often worth the modest visual trade-off. It softens diode dots, reduces sparkle on glossy counters, and gives the light source a finished architectural appearance. If you're comparing products or tools for a separate work area, a Milwaukee underbody light price guide can provide a useful point of reference, but a work light isn't automatically the right choice for permanent kitchen cabinetry.
Power, Wiring, and the Quiet Work Behind the Cabinets
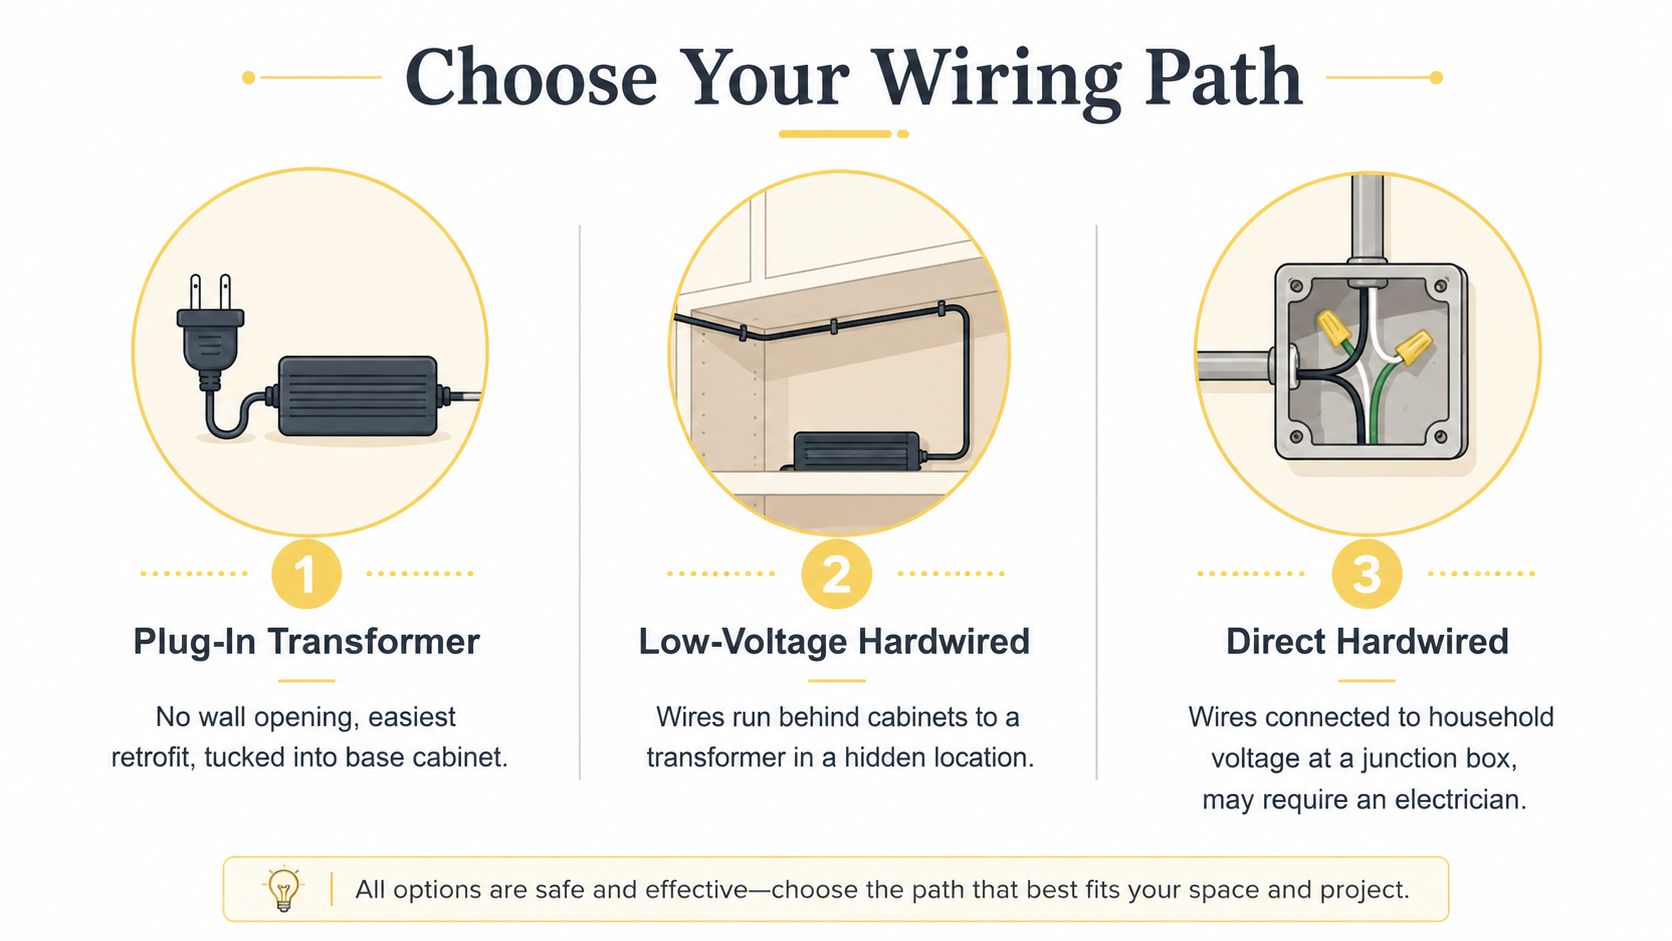
The wiring path determines how finished the kitchen feels. Most homeowners choose among three approaches, and each solves a different renovation problem.
A plug-in transformer sits inside a base cabinet or another concealed location. It avoids opening walls and often makes the most sense for a retrofit when the nearest outlet is accessible and cords can be routed cleanly. A low-voltage hardwired system sends cable behind the cabinets to a remote driver in a basement, attic, or serviceable cabinet. It produces a cleaner visual result, especially when several cabinet runs need to operate together. A 120V hardwired system connects fixtures to a switch leg or junction box and may require more invasive electrical work.
Size the driver before routing cable
Add the wattage of every LED fixture on the driver, then select a driver with enough capacity to keep the continuous load at no more than roughly 80% of the driver's capacity. That planning margin gives the system room to operate without forcing the driver to run at its limit. Never mix 12V and 24V fixtures on the same driver. The voltage, connectors, and fixture specifications have to agree from the beginning.
LED drivers should be listed Class 2 transformers where required by the installation, placing these systems in a standardized low-voltage category rather than treating them as improvised add-ons. The broader electrical guidance also notes that lighting loads should not exceed 80% of circuit rating for continuous use, so the electrician should review the actual circuit and fixture load together, not in isolation.
Controls deserve equal attention. Decide whether the lights need a single-pole switch, a three-way arrangement, or a separate control from the ceiling fixtures. Confirm whether the selected driver requires an ELV or 0-10V dimmer, and verify that the exact dimmer and driver combination appears on compatible product documentation. Install the electrical box before drywall closes.
For a remodel with several cabinet runs, a simple load map can prevent expensive revisions. Electrical teams may also use tools such as Exayard electrical estimating software to organize fixture, wiring, and labor allowances before the installation begins.
California energy-code guidance treats cabinet-mounted task lighting that projects onto the countertop as kitchen lighting and recognizes separate control from ceiling lighting by an EMCS, as described in California's requirements for specific indoor space types. Local requirements vary, so an electrician should confirm circuit protection, listed components, permit triggers, and inspection requirements for the specific home.
Tools, Materials, and a Realistic Install Day
A successful install day starts with a layout that has already been tested on the cabinet. The shopping list should reflect the chosen wiring path, not a generic kit bought before anyone measures the run.
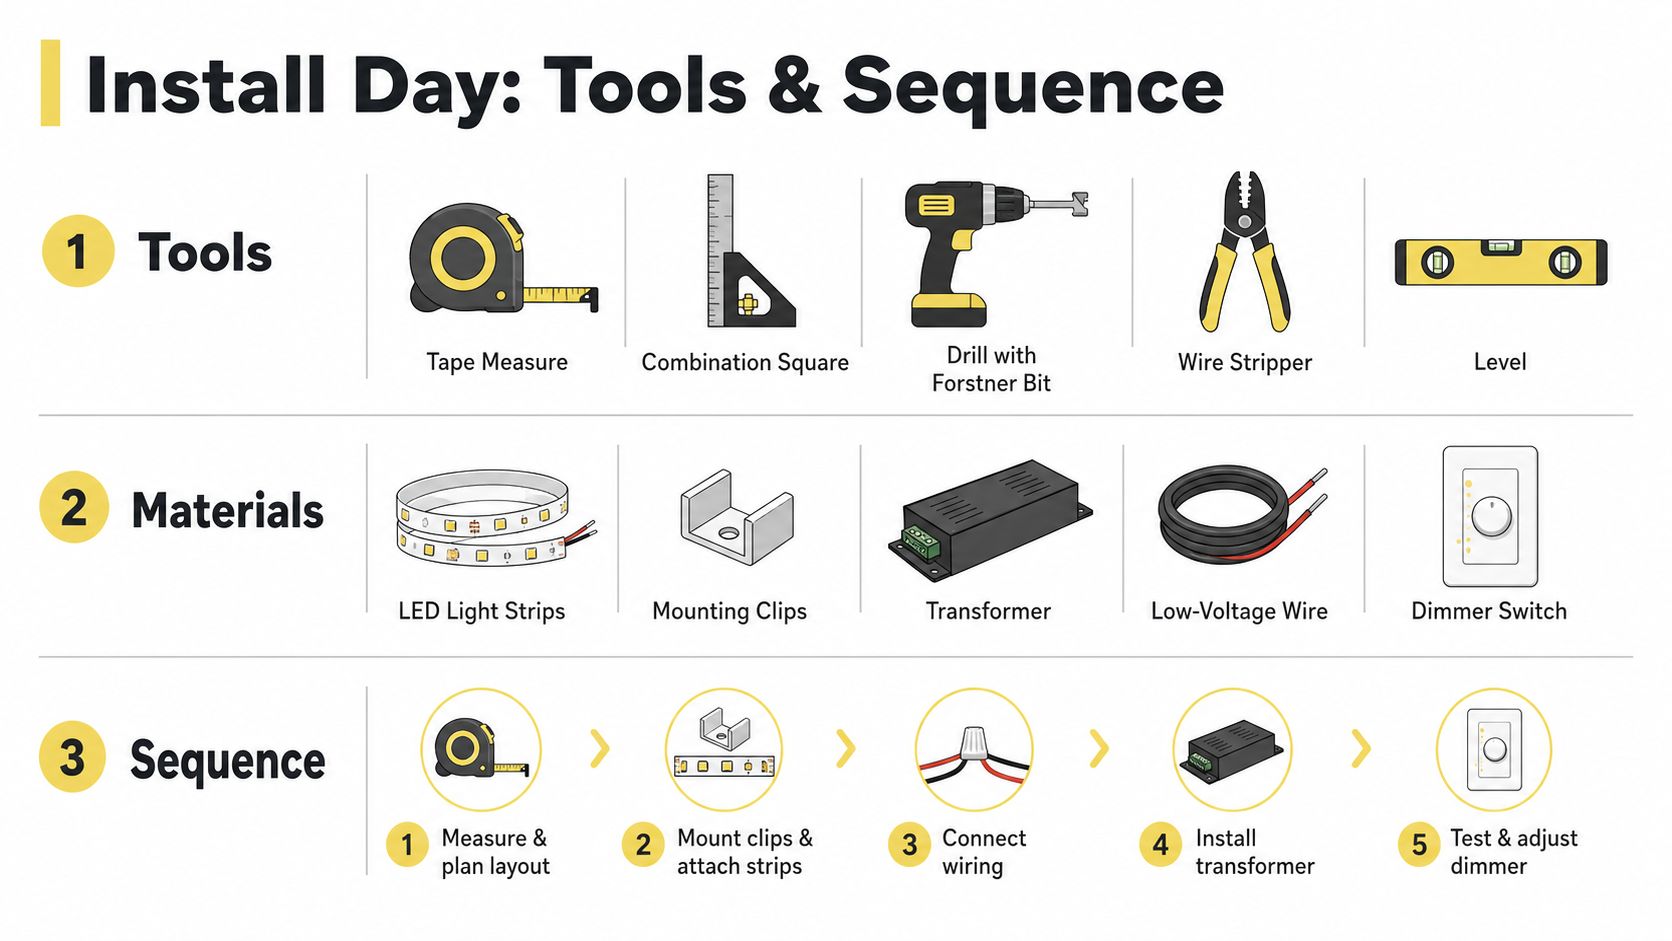
Tools typically include a tape measure, combination square, drill, Forstner or hole-saw bits for puck fixtures, wire strippers, low-voltage crimp connectors, fish tape, stud finder, level, and a labeled paint pen for marking cable routes. A small inspection mirror is also useful when tracing a path behind cabinet backs.
Materials usually include LED fixtures with mounting clips or aluminum channel, 18/2 CL2 low-voltage cable, a compatible driver, the correct dimmer, wire nuts, and a compact wire-management channel. For a quality finish, choose channel and diffuser components that match the cabinet interior rather than leaving adhesive-backed tape exposed at the front edge.
A measured sequence prevents rework
- Dry-fit every fixture: Mark the front-edge position, cable exits, cabinet breaks, and driver location.
- Drill or cut channels: Use shallow starter holes and protect finished cabinet surfaces from tear-out.
- Run the cable: Keep routes concealed and accessible, especially at corners and cabinet transitions.
- Connect at the driver: Confirm polarity, voltage, and connector security before final fastening.
- Power up and test: Check brightness, dimming, shadow lines, and color consistency at night.
- Complete the mounting: Close the toe-kick or wire channel only after the system performs as intended.
For a typical 8 to 12 linear foot run, a confident DIYer should plan 3 to 5 hours, based on the installation guidance in the project brief. Material allowances are approximately $180 to $450 for a quality strip system and $250 to $600 for puck or linear-bar systems. Those figures cover materials, not the cost of an electrician if the project requires a new switch leg, junction box, or permit work.
The most important part of the day is the test before concealment. A light can look correctly installed from below and still throw glare across the counter when viewed from the usual standing position. Turn it on after sunset, adjust the dimmer, and inspect the kitchen as you'll use it.
Troubleshooting the Problems You Only Notice at Night
Nighttime reveals whether the installation serves the room. Start with the symptom, then check the most likely cause before replacing a fixture.
Flicker and buzzing
Flicker under a dimmer usually points to a control mismatch or a poor connection. Check the driver's specifications against the dimmer's ELV or MLV requirements, then inspect terminals and connectors. Don't blame the LED strip until the control and driver have been verified.
A buzzing driver may be overloaded, poorly filtered, or trapped in a tight, unventilated cabinet. Relocate it to a serviceable, ventilated position or replace it with a higher-quality compatible driver.
Hotspots and dark zones
Hotspots or scalloping on a glossy counter often indicate that the fixture is too close to the backsplash or that the beam angle is too narrow. Pulling the light forward slightly, or placing it in aluminum channel with a frosted lens, can soften the pattern.
Dark zones between cabinet runs usually come from a coverage gap or an overly long jumper at the driver end. Bridge the gap with a short connecting strip or revise the jumper route. If an entire run is dead, check the driver first, then the connectors, then the strip.
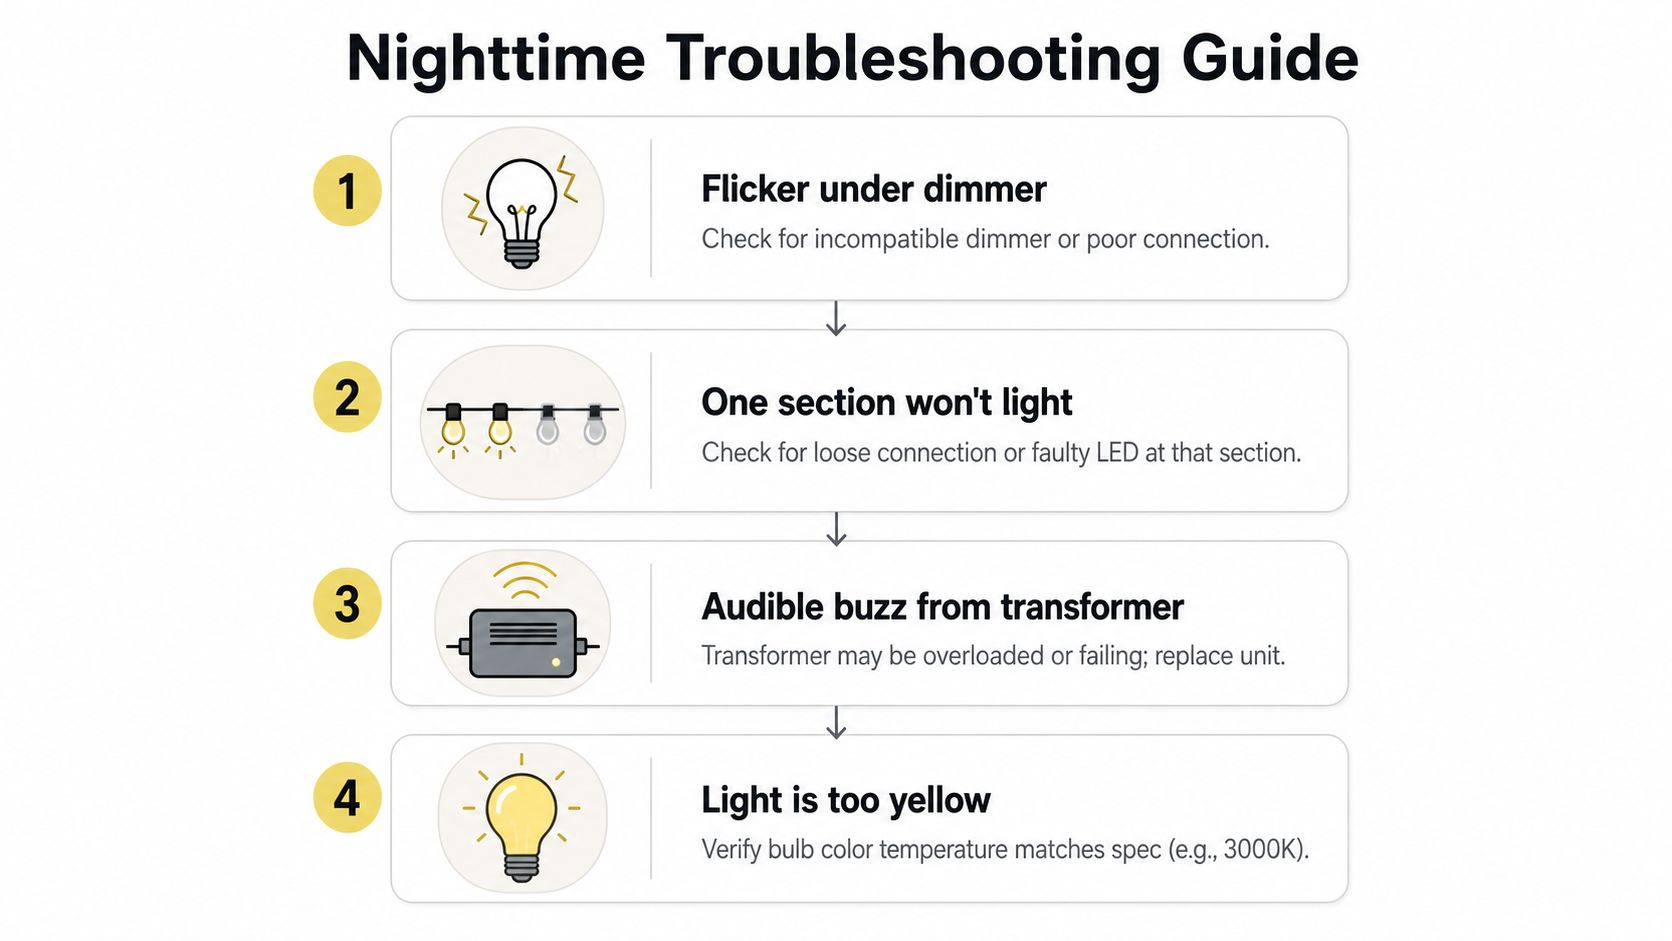
Color inconsistency has a different source. Confirm that all fixtures share the same color-temperature specification and that replacement sections come from a compatible product family. If the light appears too yellow, adjust the selected temperature or replace the mismatched section rather than trying to correct it with a dimmer.
When to Bring in a Designer or Electrician
DIY installation makes sense when the run is simple, the power source is accessible, the driver and dimmer are compatible, and the cabinet geometry is forgiving. It becomes a false economy when the work involves older wiring, stone surfaces that can't be patched easily, multiple control zones, or a new switch leg.
Bring in a licensed electrician when the project touches household-voltage wiring, requires a new wall box, changes circuit connections, or triggers local permit and inspection requirements. An electrician resolves circuit protection, junction boxes, grounding, load calculations, and code compliance. In the United States, under-cabinet fixtures still have to be listed and installed according to manufacturer instructions, and the applicable circuit cannot be assumed from the fixture's small size.
A kitchen designer or lighting designer solves a different set of problems. That professional coordinates cabinet elevations, appliance placement, backsplash transitions, work zones, sightlines, driver access, and the relationship between task, ambient, and decorative lighting. Open-concept kitchens need particular care because a bright under-cabinet layer can spill into adjacent rooms and compete with dining or living-room lighting.
Professional threshold: If a misplaced strip would be buried behind finished stone or if the lighting needs to join several scenes, resolve the plan before installation.
Smart-control ambitions also deserve early coordination. A single dimmer may be adequate for a compact kitchen, but larger remodels often need separate task zones, ceiling controls, decorative controls, and a reliable scene strategy. The box locations, control wiring, and selected drivers should be agreed upon while the walls and cabinets are still accessible.
Homeowners considering the design process can also review what to know about working with a kitchen designer. For a project in the Washington DC, Maryland, or Virginia area, bring cabinet elevations, a measured plan, fixture preferences, and proposed switch locations to a Jennifer Gilmer Kitchen & Bath showroom in Washington DC, Rockville, or Alexandria to pressure-test the fixture type, driver location, and dimmer compatibility before drilling.
Jennifer Gilmer Kitchen & Bath plans kitchen lighting as part of the cabinetry, layout, electrical coordination, and installation process, rather than treating under cabinet lighting as an afterthought. Visit Jennifer Gilmer Kitchen & Bath to discuss your cabinet runs, work zones, and control preferences with a design team serving Washington DC, Maryland, and Virginia.