.avif)
At dusk, the kitchen should do more than become brighter. The island can glow warmly, the sink can remain clear without reflecting light into your eyes, and the counters should support food preparation without making the room feel clinical. That result depends less on one decorative fixture than on how light is layered, placed, and controlled from the beginning.
These modern kitchen lighting ideas reflect the approach Jennifer Gilmer Kitchen & Bath takes with clients across Washington, DC, Maryland, and Virginia, from initial concept through installation. Each decision below addresses a practical question, from where light belongs to what it should be built into and how it should respond to daily routines.
If you're still at the layout stage, plan your kitchen lighting before you begin choosing individual fixtures. The sequence matters.
Table of Contents
- 1. Layered Lighting with Dedicated Task, Ambient, and Accent Zones
- 2. Under-Cabinet LED Lighting
- 3. Statement Island Pendant Lighting
- 4. Recessed Lighting with Strategic Placement
- 5. Linear Track Lighting for Flexibility and Modern Aesthetics
- 6. Integrated Lighting Within Custom Cabinetry
- 7. Adjustable Color Temperature and Smart Lighting Control
- 8. Statement Fixtures and Architectural Lighting Design
- 8-Point Modern Kitchen Lighting Comparison
- Plan the Light Before the Cabinets Go In
1. Layered Lighting with Dedicated Task, Ambient, and Accent Zones
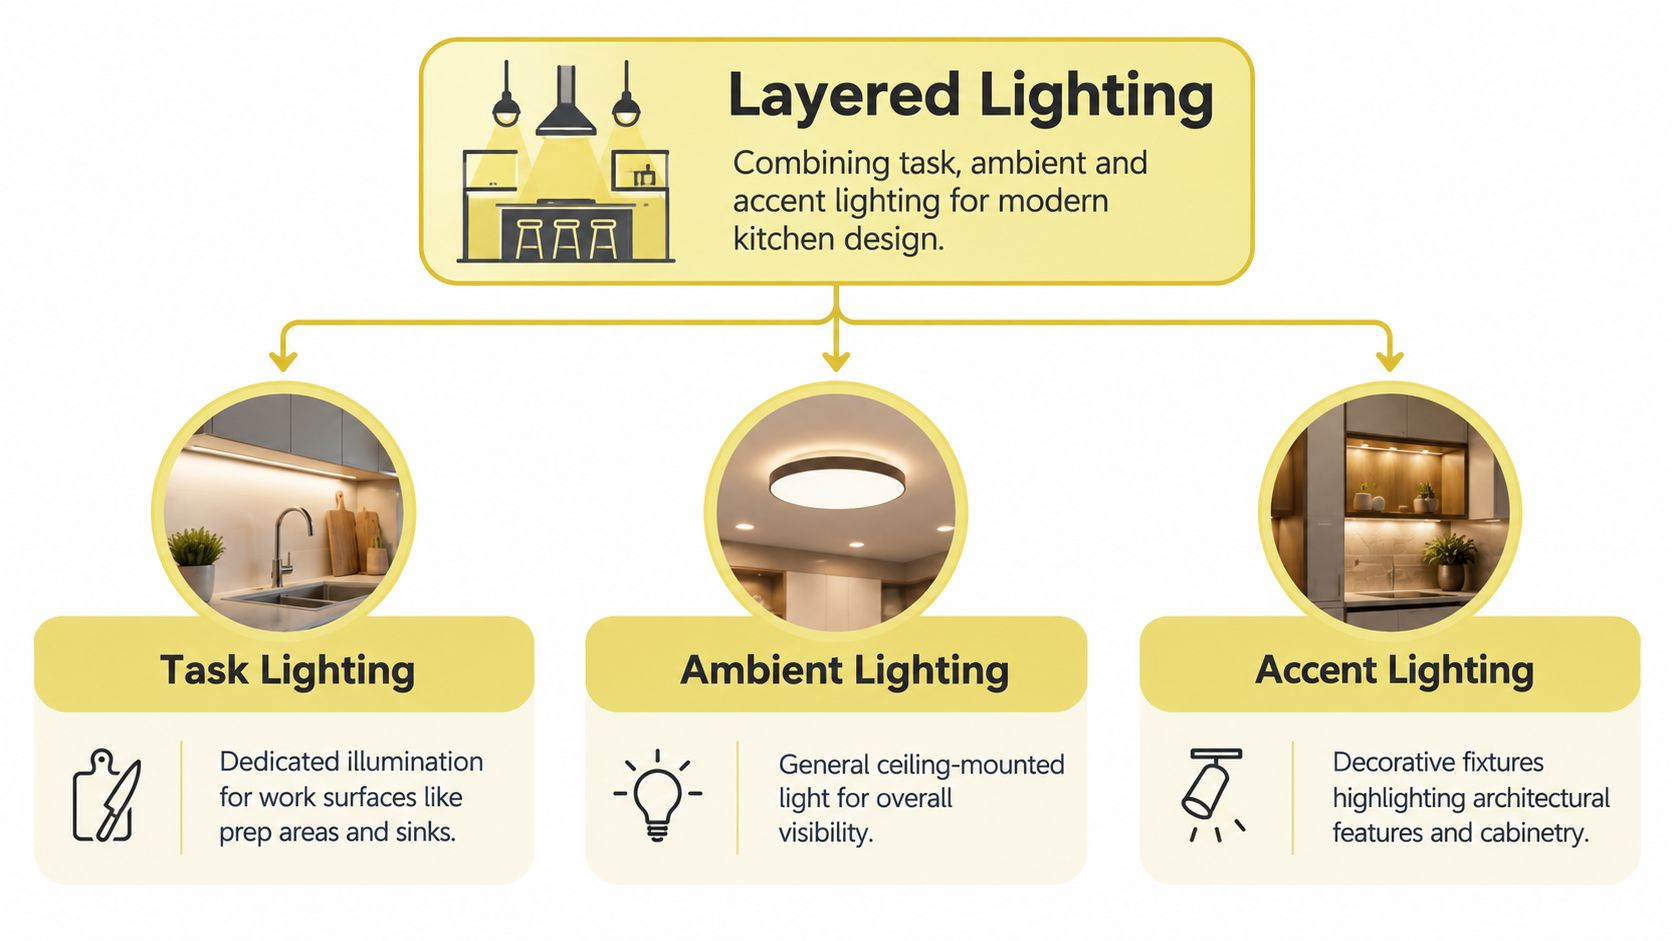
A kitchen needs several kinds of light because it supports several kinds of activity. Task lighting illuminates work surfaces for chopping, cooking, and washing. Ambient lighting provides general illumination for movement and conversation. Accent lighting adds depth by drawing attention to cabinetry, shelving, a backsplash, or an architectural feature.
A single central ceiling fixture rarely handles all three jobs well. The person standing at the counter can cast a shadow over the work surface, while a bright fixture aimed at the center of the room may leave the sink or perimeter counters underlit. A layered plan places light at different heights and directs it toward the way the kitchen is used.
Practical rule: Assign light to the prep area, cooking surface, sink, island, and circulation paths before assigning fixtures to the ceiling.
In an open-plan kitchen, layering also helps the room transition into adjacent living spaces. Recessed fixtures can provide quiet ambient coverage, pendants can establish the island as a visual center, and concealed LEDs can give the counters a soft working glow. Dimmers make those layers easier to adapt from weekday cooking to evening entertaining.
The hierarchy is useful, but it shouldn't become rigid. Some kitchens need stronger task lighting at a baking station, while others benefit from more accent light around glass-front cabinets. Jennifer Gilmer Kitchen & Bath can coordinate those choices with cabinetry, appliance placement, finishes, and sightlines. For additional guidance on selecting fixtures that support the overall plan, see this resource on kitchen lighting fixtures.
2. Under-Cabinet LED Lighting
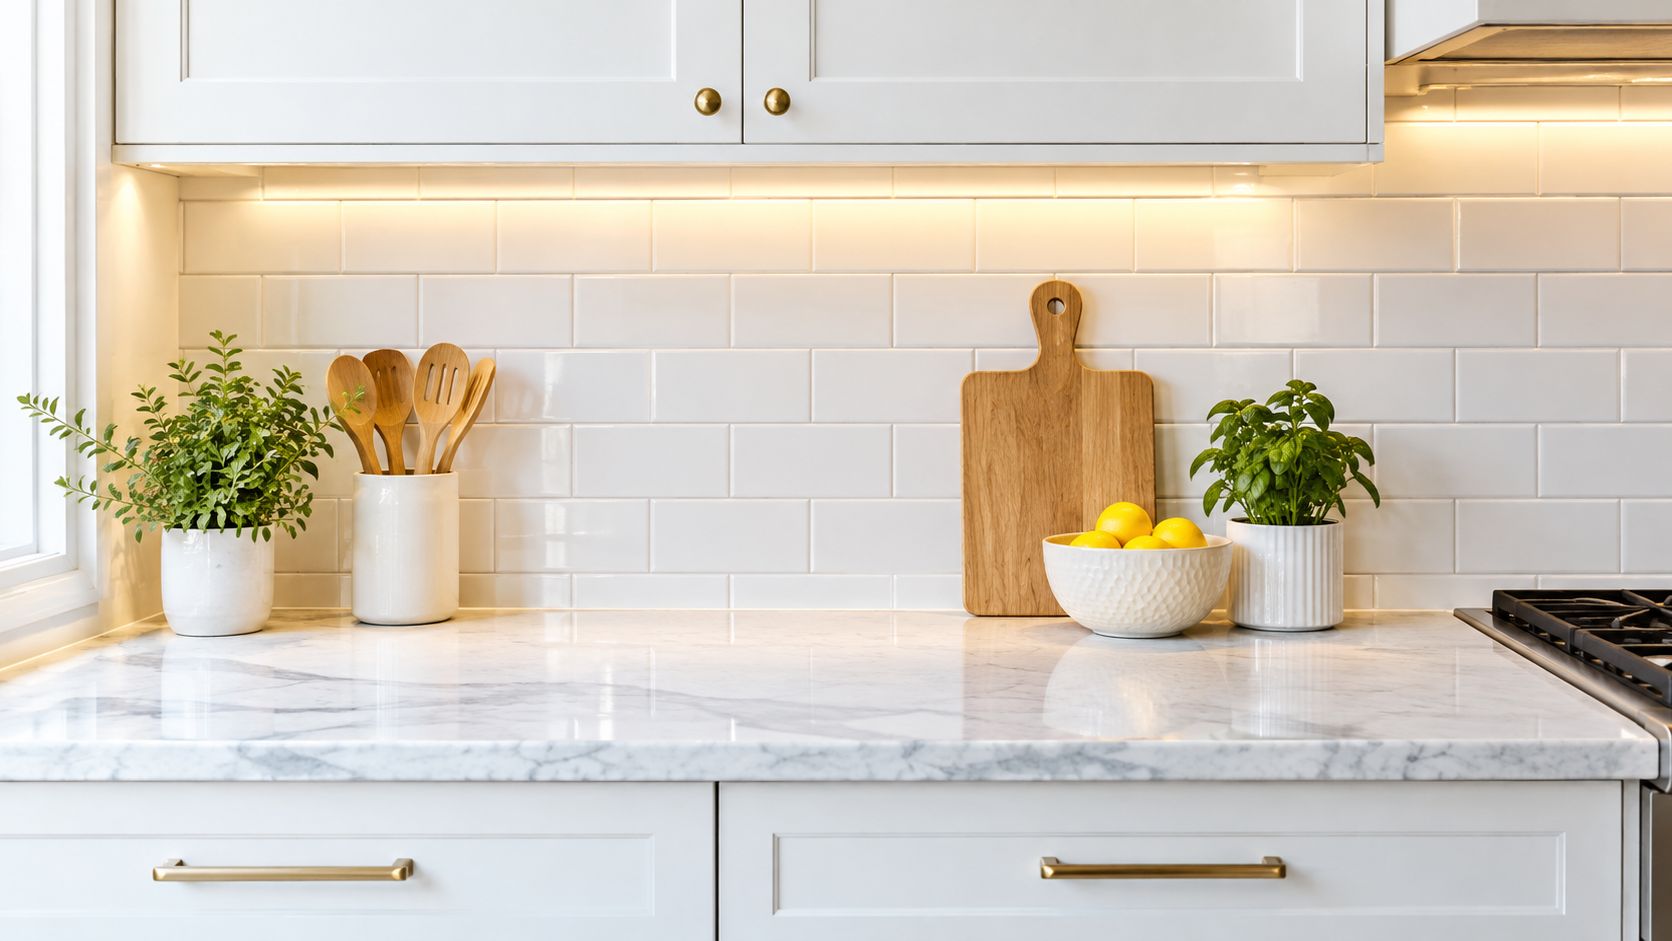
The underside of an upper cabinet is one of the most useful places to put light, because it sits close to the surface where work happens. A well-integrated LED strip can illuminate the counter, reduce shadows, and reveal the texture of a stone backsplash without adding visual clutter.
The fixture should be concealed as much as possible. An aluminum channel can protect the strip and help distribute light more evenly, while a finished lip or recessed installation keeps the source out of direct view. This matters especially with polished stone, stainless steel, and glossy cabinetry, all of which can reflect an exposed point of light.
LEDs make sense in frequently used work zones. ENERGY STAR reports that certified LED products use up to 90% less energy than traditional incandescent lighting and can last up to 25 times longer. For an 800-lumen replacement, Mass Save compares a 9-watt ENERGY STAR LED with a 60-watt incandescent bulb. Under its stated assumptions, annual operating cost is about $1.89 for the LED and $12.61 for the incandescent, with estimated lifetime savings of $130 to $230. Those figures are specific to the cited assumptions, but they clarify why LEDs suit lighting that runs every day and becomes difficult to access after cabinetry is installed.
A warm 2700K source can coordinate with residential finishes, while 3000K offers a balanced appearance. Whatever temperature you choose, specify a dimmable system with a quality driver, and test it with the intended control. Under-cabinet lighting installation should be resolved alongside cabinet construction, not after the backsplash is complete.
3. Statement Island Pendant Lighting
The island pendant is often the fixture people notice first, but its visual importance shouldn't override proportion or comfort. A pendant needs to provide useful light for the island while maintaining sightlines across the kitchen and into adjoining rooms.
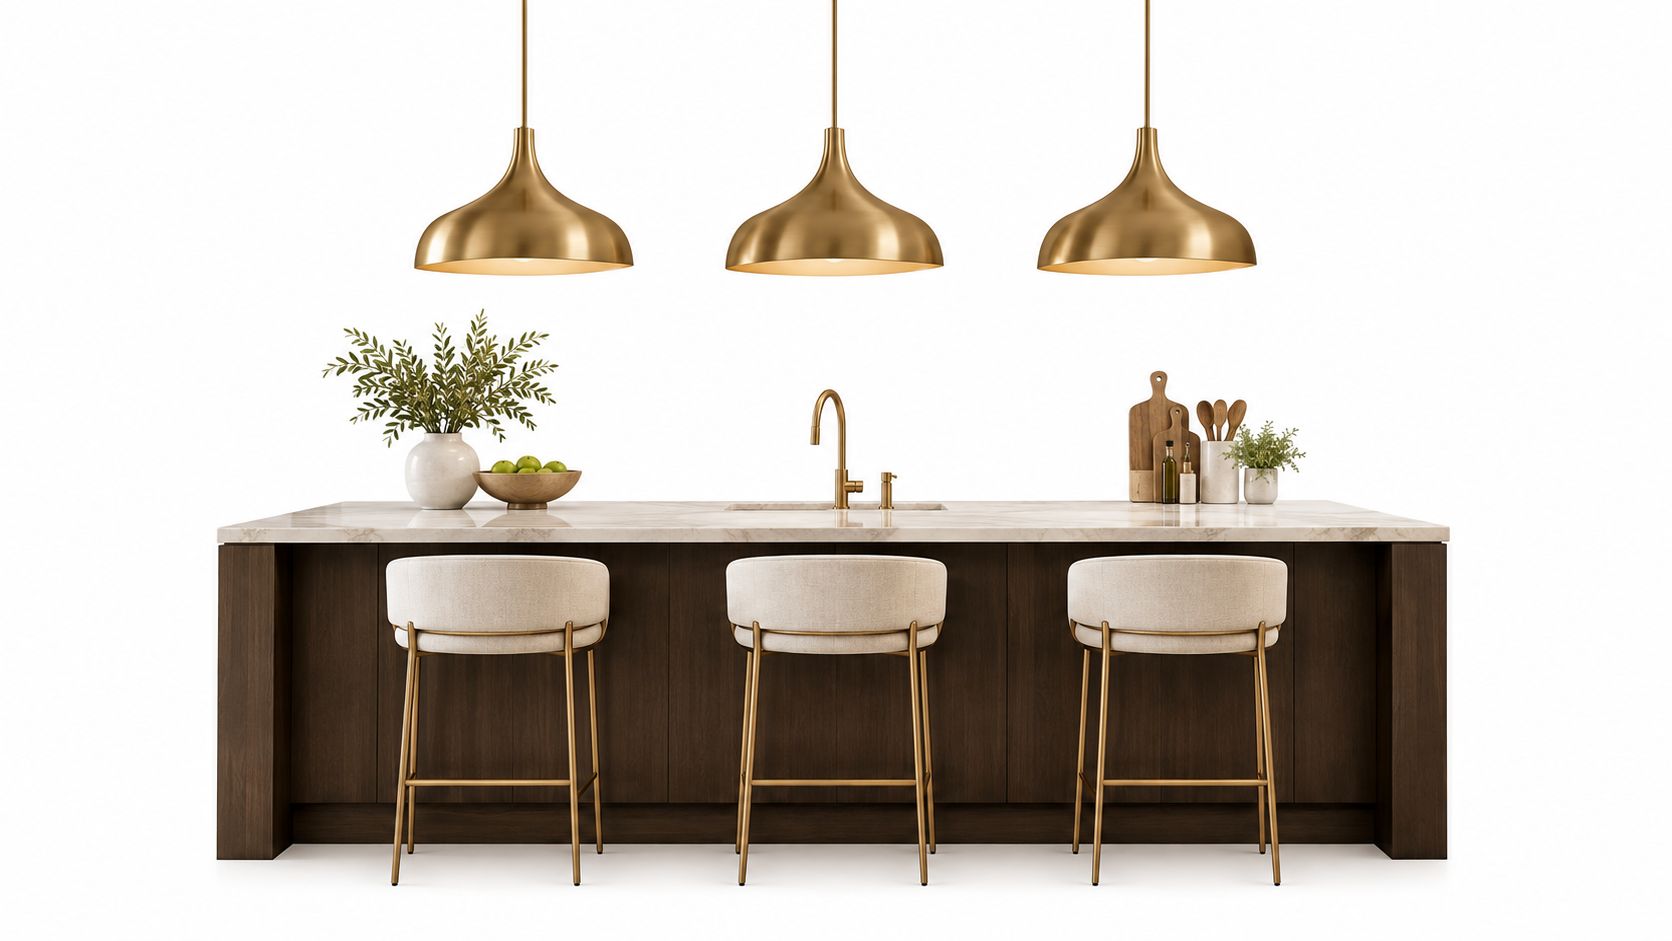
Geometry, glass, ceramic, brass, and painted metal can all work in a contemporary kitchen. A sculptural brass pendant may add warmth to white cabinetry, while a simple opal-glass form can soften a room with dark stone. In a transitional kitchen, a traditional-inspired silhouette can provide continuity without making the space feel dated.
The familiar installation range of 30 to 36 inches above a typical counter can be a useful starting point, but it isn't a universal rule. Ceiling height, pendant scale, shade opacity, and the occupants' eye level all affect the final position. If people regularly sit at the island, the fixtures may need to hang higher to preserve conversation and visual connection.
A pendant should frame the island, not compete with every other element in the room.
Proportion deserves the same attention. The fixture should relate to the island's width, seating arrangement, cabinetry, and nearby dining or living furniture. Clusters can create rhythm, while one larger fixture may suit a compact island or a space with strong architectural lines. Either way, the ambient and accent layers should remain quieter if the pendant carries the visual emphasis.
Look at samples against the actual cabinet finish and countertop rather than selecting from a small screen. A fixture that feels delicate in a showroom may disappear above a substantial island, while an oversized shade can dominate a narrow room. Before final selection, compare options in context, including the sightline from adjacent rooms. For guidance on measurement relationships beyond the kitchen, Vinson Fine Furniture's expert measurements offer useful perspective.
4. Recessed Lighting with Strategic Placement
Recessed lighting works best when it disappears into the ceiling and leaves the room's surfaces to carry the design. The mistake is treating that clean appearance as permission to install a uniform grid. Regular spacing can leave the user standing between the light source and the counter, producing shadows exactly where visibility matters.
Start with the ceiling plan and the work zones below it. A recessed fixture may belong near the sink, along a prep run, or at a circulation path, while a small cluster can support a baking counter or cooking area. Adjustable trims can direct light toward vertical surfaces, artwork, open shelving, or a backsplash rather than sending every beam straight down.
A typical planning range of 4 to 6 feet between fixtures can provide a starting point for ambient coverage, followed by more concentrated lighting over work areas. The final layout depends on ceiling height, beam angle, cabinet depth, surface reflectance, and the output of the selected fixture. Verify the delivered lumens and distribution instead of comparing products by wattage alone.
Seattle's residential lighting guidance recommends sources with a CRI of at least 80 for accurate color rendering and identifies approximately 3000K to 3500K as suitable for broadly diffused ambient illumination. The guidance also warns that a ceiling fixture alone can cast shadows across work surfaces, which is why recessed lighting should support, rather than replace, localized task illumination. The Seattle lighting guide provides the technical basis for those recommendations.
Specify dimming from the outset. A recessed layout that feels comfortable during meal preparation may be unnecessarily bright during a quiet evening, and dimming lets the room respond without changing the fixture arrangement. For a more detailed discussion of layout decisions, review recessed lighting placement.
5. Linear Track Lighting for Flexibility and Modern Aesthetics
Some kitchens need a lighting system that can change with the room. An island may serve as a prep counter in the morning, a homework surface later, and a serving area at night. Open shelves may hold cookbooks today and display ceramics tomorrow. Linear track lighting gives those locations a degree of adjustability that fixed pendants can't provide.
Modern systems use slim rails with adjustable heads, often in finishes such as matte black or brushed nickel. The rail can follow the length of an island, align with an architectural beam, or run parallel to open shelving. Individual heads can be aimed at the work surface, seating, or display areas, allowing one installation to serve several purposes.
Track lighting has a practical advantage in rooms where the furniture plan may evolve. It can be redirected when a display changes, and it can supplement ambient lighting without filling the ceiling with multiple downlights. That flexibility comes with a visual trade-off. Even a refined rail remains visible, so its finish and scale need to relate to cabinet hardware, plumbing fixtures, appliances, and other metal accents.
“Flexibility is useful only when the rail still looks intentional from the main sightline.”
Avoid using track as an excuse for vague planning. A row of adjustable heads aimed randomly at counters and shelves can look busy and create inconsistent brightness. Map the likely targets first, then select a rail length and head arrangement that follows the island or room geometry.
Linear track can be especially effective above a peninsula with mixed uses. One head can illuminate the prep zone, another can turn toward seating, and a third can wash an open shelf. Pairing it with quieter ambient fixtures keeps the room from feeling like a gallery or retail space.
6. Integrated Lighting Within Custom Cabinetry
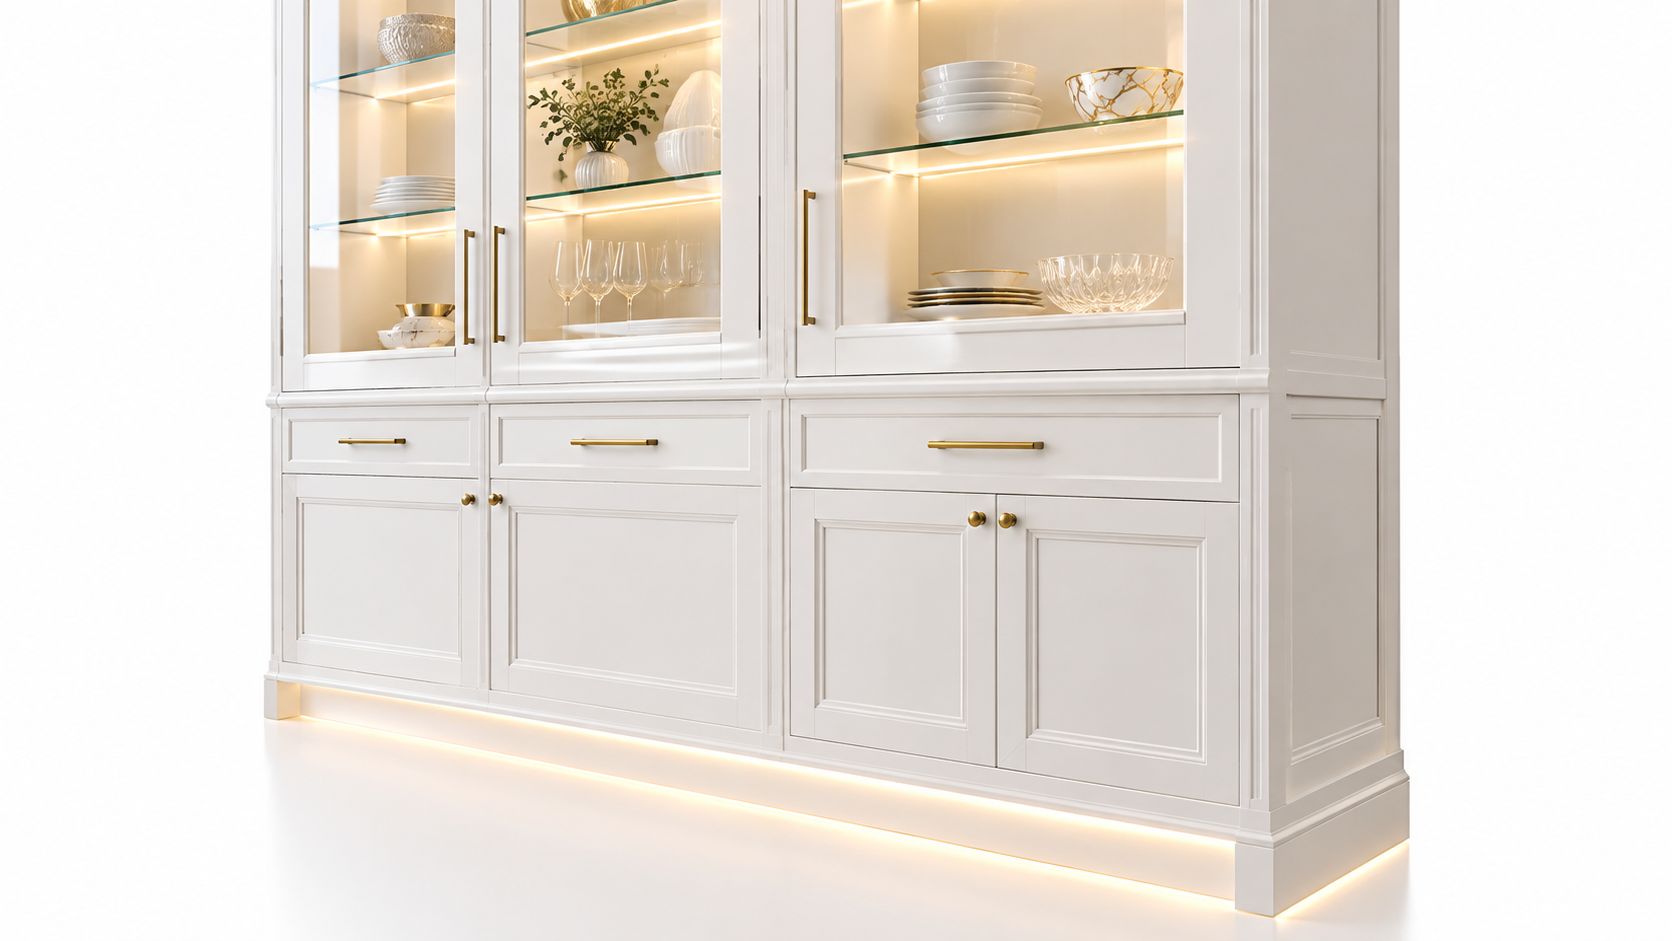
Lighting becomes most convincing when the cabinetmaker has planned for it. A strip recessed into a shelf, an interior light activated as a door opens, or a soft toe-kick glow can feel like part of the architecture rather than an accessory attached at the end.
The best applications are selective. Interior lighting helps when cabinet contents are difficult to see, especially in deep pantry storage or glass-front cabinets. Shelf lighting can reveal dishware and provide a layer of evening illumination. Toe-kick lighting can create a low path through the kitchen after dark without asking the full ceiling system to turn on.
LED technology supports these details because it is compact, resistant to breakage and vibration, and capable of instant-on performance. The Department of Energy describes good-quality white LED products as generally expected to provide a useful life of 30,000 to 50,000 hours or longer, and notes that some specialized LEDs reach 150 lumens per watt or more. Those figures describe LED characteristics broadly, not a guarantee for every integrated cabinet system. DOE's LED basics also makes clear why product quality, heat management, and installation still matter.
The hidden infrastructure needs equal attention. Drivers should remain accessible, wiring should be coordinated before cabinet installation, and an integrated fixture should have a practical service plan if it fails. Independent inspection guidance also points to Type IC requirements where insulation contacts recessed downlights, a detail that should be resolved with the electrical team rather than left to the cabinet installer.
For warm wood interiors, 2700K can keep the cabinet lighting welcoming. With glass doors, place the source to avoid glare on the fronts and prevent bright reflections from competing with the displayed objects. Toe-kick lighting works best when it remains subtle, especially against dark flooring where excessive brightness can draw attention to the base instead of the cabinetry.
7. Adjustable Color Temperature and Smart Lighting Control
A kitchen doesn't need to look the same at breakfast, during preparation, and after dinner. Tunable lighting allows the color temperature to shift from warmer evening light toward a crisper daytime appearance, while dimming changes intensity without changing the room's finish palette.
Color temperature is measured in Kelvin. Lower values look warmer and more golden, while higher values read cooler and more neutral. Residential guidance commonly places general kitchen illumination around 2700K to 3000K, while some contemporary schemes use ambient light as high as 3000K to 4000K for a clearer work-surface effect. Warm accent lighting can remain around 2700K to 3000K to create contrast around glass cabinets, shelves, or toe-kicks.
The key is consistency within a visible zone. If the under-cabinet light reads warm, the pendant reads neutral, and the recessed fixtures read cool, the countertop and cabinet colors may appear disconnected. The effect can be intentional, but it should be decided rather than discovered after installation.
Smart controls add scenes to that palette. A cooking scene can raise task lighting, an entertaining scene can emphasize the island and cabinetry, and a nighttime scene can limit illumination to a path through the room. Physical wall controls still matter. A homeowner shouldn't need a phone to turn on the sink light, and voice control should supplement a reliable switch rather than replace it.
Start with dimmable, compatible fixtures on the layers that matter most. Verify that the selected LED drivers work with the intended dimmers, because incompatibility can produce flicker or buzzing. Plan circuit separation for ambient, task, accent, and nighttime lighting before drywall closes the walls. The most convenient interface can't repair wiring that never supported the desired scenes.
8. Statement Fixtures and Architectural Lighting Design
A lighting fixture can define a room's architecture, especially in an open-plan kitchen viewed from several directions. A linear suspension may establish the island as a boundary between cooking and living, while a sculptural sconce can create a visual endpoint near a beverage station or pantry wall. Uplighting can draw attention to ceiling height and make a compact room feel more considered.
These gestures need a strong spatial reason. A bold fixture is most successful when it aligns with a sightline, balances the mass of cabinetry, or reinforces the shape of an island. It becomes arbitrary when selected before the room's proportions, materials, and circulation are understood.
Jennifer Gilmer Kitchen & Bath approaches statement lighting as part of the broader design language. Jennifer Gilmer, CKD, Nancy McCarren, AIA, LEED AP, and Marie-Josée Parisi can coordinate the fixture with cabinet profiles, stone, hardware, appliances, and the way clients move through the space. That coordination matters in transitional kitchens, where a sculptural modern fixture may need to bridge traditional millwork and clean-lined surfaces.
A statement fixture should have a job in the composition, even when its job is primarily visual.
Proportion remains the first test. Consider ceiling height, island length, room width, pendant or suspension depth, and the view from adjacent spaces. A fixture that feels balanced in a showroom may look undersized above a large island or crowded in a kitchen with upper cabinets.
Material context changes the result, too. Brass can warm a white kitchen, ceramic can add texture to a restrained palette, and dark metal can echo window frames or appliances. Visit a showroom and view options beside cabinet samples and countertop materials before committing. Jennifer Gilmer Kitchen & Bath maintains showrooms in Chevy Chase, Easton, and Ashburn, giving clients an opportunity to compare fixtures and finishes in context.
8-Point Modern Kitchen Lighting Comparison
| Title | Implementation Complexity 🔄 | Resource Requirements ⚡ | Expected Outcomes 📊 | Ideal Use Cases 💡 | Key Advantages ⭐ |
|---|---|---|---|---|---|
| Layered Lighting with Dedicated Task, Ambient, and Accent Zones | High, multiple circuits, coordination | High, fixtures, dimmers, wiring, designer time | Very high, balanced illumination, flexible scenes (⭐⭐⭐⭐) | Open-plan kitchens; multipurpose zones | Eliminates shadows; adaptable mood and function |
| Under-Cabinet LED Lighting | Moderate, localized wiring, placement critical | Moderate, LED strips, drivers, channels, installation | High, superior task visibility and backsplash accent (⭐⭐⭐) | Prep-heavy counters; dark surfaces | Energy-efficient task light; long life; subtle ambiance |
| Statement Island Pendant Lighting | Moderate, mounting points, exact placement | Moderate, quality fixtures, canopy, suspensions | High, strong visual anchor plus task light (⭐⭐⭐) | Islands as focal points; open-plan separators | Establishes style; focal design element; task + form |
| Recessed Lighting with Strategic Placement | Moderate–High, requires careful layout and IC-rated fixtures | Moderate, multiple recessed fixtures and trims | High, unobtrusive ambient base; integrates with layers (⭐⭐⭐) | Contemporary ceilings; vaulted or seamless ceilings | Clean sight lines; customizable beam control; low profile |
| Linear Track Lighting for Flexibility and Modern Aesthetics | Moderate, surface-mounted runs, planning for runs | Moderate, tracks, adjustable LED heads | High, adaptable accent/task direction (⭐⭐⭐) | Open shelving; changing displays; retrofit islands | Reconfigurable aiming; combines task and accent in one system |
| Integrated Lighting Within Custom Cabinetry | High, planned during cabinet design and fabrication | High, custom LEDs, wiring integrated into cabinetry | Very high, luxury, refined displays, functional interiors (⭐⭐⭐⭐) | High-end kitchens; glass-front cabinets; show kitchens | Seamless built-in look; highlights finishes; boutique feel |
| Adjustable Color Temperature and Smart Lighting Control | High, control infrastructure and programming | High, tunable fixtures, controllers, integration | Very high, adaptive scenes, circadian support, convenience (⭐⭐⭐⭐) | Tech-forward homes; multi-use kitchens; open-plan shifts | Tunable white, scenes, automation, energy optimization |
| Statement Fixtures and Architectural Lighting Design | High, coordinates with architecture and sightlines | High, premium fixtures and precise placement | High, strong spatial definition and memorable moments (⭐⭐⭐) | Transitional/contemporary showpiece kitchens | Defines zones; creates signature identity and drama |
Plan the Light Before the Cabinets Go In
Lighting decisions are easiest to make, and cheapest to get right, while walls, ceilings, and cabinet layouts are still on the drawing board. Begin by mapping the work zones, then layer task, ambient, and accent light over them. Decide early which sources will be built into the cabinetry, where drivers will be accessible, and which scenes will use dimmers or smart controls.
The plan should respond to daily use rather than fixture trends. At breakfast, you may want clear light at the sink and prep counter. During dinner, the island may need softer illumination while a pantry or beverage station remains available. Late at night, a restrained toe-kick or cabinet glow can provide orientation without waking the entire room.
Technical specifications deserve the same care as finish selections. Choose LEDs by lumens, efficacy, color temperature, color-rendering quality, dimming compatibility, beam angle, and rated life. For kitchens where food colors, stone, paint, and cabinet finishes need to read accurately, a CRI 90+ LED is a practical upgrade. University of Maryland Extension guidance identifies CRI 90+ as appropriate for kitchens and recommends approximately 3500K to 4000K for clear, neutral work-surface illumination. Those choices should be balanced with glare control, especially around polished stone, stainless steel, and glossy cabinet fronts.
A designer should also review the electrical plan before construction. Separate controls for ambient, task, accent, and nighttime paths make the room more useful. Integrated LEDs need service access. Recessed fixtures need the correct insulation rating where applicable, and LED-rated dimmers should be tested with the selected fixtures. These decisions are hidden once the walls and cabinetry are finished, which is precisely why they belong in the early design conversation.
Jennifer Gilmer Kitchen & Bath works with homeowners throughout Washington, DC, Maryland, and Virginia from concept through installation, coordinating layout planning, cabinetry, materials, lighting, hardware, and storage. Its showrooms in Chevy Chase, Easton, and Ashburn give clients places to compare finishes and fixtures in person. Bring a simple record of how your kitchen works at breakfast, during dinner parties, and after dark. That daily pattern will lead to a better lighting plan than choosing fixtures one at a time.
Jennifer Gilmer Kitchen & Bath coordinates kitchen lighting with cabinetry, layout, materials, and installation for residential projects in Washington, DC, Maryland, Virginia, and Delaware. Visit Jennifer Gilmer Kitchen & Bath to explore the firm's design process and arrange a consultation for a kitchen where every layer of light has a clear purpose.