

You're trying to put away the hair dryer, but its cord catches on the plumbing. Spare towels are in another room, and opening the vanity drawer means stepping out of the doorway. The cabinet may still look perfectly respectable. It doesn't suit the way you use the bathroom.
Choosing custom cabinets for bathroom renovations starts with those everyday frustrations, not a paint color. The most useful design balances storage with walking room, accommodates the plumbing, and accounts for moisture before anyone begins building. Beautiful doors matter, but so do the details behind and beneath them.
Table of Contents
Custom, Semi-Custom and Stock Bathroom Cabinets Compared
Say your powder room has a standard vanity that leaves an awkward gap beside the toilet, while an open cabinet door hits the wall. Replacing it with a more attractive version of the same size won't necessarily solve either problem. First, decide how much flexibility the room needs.
Stock, semi-custom and custom bathroom cabinets
| Option | Sizing | Construction and finish | Best fit |
|---|---|---|---|
| Stock | Standard catalog widths | Factory-built boxes with finishes in a fixed set of colors | Simple rooms with standard walls and plumbing |
| Semi-custom | Adjusted within manufacturer increments | Specified factory construction with a wider choice of door styles, finishes and interiors | Standard footprints that need a more personal look |
| Custom | Built to measured walls, plumbing and clearances | Project-specific construction with full choice of species, door profile, interior layout and hardware | Irregular rooms, double vanities and dedicated storage needs |
With stock cabinetry, the room largely adapts to the cabinet. Fillers can close a gap, but they don't turn that space into usable storage. Stock can still be a sensible choice when the walls, supply lines and sink location already suit the available cabinet.
Semi-custom cabinetry offers a middle ground. You can personalize the appearance and interior arrangement without commissioning every dimension. However, modifications remain within the manufacturer's rules, so confirm what can change before committing to a layout.
Where custom work earns its place
Custom becomes useful when separate constraints overlap. An irregular wall might require a carefully fitted end panel; a double vanity might need unequal drawer banks to accommodate plumbing. A linen tower may need to stop below a window rather than match a catalog height.
Different routines can justify customization, too. A person who stores tall bottles and grooming appliances needs a different arrangement from someone who mainly wants shallow cosmetic drawers. A storage schedule is a written list of what each cabinet must hold.
A useful test: Measure the available wall, mark the plumbing locations, and list everything that needs a home during the morning routine.
Don't assume the custom label guarantees better construction. Compare the box material, joinery, finish coverage and hardware alongside the dimensions.
The cost question has a practical answer: custom earns its cost where catalog sizes can't accommodate the walls, plumbing, circulation or storage schedule. For a standard footprint with a clear finish preference, semi-custom may be enough.
Materials and Finishes That Hold Up in Bathrooms
A bathroom cabinet can fail at an unfinished edge or exposed bottom while its front still looks sound. Water from a small leak or repeated splashing can reach those hidden surfaces, so the material name alone isn't an adequate specification.
MDF is hydrophilic, meaning it readily absorbs water; LeisureMod's plywood and MDF comparison describes unsealed edges wicking moisture into the core, with expansion reported at up to 30% after moisture penetration. Plywood generally retains its dimensions better during intermittent exposure, but prolonged soaking can discolor veneers or weaken glue lines.
Bathroom cabinet materials and moisture behavior
| Material or part | Moisture behavior | Where to specify it | Care note |
|---|---|---|---|
| Plywood cabinet box | Generally keeps its dimensions through intermittent moisture | Boxes and bases near tubs, showers and sinks, outside direct spray | Seal cut edges and keep the base off wet floors |
| Moisture-resistant MDF | Performs better when every edge is sealed; raw edges can wick water | Painted doors and panels in powder rooms and family baths | Factory-finish every face and edge |
| Standard MDF | Unsealed edges can swell and lose strength | Dry, low-humidity locations only | Avoid for bath boxes and exposed bottoms |
| Solid hardwood, including white oak, maple and walnut | Finished surfaces resist incidental moisture; standing water remains a risk | Doors, drawer fronts and open shelves away from splash | Inspect the finish regularly and renew it according to the finish system |
| Corrosion-resistant hardware | Better suited to humid air and incidental splash | Pulls, hinges and drawer slides | Wipe dry and check fasteners annually |
Specify the hidden surfaces
Ask for plywood or moisture-resistant cabinet boxes, with exposed edges sealed before installation. That includes sink cutouts, toe-kick interfaces, service penetrations and bottom edges. Painted MDF doors and panels should receive factory finishing on all six sides, including their edges.
Installation can introduce fresh vulnerabilities. If a plumber enlarges an opening through a finished panel, the newly exposed material needs sealing before the connection conceals it. A polished exterior doesn't compensate for a raw service hole behind a drawer.
Coordinate the finish with the room
White oak, maple and walnut bring warmth and grain, but each needs a finish suited to incidental splash. Open shelves are best placed away from direct spray, where folded towels won't become a damp buffer against wood.
Compare cabinet samples beside the countertop and tile rather than judging them alone. For example, Nexora Flooring's Bedrosians ceramic tile provides a matte-white reference when exploring warm wood and quiet surface combinations; confirm the tile's suitability for its intended location separately. The Maryland homeowner's guide to timeless bathroom materials offers another way to consider those selections together.
Good materials and complete sealing reduce swelling, drawer misalignment and finish cracking. They don't replace leak detection, ventilation or protection from routinely wet floors.
Sizing and Clearances to Measure Before You Order
Vanity dimensions should follow the person using the room and the plumbing behind the wall, not just the nearest catalog width. Start with a measured floor plan, then test how someone will approach the basin, open storage and move toward the shower.
A tape measure and a simple drawing can reveal conflicts before they become cabinetry.
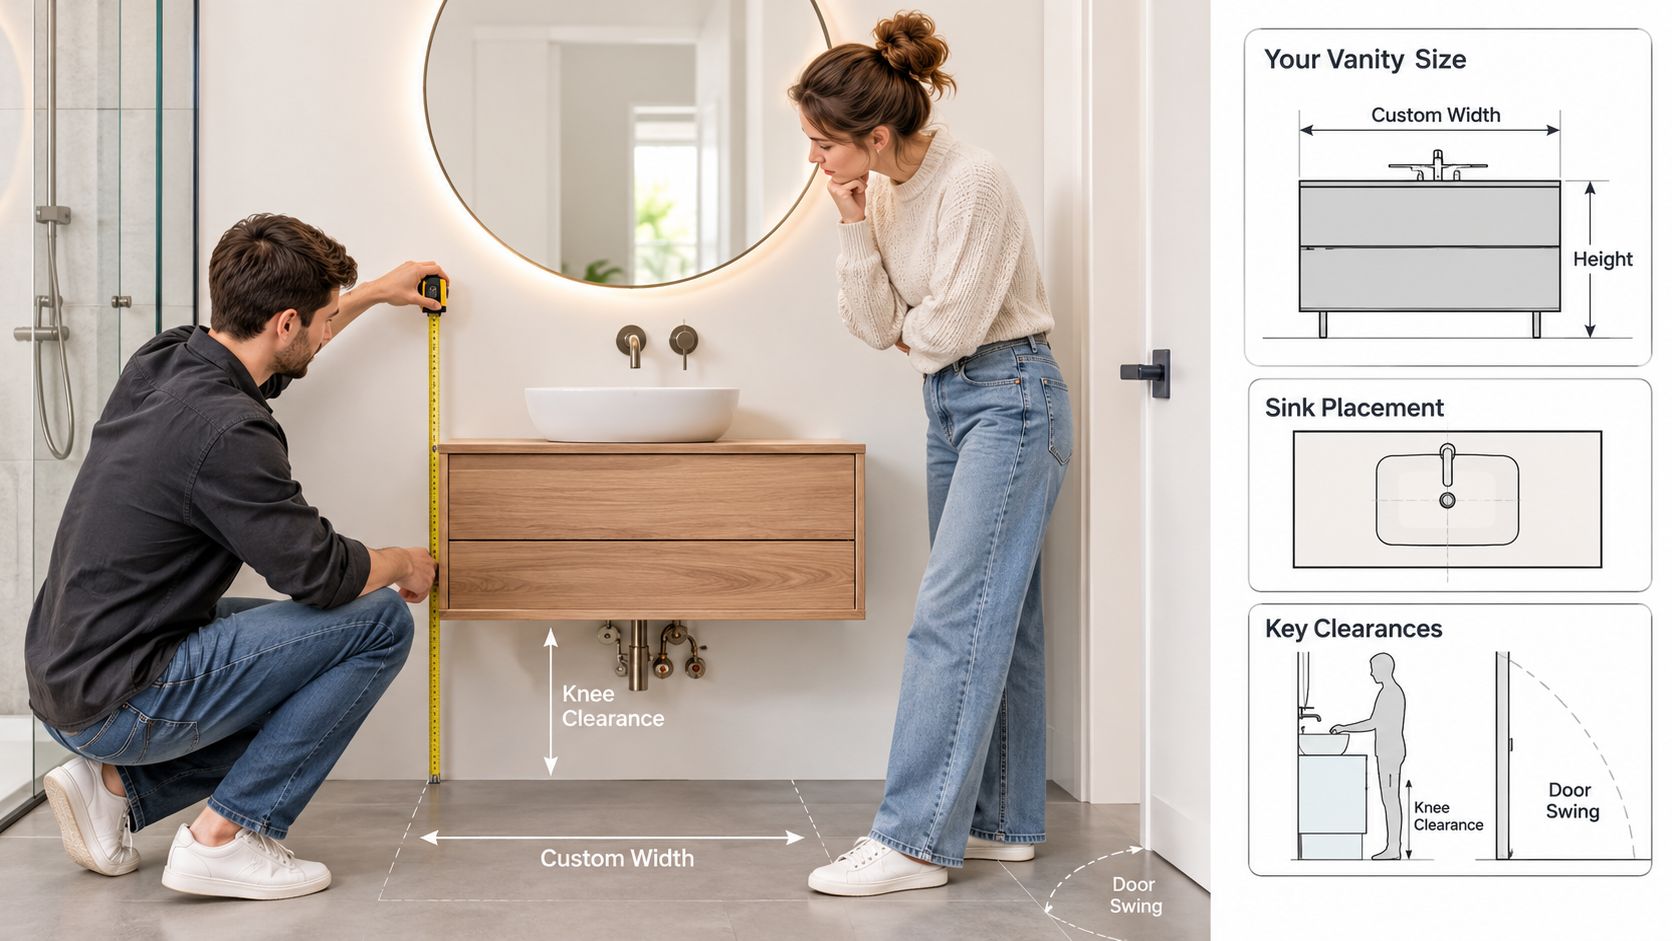
The NKBA Bath Planning Guidelines recommend at least 30 inches of clear space in front of fixtures and 24 inches in front of a shower opening. Treat these as planning recommendations, not a substitute for checking applicable local requirements.
For other reference dimensions, WNS Global's vanity dimensions guide identifies typical depths of 21 to 24 inches and summarizes accessible applications under the 2010 ADA Standards with a counter or higher sink rim no higher than 34 inches, plus knee clearance at least 27 inches high, 30 inches wide and 19 inches deep. Accessible detailing must also be checked against the applicable standard and the user's actual needs.
Bathroom clearances and reference dimensions
| Clearance or dimension | Reference value | Why it matters |
|---|---|---|
| Clear floor space in front of a vanity or toilet | 30 inches minimum planning recommendation | Preserves passage; open doors and drawers still need checking |
| Shower entry clearance | 24 inches in front of the opening | Provides approach room and space to reach nearby towels |
| Typical vanity depth | 21 to 24 inches | Balances storage against walking space |
| Accessible counter or sink rim height | No higher than 34 inches above finished floor | Keeps the basin within reach |
| Knee clearance under a sink | At least 27 inches high, 30 inches wide and 19 inches deep | Provides space for a seated approach |
Test movement, not just measurements
A deeper cabinet offers more storage but takes that depth from the aisle. Adding another sink without preserving approach space can create drawer conflicts, restrict wheelchair maneuvering or leave someone standing at an angle to the basin.
Use painter's tape to mark the proposed cabinet footprint on the floor. Hold cardboard at the planned drawer projection and test the entry door, shower door and neighboring storage. The bathroom vanity depth guide can help you weigh a shallower cabinet against lost storage.
Complete the pre-order check
- Finished counter height: Include the countertop and sink configuration.
- Sink centerlines: Coordinate basins, faucets and usable counter space.
- Door and drawer swing: Test adjacent openings together.
- Fixture offsets: Confirm toilet and side-wall relationships.
- Plumbing rough-ins: Locate supplies, drains and shutoffs.
- Clear floor area: Check the approach with storage open and closed.
If pipe locations need clarification, Piper Plumbing's overview of plumbing help for kitchens and baths explains relevant service considerations. Resolve proposed changes before approving drawer depths.
For future flexibility, consider a removable or open knee-space section that supports seated use now and can accept enclosed storage later.
Storage Plans for Powder Rooms, Family Baths and Primary Suites
About 48% of occupied homes in both the South and West have at least two full bathrooms, compared with 30% in the Midwest and 26% in the Northeast, according to regional Census housing findings summarized with the Census Bureau and HUD home-improvement information. Multiple bathrooms bring different footprints and different jobs. Repeating the same cabinet arrangement throughout a home rarely serves them equally well.
Storage priorities by bathroom type
| Bathroom type | Storage priority | Cabinet features that fit | Planning note |
|---|---|---|---|
| Powder room | Hand towels, soap and backup tissue | Slim vanity with a small drawer bank | Keep the door swing clear of the toilet |
| Family bath | Towels, toiletries and children's supplies | Double-drawer base, tall linen tower and child-height cubbies | Give each regular user defined storage |
| Primary bath | Grooming tools, cosmetics, robes and hampers | Dual-user vanity or side towers, appropriately specified outlet drawers and pull-out hamper | Reserve approach space for both users |
| Wet room or shower-heavy bath | Cleaning supplies, bath products and damp textiles | Sealed cabinetry, vented interiors and shallow storage | Keep the base off wet floors and ventilate compartments |
| Guest or secondary bath | Guest linens and spare toiletries | Closed drawers and a linen cabinet | Keep storage minimal to simplify cleaning |
Give each room a specific job
A powder room doesn't need to become a linen closet. A slim cabinet with discreet backup supplies can preserve breathing room around the basin and toilet.
In a family bathroom, a tall linen tower can separate clean towels from toothpaste, bath toys and daily clutter. Child-height cubbies help with independence, but cleaning products and medicines need secure storage out of children's reach.
A primary suite benefits from an inventory of grooming tools before drawer dividers are drawn. Measure the actual appliances, brushes and bottles; specify electrical accessories with the electrician rather than placing an ordinary power strip inside cabinetry.
Wet-room storage needs a different routine. Sealed interiors help with incidental moisture, but damp towels should dry before they're enclosed. Guest storage can remain deliberately spare, with visible essentials and closed space for backup linens.
Assign every item a home near where someone uses it. Then let the inventory determine drawer count and cabinet width.
The bathroom storage solutions guide offers ideas for turning that inventory into organized storage. Record each person's morning routine separately, including what stays on the counter and what can comfortably be put away.
Designing Bathroom Cabinets for Aging in Place
An accessible bathroom doesn't have to look clinical, and it isn't defined by a single open-bottom vanity. The 2025 U.S. Houzz Bathroom Trends Study found that 68% of renovating homeowners considered special needs, up four percentage points year over year; 47% expected those needs five or more years in the future, while 31% were addressing current household needs, according to Houzz's accessibility findings.
A furniture-like vanity, warm wood and a seated section can feel entirely at home in a carefully composed bathroom.
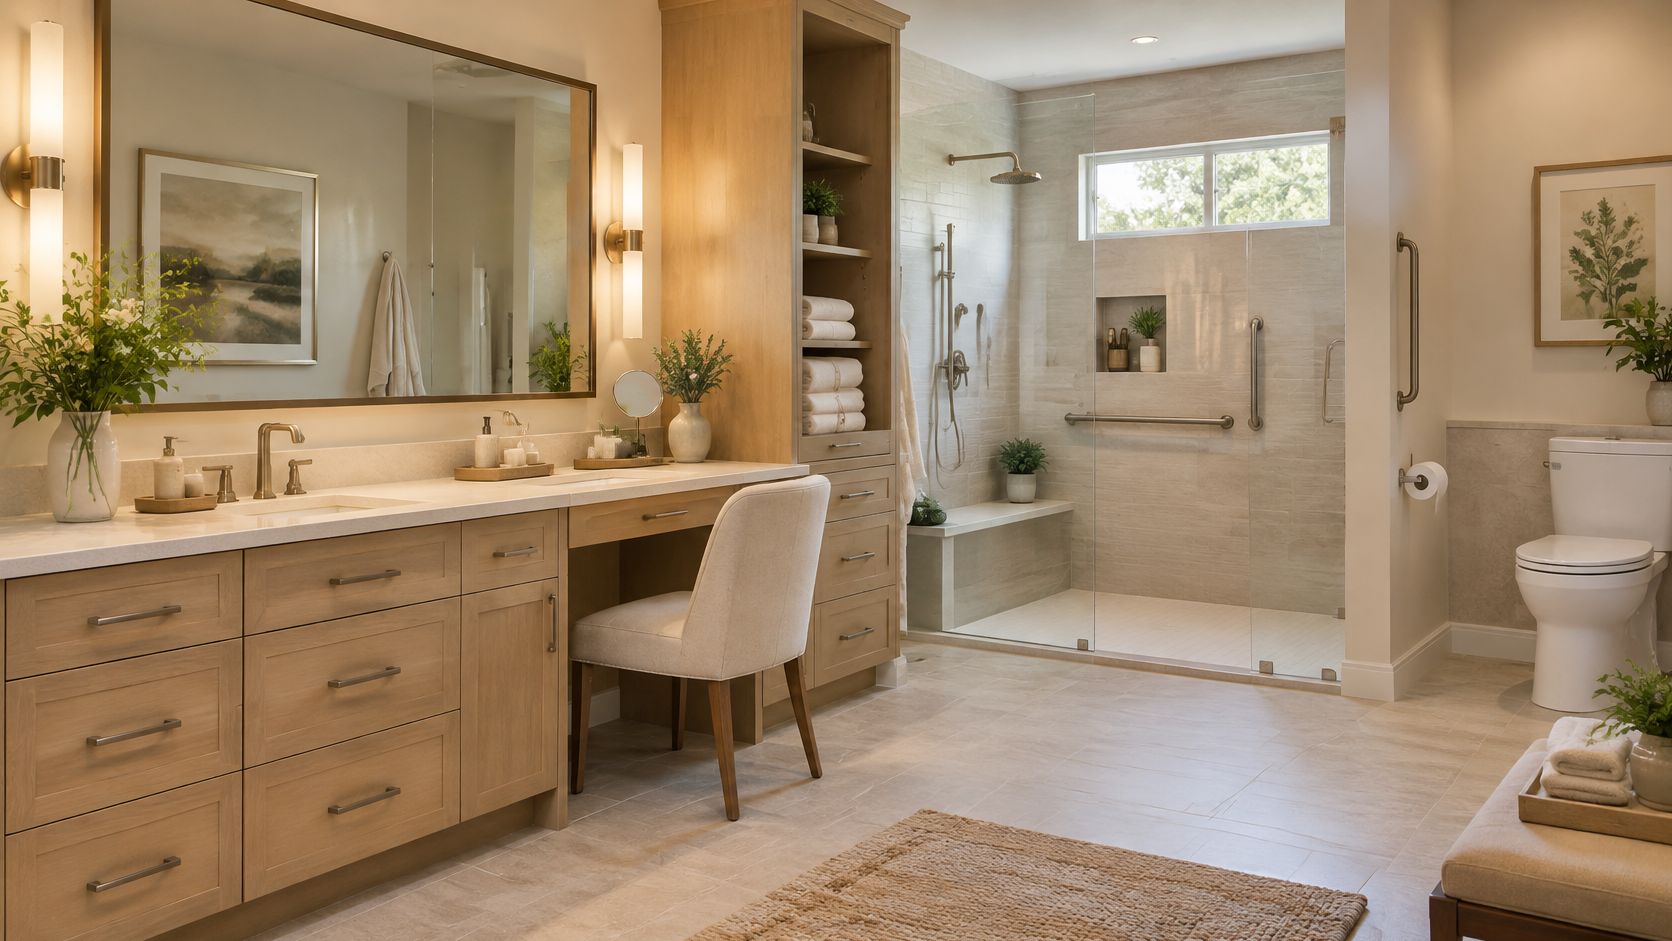
Prioritize features you can use today
Begin with the user rather than a universal height prescription. For a standing user, frequently used items may fit comfortably between hip and shoulder height; a seated user needs a reach assessment from their actual position.
- Drawer-based storage: Bring contents forward instead of requiring a reach into a deep base cabinet.
- Easier-grip pulls: Choose handles that accept a relaxed hand, with contrast against the cabinet finish.
- Task lighting: Illuminate the counter without making someone work in their own shadow.
- Clear approach space: Test the layout with the mobility device the person uses or anticipates using.
Decorative features aren't accessibility features just because they look contemporary. A floating vanity may appear open yet still place the basin too far away. A handleless door may look clean but be frustrating for someone with limited dexterity.
Balance access with storage
Deep drawers make contents easier to retrieve, but they can occupy space needed for knees. A lower seated section helps some users while reducing enclosed storage, so nearby side drawers or a linen cabinet may need to take on more.
Wall-mounted cabinetry can simplify floor cleaning, but it requires structural planning before the walls are closed. In a wet room, supports and penetrations must be coordinated before waterproofing, rather than improvised afterward.
Design principle: Integrate cabinet height, circulation, lighting and shower entry as a single layout decision.
That approach allows accessibility to remain discreet. The room can express the homeowner's taste while accommodating changing strength, reach and mobility.
How the Custom Process Moves From Sketch to Install
Custom cabinets earn their cost in the steps before fabrication. The design process works like a relay: measurements feed drawings, drawings feed the screen preview, and the preview feeds the cabinet contract, so each decision hands the next one a cleaner starting point. At Jennifer Gilmer Kitchen & Bath, clients see what they are approving before anything is cut, rather than interpreting isolated samples.
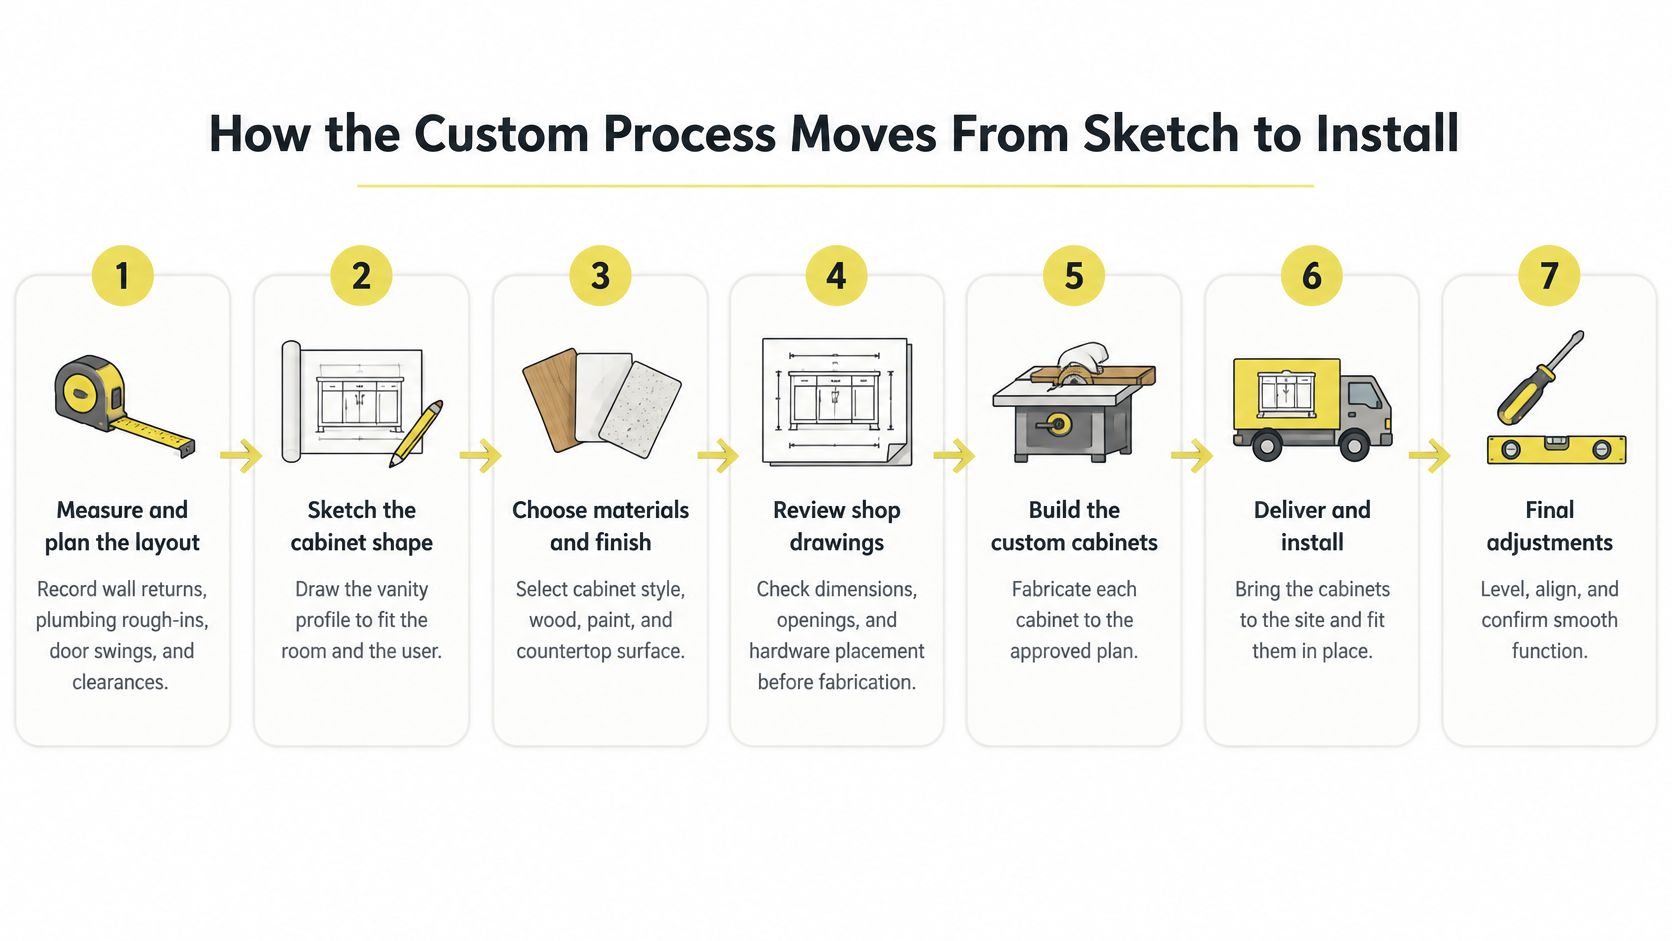
The walkthrough above mirrors the sequence below, from first measurements to final adjustments.
Settle the decisions before fabrication
Measure and plan the layout. Record wall returns, plumbing rough-ins, door swings and approach space, because every later drawing relies on them. A common slip is measuring unfinished walls without accounting for the final surface buildup, so a vanity ordered from those numbers arrives slightly too deep.
Choose door style and finish alongside plan review. We help clients select profile, species and finish together, because those choices change the cabinet's visual weight. Choosing a door in isolation can leave a compact bathroom feeling busier than intended.
Preview the finished room on screen. Our design process includes showing clients what the finished project will look like before starting. Use that review to assess proportions and sightlines, then confirm color and sheen against physical samples, since screens flatter nearly everything.
Finalize the cabinet contract. Once plans and materials are settled, we prepare the cabinet contract along with the other selected materials. Leaving a sink or hardware selection unresolved until afterward creates avoidable revisions, and because realistic timelines run from design through completion, a late decision shifts the schedule for everyone.
Coordinate ventilation and penetrations. Bathroom exhaust should be sized for the room and discharge directly outdoors rather than into an attic, so confirm the fan's airflow rating and duct route with your installer before the walls are closed. A common mistake is choosing the fan without checking the duct path or leaving service openings unsealed, which lets humid air linger where cabinets and wall surfaces meet.
Fabricate and deliver against the approved documents. Check cabinet components, fillers, finished panels and hardware against the order before installation begins. Delivery coordination supports this stage: Christopher Maga delivers all kitchen and bath plumbing fixtures and makes sure every part is complete, so a missing trim piece or incorrect panel gets caught while it is still easy to fix.
Install and make final adjustments. Set the vanity level, secure it appropriately, and verify fixture connections and clearances against the plan. Our team oversees builders and works with contractors to implement the design, and we can help you find a contractor if the project needs one. If a drawer drags or binds, treat it as an installation problem to adjust, since uneven rooms are expected and accounted for during fitting.
Check the room beyond the cabinet
Bathroom exhaust and whole-home cooling serve different purposes, though homeowners sometimes bundle them into one renovation conversation. If the project also raises broader cooling questions, Erica's Plumbing, Air Conditioning & Restoration's cooling system guide for local homeowners explains system types in a Florida context; mechanical planning for a Washington-area bathroom stays with your local installer.
A short video offers one more visual reference alongside your drawings and samples.
The finished installation should have square doors, even reveals and drawers that close without pressure. Open every door and drawer, inspect the plumbing connections, and confirm that shutoffs remain accessible. If something sits out of level or resists movement, raise it during the final walkthrough rather than after the crew has left.
Confirm Your Layout Before You Order Cabinets
A cabinet order locks the room's paper decisions into wood and hardware.
Once fabrication begins, a relocated drain or a changed basin affects several finished components rather than a drawing alone. Confirm the layout, clearances and storage plan before anything is ordered.
Bring the pre-order checklist from the sizing section to your consultation, along with the room's ventilation details. Measurements describe the room's dimensions; the remaining information describes how your household lives in it:
- Your storage list: Include everyday items, backup supplies and anything that currently lives outside the bathroom.
- Each person's daily routine: Note who uses the room together, which tasks overlap and whether seated use matters.
These details shape cabinet depth, drawer layout and door swing as much as the wall measurements do. A vanity that fits the room can still crowd a doorway or strain a shared morning routine if circulation was never part of the plan.
Make the consultation tangible
Jennifer Gilmer Kitchen & Bath serves homeowners throughout Washington, DC, Maryland, Virginia and Delaware, with showrooms in Chevy Chase, Maryland; Easton, Maryland; and Ashburn, Virginia. By-appointment consultations let clients see materials and cabinetry in person and consider how the selections relate to their own rooms.
The firm's website offers a starting point for exploring its work before a showroom visit.
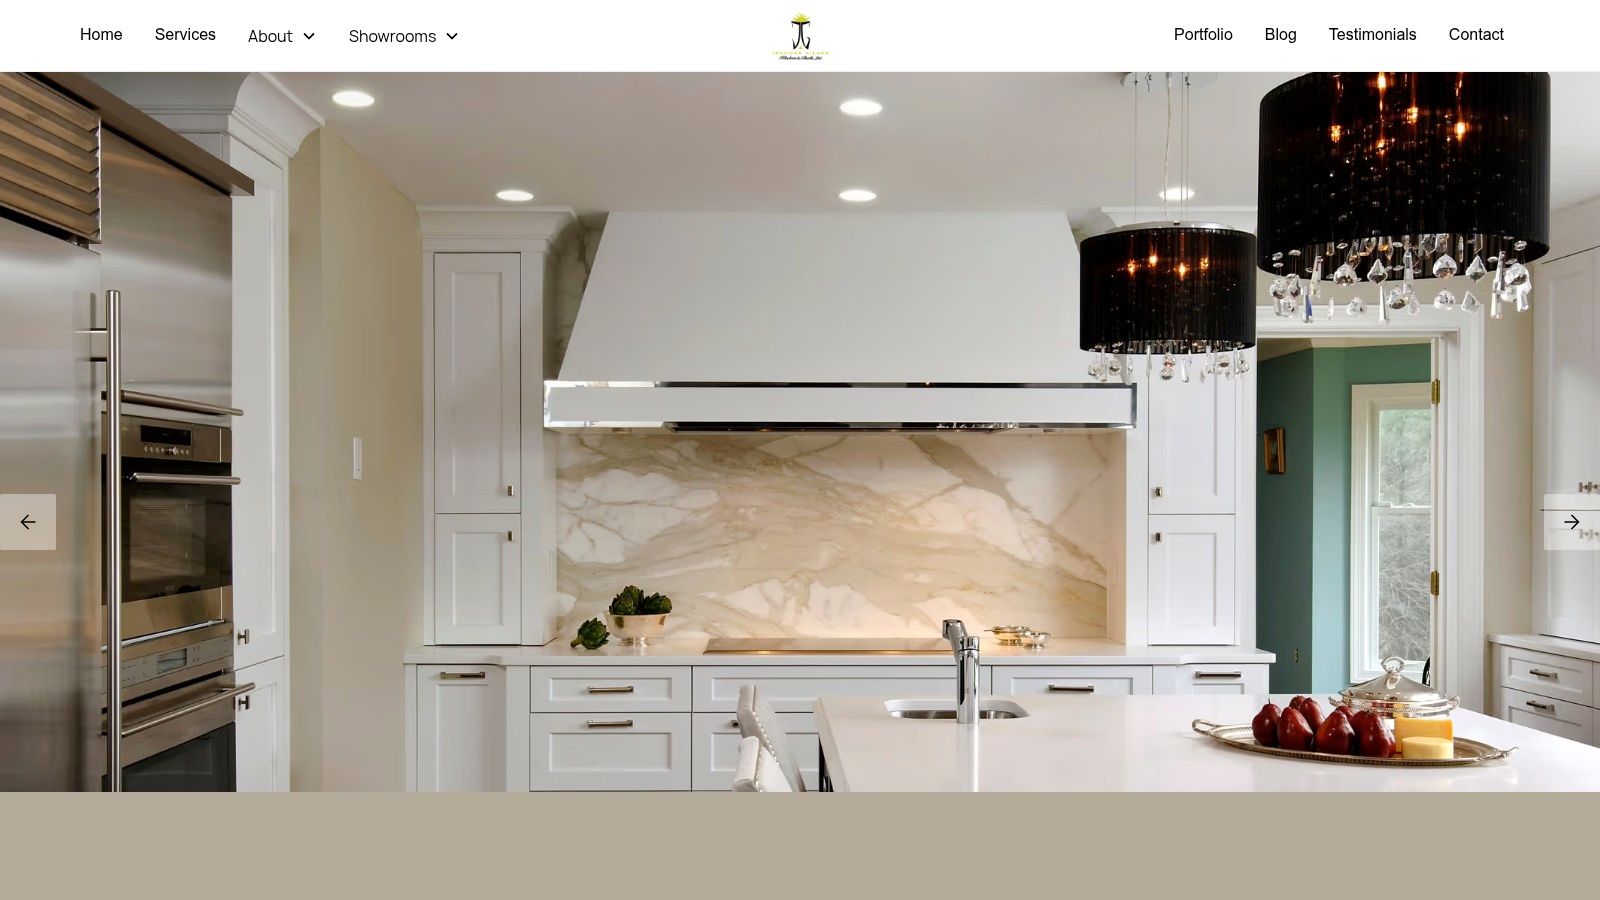
The firm's work includes custom kitchen cabinets, semi-custom cabinetry, kitchen layouts, bathroom cabinetry, custom pantry and built-in storage, and selection support for finishes, lighting and hardware. From concept through installation, the team coordinates the relationship between the room's appearance and its practical requirements.
Jennifer Gilmer Kitchen & Bath can help clients find a contractor to implement the design and provides realistic timelines from design through completion. A productive appointment doesn't require every finish to be chosen. Bring the measurements and storage list, explain the daily routines, and ask for a timeline before choosing materials.
Jennifer Gilmer Kitchen & Bath offers thoughtful bathroom planning, cabinetry guidance and installation coordination for rooms that need better storage without sacrificing circulation. Visit Jennifer Gilmer Kitchen & Bath to arrange a consultation, and bring your measurements and storage list so the conversation can begin with fit, durability and a realistic project timeline.