

The most repeated advice about tiling a bathroom wall is to start with the tile. Choose the stone, pick a grout color, then let someone build a wall around it. That order is backwards. The finish you see is the last decision in a bath, not the first, and the layers behind it decide whether the room is still sound fifteen years from now.
Tile and grout are finishes. They shed most of the water that hits them and pass the rest along, which is fine as long as something behind them takes it. The work that matters happens in a layer you'll never see again once the first course goes up.
A shower that failed tells you so from the outside. A grout line that opened at an inside corner, a stain under the valve trim, a tile that sounds hollow under a knuckle. Those aren't tile problems. They're assembly problems, and they start before anyone opens a box.
Jennifer Gilmer Kitchen & Bath begins a bath by drawing that assembly, whether the room is a primary suite or a half bath that only needs a vanity wall. Get it right and an ordinary ceramic reads as calm and considered.
Table of Contents
- The Numbers That Keep a Tiled Wall Sound
- Which Wall Assembly Belongs in Each Zone
- Plan Layout Joints and Cuts Before Setting
- Set Grout and Seal the Bathroom Wall
- Details That Keep the Bath Useful for Years
- When the Finished Wall Starts to Fail
- Choose a Dry Wall Project or a Designed Bath
The Numbers That Keep a Tiled Wall Sound
A tiled wall is only as sound as the water plan behind it. In a shower, the waterproofing membrane sits behind or directly beneath the tile-setting layer so moisture never reaches the wall structure. The U.S. benchmark is ANSI A118.10, which governs load-bearing, bonded waterproof membranes under ceramic tile and stone. It covers sheet membranes bonded in mortar and liquid-applied membranes that cure into a continuous film, as this overview of bonded waterproofing systems sets out.
That approach is newer than the older sloped mortar bed and pan liner method. Bonded waterproofing lets tile sit directly over a membrane. Older showers relied on a sloped mortar bed, a pan liner, and drain weep holes to manage water that got past the grout and mud. The bonded version moves protection closer to the tile, so far less water enters the assembly at all. The tile remains the finish. The membrane does the water work.
Here is the grid that sits on the table during a bath design meeting. Mark the rows that belong to the shower and the rows that belong only to the dry wall beside the vanity. They are not the same wall, and they do not carry the same requirements.
| Check | Target | Where it applies |
|---|---|---|
| Mortar contact | At least 95 percent, including edges | Showers and other wet walls |
| Mortar contact | About 80 percent | Typical dry interior walls |
| Finished mortar bed | At least 3/32 inch (2 mm) | After the tile is embedded |
| Large-format tile | Any edge over 15 inches | Layout, flatness, and back-buttering |
| Narrowest practical grout joint | 1/16 inch | Increase for variation or warpage |
| Shower floor slope | 1/4 inch per foot to the drain | Sloped mortar-bed surfaces |
| Bonded membrane height | About 6 feet above the shower floor | TCNA B422-style shower walls |
| Movement joint spacing | 12 feet | Tile exposed to moisture or sunlight |
| Movement joint spacing | 25 feet | Ordinary interior runs |
| Indoor humidity | 30 to 50 percent, and below 60 percent | The finished bathroom |
| Exhaust fan | 50 cfm intermittent or 25 cfm continuous | Ducted outdoors |
Read each row as a decision
Mortar contact is the line that separates a professional set from a hopeful one. Wet walls call for coverage out to the edges, while dry interior walls are held to a lower figure. A habit borrowed from a hallway ceiling does not transfer into a shower. Think of mortar as the grip under a shoe. The sole may look clean, but the bond is what keeps each step steady.
The finished bed gives that grip enough body to hold tile flat. Large-format pieces add another demand. Any edge over 15 inches calls for closer attention to layout, flatness, and back-buttering. A long tile behaves like a plank laid over an uneven floor. If the support rolls, the finish telegraphs the roll.
Membrane height and slope belong in the same sentence. The TCNA B422 shower method is commonly described as requiring a continuous, bonded, load-bearing membrane carried to roughly 6 feet above the shower floor, sealed at every seam and penetration (membrane guide for mosaic tile installations). Any surface that has to drain needs enough pitch to reach the outlet rather than hold water. A wet floor with no clear path to the drain is a shallow basin wearing tile.
Joint width and movement joints follow the tile in your hand, not the number printed on the carton. Narrow joints look crisp on rectified porcelain and expose every wobble in a softer body. Movement joints give the assembly room to shift. Every change of plane in a bathroom is two planes moving independently, so those junctions take sealant rather than grout.
The question to ask before you buy tile: was this whole wall designed as one wet-area system, substrate through sealant, or was the tile treated as a barrier on its own?
The last rows concern the air in the room, which decides how much moisture the finished wall holds between showers. A tile wall in a poorly ventilated bath works harder than the same wall in a dry one. Ventilation is part of the assembly's daily life, even though it sits above the wall rather than inside it.
Which Wall Assembly Belongs in Each Zone
Most baths fail in an attractive way. The tile is well chosen, the layout is tidy, and the water path behind it was never finished. The question isn't whether to use cement board. It's which of five assemblies you're building, and in which zone.
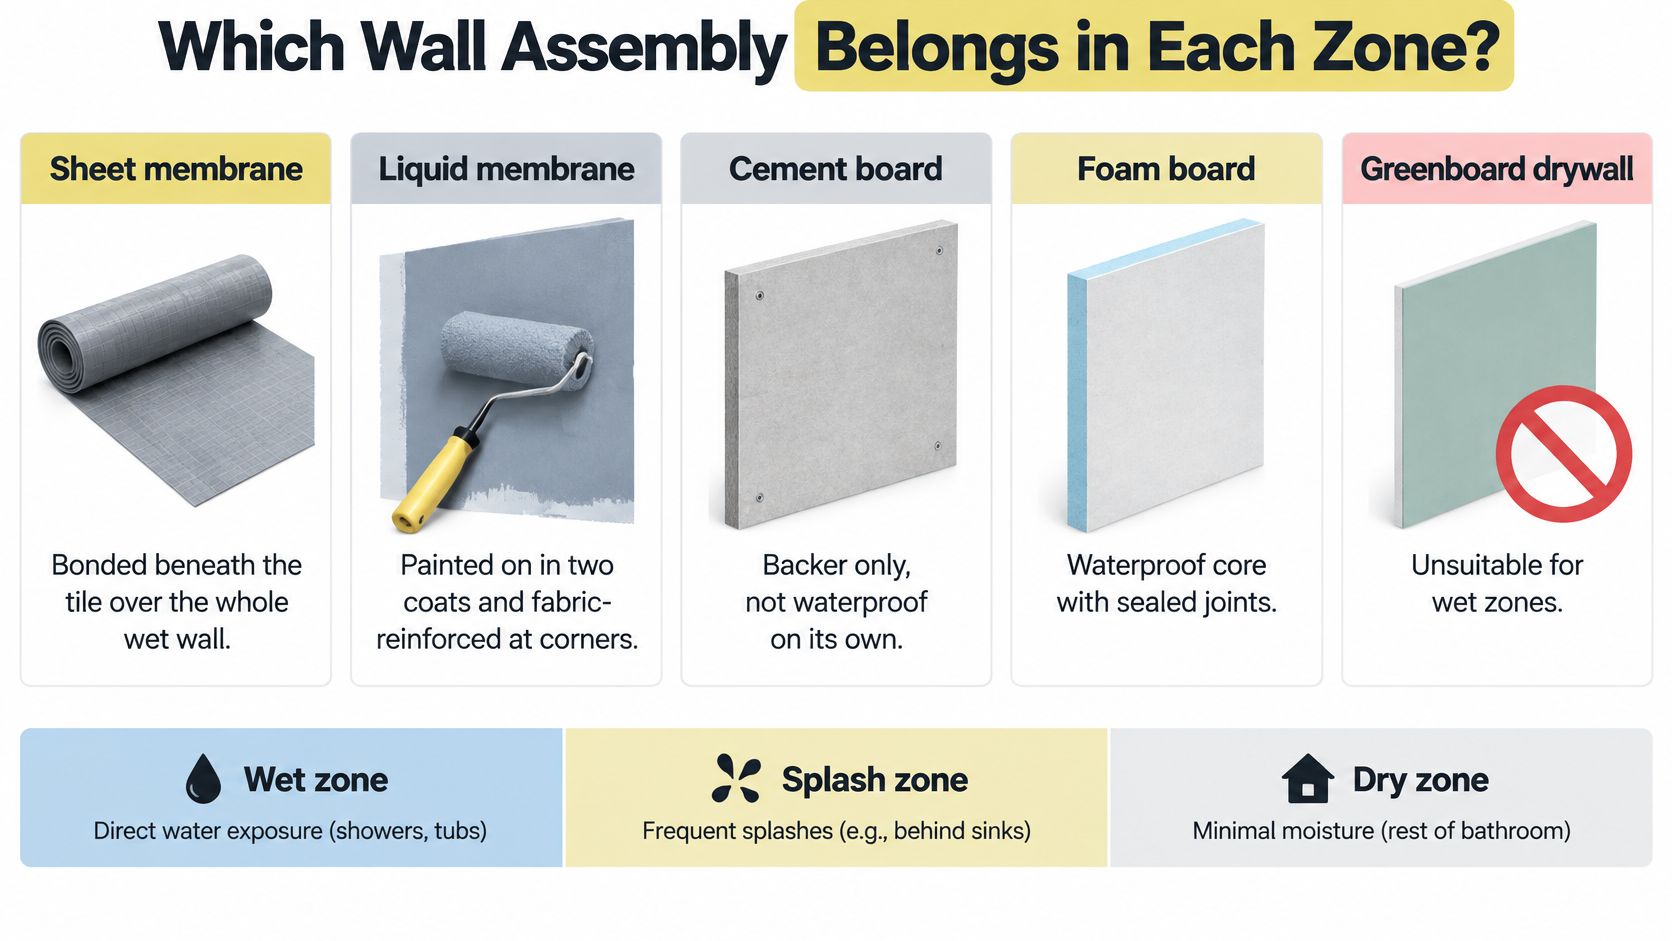
Sheet membrane is what most shower walls want. It's bonded beneath the tile across the whole wet area and turns the wall into one continuous surface, provided every seam, corner, and overlap is treated. Long shower walls go quickly with it, and it carries large-format tile without complaint.
Liquid-applied membrane cures into a continuous film and is often the easier choice around a crowded valve, a niche, or a bench, because you can brush it into the geometry instead of wrapping a sheet around it. It only works when the coats reach the thickness and cure the maker specifies. Two thin passes and a third brushed into the corners is the pattern.
Foam and coated backers are complete systems. Board, fasteners, joint band, and sealant are designed together, so substituting a different screw or skipping the band turns a waterproof panel into a sponge. Cement board is a stable substrate, not a barrier: it holds tile beautifully and waterproofs nothing. Ordinary drywall can be reasonable beyond the splash, on the wall beside a vanity that sees humidity and the occasional towel. As a default inside a shower it's a mistake.
| Assembly | Best zone | Role | Do not skip |
|---|---|---|---|
| Sheet membrane | Shower and tub walls | Bonded waterproof layer under the tile | Seams, corners, and overlaps |
| Liquid-applied membrane | Wet walls with niches and clustered pipes | Cures to a continuous film | Specified thickness and full cure |
| Approved foam or coated backer | Wet areas used as a complete system | Board and sealed joints work together | That maker's fasteners and joint bands |
| Cement board alone | A stable base, not a shower barrier | Holds the tile | A separate membrane in any wet zone |
| Ordinary drywall | Dry walls outside the splash | Acceptable only for occasional wetting | Never as the default inside a shower |
Standards-based guidance is blunt here. Shower and bath walls exposed to repeated wetting need a moisture-resistant substrate plus an impervious layer behind the tile, and this guide to substrates for bath and shower enclosures names tub walls, shower walls, thresholds, seats, windowsills, niches, and shelves as the surfaces that count.
Older houses ask more of the wall
In older Washington, DC, Maryland, and Virginia houses, the framing behind the tile is rarely uniform. You find patches of gypsum board next to plaster, studs out of plane by a half inch, and a soft spot near the tub that has been damp for years. Those get repaired before a membrane goes on, because a sheet laid over a moving wall will crack at the seam it was meant to protect.
Detail corners, changes of plane, shelves, and every pipe on the same day the membrane goes up. One open joint undoes a continuous coat. If you want a second walkthrough of that step before you talk to an installer, Trademaster Construction's shower waterproofing guide follows the sequence from bare substrate to sealed penetration.
Which is why the honest answer to how to bathroom wall tile a shower starts behind the wall, and why a modest ceramic over a complete assembly outlasts expensive stone set on an untreated one. If the format question is still open, these notes on ceramic tile for a shower are worth reading before you fall for a slab.
Plan Layout Joints and Cuts Before Setting
A tiled wall is judged by its edges before anyone studies the field. A thin strip beside a door looks improvised. Equal cuts on both sides look intentional. That result comes from a pencil layout, not a lucky first row. The tile is the finish, while layout, membrane detailing, and future use decide whether a handsome wall lasts.
Measure, then find the center that matters
Measure every wall separately, because old baths rarely give you matching dimensions. Find the elevation you see most often, usually the wall facing the door or shower entry, and center the layout there. If the outside cuts look awkward, shift the start line until they balance. Carry that line around the room with a level control line so the pattern does not drift.
Mark the niche, bench, and valve before anything is covered. Keep those openings inside full tiles when the module allows, because a clipped niche reads like an accident. This planning step also protects daily use. A valve centered in a tile, a bench aligned with the field, and a clean turn at the door all make the wall feel calm once the bath is in service.
Judge the joint from the tile in hand
Industry guidance treats 1/16 inch as the narrowest practical joint, and the right width also depends on size variation, edge warpage, and whether the tile is rectified (grout line size guide). Rectified porcelain holds a quiet line. A softly cushioned or bowed body needs more room, or the wall reads wavy even when it is flat.
Large-format changes the math. The Tile Council of North America definition cited in shower tile installation guidance classifies a tile as large-format once any edge exceeds 15 inches, and the same guidance calls for back-buttering those units to reach at least 95 percent mortar contact in wet areas. Fewer grout joints give the wall a cleaner plane, but they ask more of the substrate. Think of the joint as a shock absorber, and the tile edge as a hard wheel. A better wall needs both a true surface and enough space for normal movement.
A tile with an edge over 15 inches needs two pairs of hands, a flat wall, and mortar on the back of the piece as well as the wall.
Where sealant replaces grout
Grout keeps debris out of the joint and allows a little movement from heat and humidity, but it should not fill every junction. Guidance tied to TCNA detail EJ171 sets interior movement joints at a maximum of 25 feet in each direction, tightened to 12 feet where tile is exposed to moisture or direct sunlight (grout joint glossary). A residential shower is far smaller than either figure, so the useful rule is local: flexible sealant at inside corners, the ceiling line, the wall-to-floor joint, and the edges of niches and benches. Those are the places where the wall changes direction or meets another material, so rigid grout is the wrong tool.
Check lippage with a straightedge as each course goes up, and adjust before the mortar sets. For more on balancing cuts, formats, and grout color across a room, these bathroom tile design ideas show how the same rules play out in different layouts. You can also compare bathroom tile layouts and grout when deciding how the finish will read in the finished room.
Leave this stage with a sketch: centerlines, cut sizes, joint width, and every joint that will be sealant rather than grout.
Set Grout and Seal the Bathroom Wall
With the assembly closed and the layout drawn, setting becomes a coverage job. Appearance is not the test. Contact is, and the standard puts a number on it: 95 percent distributed contact for showers and other wet installations, 80 percent for typical dry interiors (ANSI coverage standards explained).
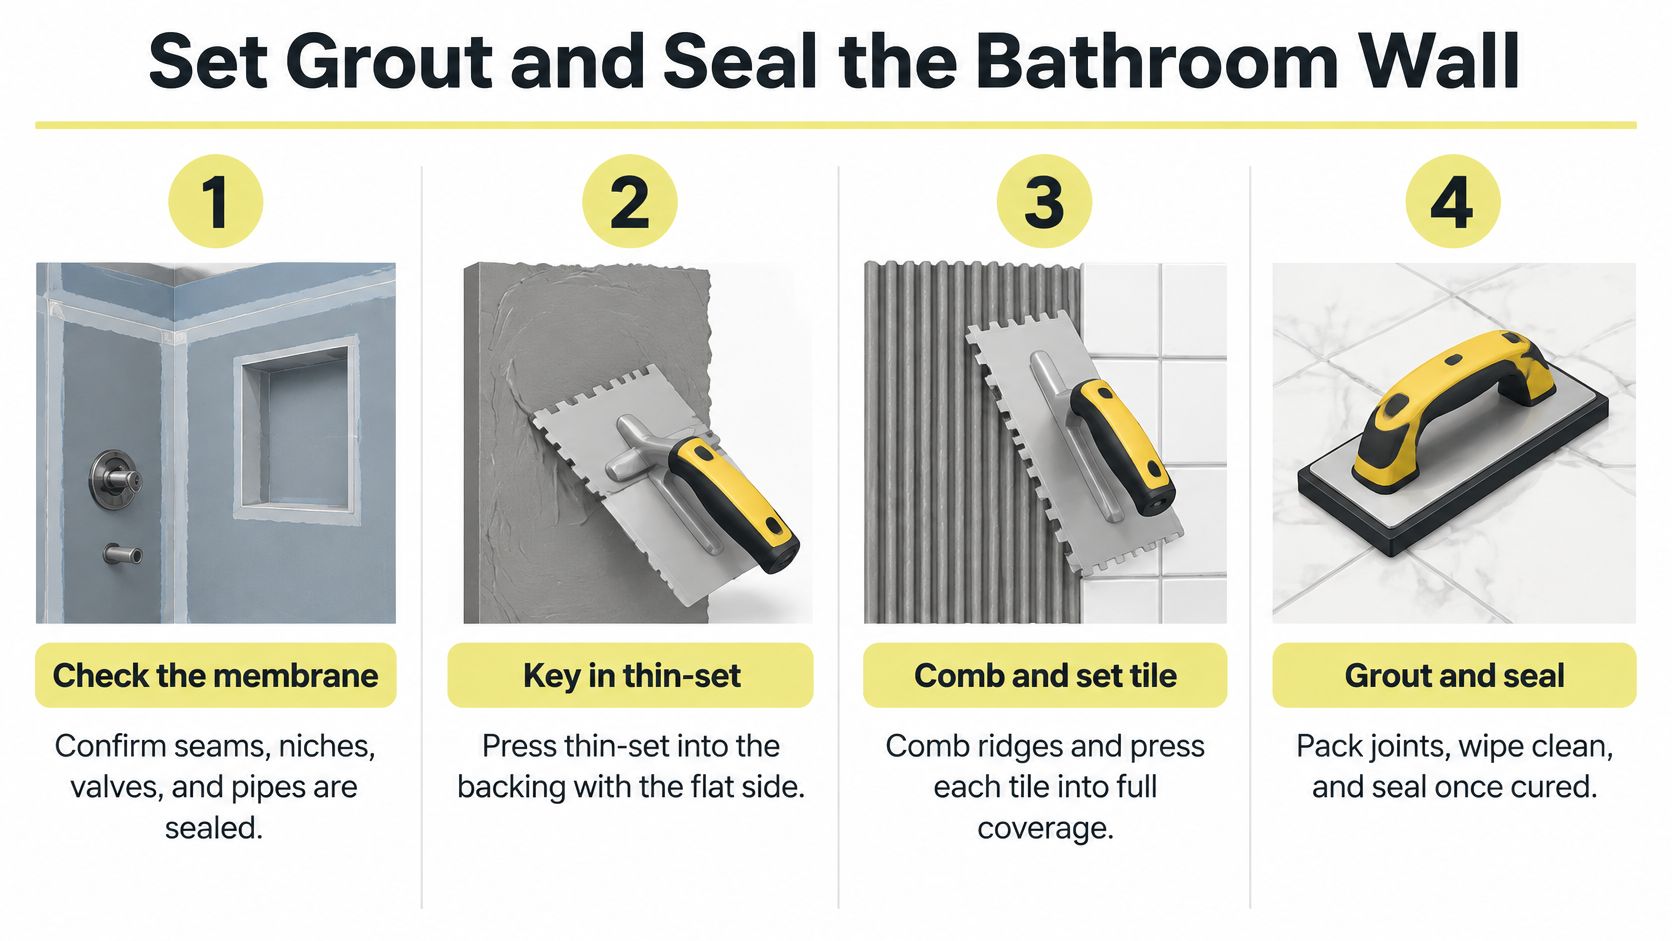
- Confirm the membrane is cured. Seams, niches, valves, and pipe penetrations should already be sealed and finished before a tile covers them.
- Key thin-set into the backing with the flat side of the trowel, pressing it into the pores rather than laying it on top.
- Comb fresh mortar in one direction with the notch the mortar and tile makers specify, holding the trowel at a consistent angle so the ridges are uniform.
- Back-butter anything over 15 inches, plus heavy, warped, or textured pieces, so the edges never sit on air.
- Press and slide each tile across the ridges so they collapse, and spread only what you can cover before the mortar skins over. Tile must not go onto skinned mortar.
- Pull at least three tiles as you work. The finished bed should stay at least 3/32 inch, or 2 mm, after embedding.
- Clean mortar from the joints while it's soft, keep widths consistent with spacers, and leave corners, the wall-to-floor line, niches, and benches open.
- Grout the field only, wiping haze on the maker's schedule, then tool color-matched sealant into every change of plane.
Spot-bonding is the habit that ruins all of it. A few dabs behind a tile leave unsupported zones that crack under a shoulder, loosen at the edge, and give water a path it shouldn't have. A bigger trowel doesn't fix poor contact either; it just moves more mortar around.
Mastic has no place in a shower that stays wet. Save it for a dry vanity backsplash where the wall never sees standing moisture.
The order to keep, from the first day to the last, is flatten, waterproof, detail, dry-fit, set, check coverage, grout, seal. Skipping one shows up five years later as a hollow tile or a hairline crack at the ceiling.
If you'd rather watch the rhythm of it before you pick up a trowel, this walkthrough covers the same sequence in a working shower.
Details That Keep the Bath Useful for Years
A tiled wall should still make sense a decade from now. Future use belongs in the drawing, not in a late change order after the field is set. The tile is the finish. Layout, membrane detailing, and daily use decide whether a handsome wall lasts.
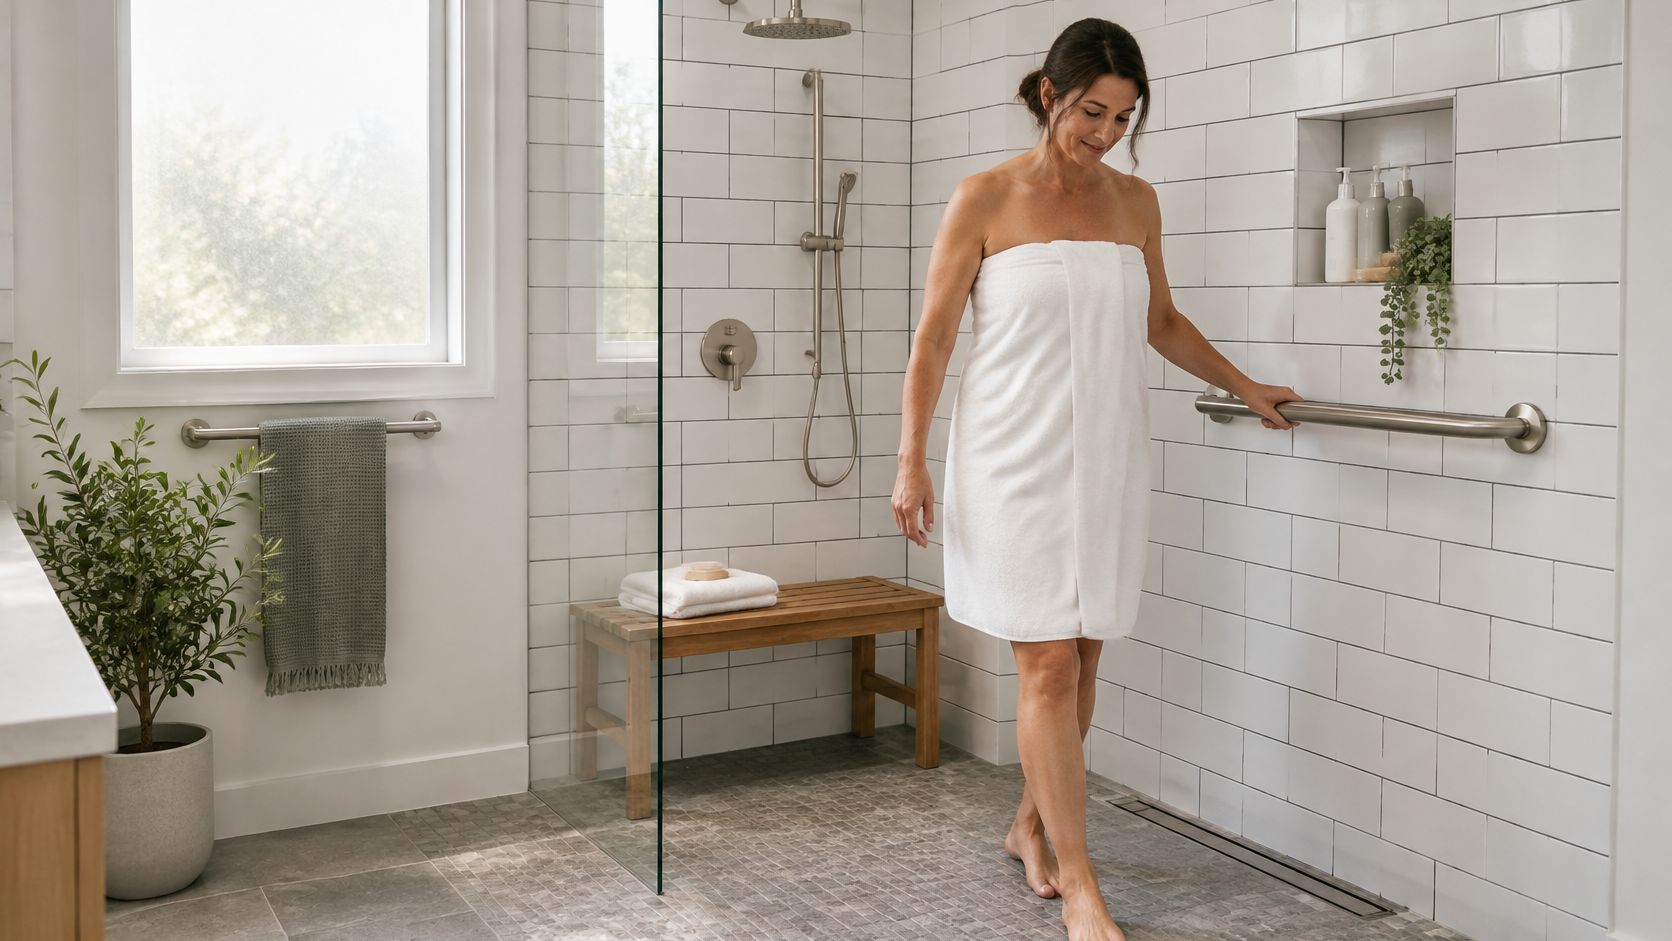
The 2025 U.S. Houzz Bathroom Trends Study, based on more than 1,700 respondents, found that 68 percent of homeowners considered special needs during their bathroom projects, four percentage points higher than the prior year (Houzz press release). Read that as ordinary planning rather than a niche concern. A bath that can change with the household is better planned from the start.
What goes in before the tile
Put solid blocking where a grab bar may land later, even if no bar is going in this year. Place a niche where a hand reaches it without stepping under the showerhead, and waterproof it as carefully as the wall around it. Work out benchmark heights from the actual users, with primary bathroom shower dimensions in front of you so the drawing reflects real reach, clearance, and daily routine.
Trim and bench edges deserve the same attention. A sharp exposed corner at knee height is a hazard in a wet room, and a mitred return costs little at the drawing stage. A narrow band of contrasting tile at a curb, a control, or a change of plane helps someone read the room without turning the shower into a pattern.
Choose the format for the cleaning you'll actually do. Small tile means more grout to keep white; large tile means fewer joints and a stricter demand for flat walls.
Jennifer Gilmer does not impose one look, so the format and the joint follow the house. A 1920s room wants a quieter grid and a base detail that meets the existing moulding. A newer bath can carry a broad, calm plane. The grab bar, bench, and controls belong in the drawing with the tile, not patched in afterward. Treat that drawing like a seating plan for the room: you would not place the chairs after the table was built.
Ventilation finishes the plan
Keep indoor relative humidity between 30 and 50 percent, and below 60 percent, and duct the exhaust outdoors at 50 cfm for an intermittent fan or 25 cfm if it runs continuously (EPA guidance on mold and moisture). None of that replaces a membrane, but it handles the moisture that sits on tile, grout, paint, and cabinetry after every shower.
Add blocking, niche height, contrast, and the fan to the same sketch as the tile layout. That sketch is the design.
When the Finished Wall Starts to Fail
A hollow tap is the most useful sound in a bathroom. It usually means a void behind the tile from spot-bonding, a skim of thin-set that dried before the piece went on, or ridges that were never collapsed. That tile comes off and gets reset. A larger trowel alone won't create contact that wasn't there.
Cracked grout at an inside corner is almost always movement, not a bad mix. Cut it out and put flexible sealant in its place rather than reaching for another bag of grout.
| What you notice | Usual cause | What to do |
|---|---|---|
| Hollow or loose tile | Voids from spot-bonding or skinned mortar | Remove and reset; confirm full contact |
| Cracked grout at an inside corner | A movement joint filled with rigid grout | Replace that joint with flexible sealant |
| Lips between tiles | Uneven wall or mortar ridges left standing | Flatten first, then slide tiles across fresh ridges |
| Stains below a valve, niche, or curb | An open membrane seam or penetration | Repair the waterproofing before any new tile |
| Soft adhesive in the shower | Mastic used in constant wetting | Reset with the specified thin-set |
| Blotchy or crumbling grout | Joint too tight, or haze left to cure | Match joint width to the real tile and clean on schedule |
Staining below a valve, a niche, or a curb is a membrane problem, and regrouting the face of the wall won't stop it. Nor will a stronger sealer. Water is already behind the tile, and the repair starts with opening the assembly.
The pattern in the field matches the pattern in the numbers. A reported New Zealand industry review found failure rates of approximately 11 percent, with estimates up to 13 percent, and attributed 89 percent of recorded failures to installers, as summarized in this ceramic tiling technical guide. Those figures aren't a global score, and the guide says as much. What they describe is familiar: the miss is a seam, a penetration, or a joint, not the tile pattern.
Blotchy grout usually comes from a joint too tight for the tile's variation, or haze left overnight until it cured in place. A mildewed line that keeps returning after cleaning is a moisture question rather than a scrubbing question, and these shower mold and mildew tips help tell the difference between surface growth and a wet assembly.
Surface repairs, meaning grout, sealant, and a few loose pieces over a sound membrane, are worth doing well. If moisture is already in the wall, stop and open it. Anything else is decorating the symptom.
Choose a Dry Wall Project or a Designed Bath
A dry wall of standard ceramic, flat and free of plumbing, can suit a careful homeowner who follows the joint and coverage rules. Keep the substrate sound, center the layout, honor the movement joints, and a vanity wall comes together well over a weekend. The tile is the finish, while the planning behind it decides whether the wall stays handsome.
A shower is a different job. So is a tub surround, a niche, a run of large-format tile, or any wall that has already been wet. Those need a continuous membrane, a 95 percent contact check, and someone who will stand behind both when the wall is closed. Treat the assembly like a raincoat: the visible fabric matters, but the seams and openings decide whether water gets in.
Budget context helps before the finish takes over the conversation. The 2024 national median cost for a basic full-bathroom renovation was reported as $12,100, a figure covering a standard 5-by-7-foot room and not limited to wall-tile work (The Decor Mag's budget breakdown). Wall tile sits inside that number, not on top of it, which is why the invisible layers are worth arguing about early.
In Washington, DC, Maryland, and Virginia, Jennifer Gilmer Kitchen & Bath designs and remodels bath projects from the first look through installation. Jennifer Gilmer starts by noticing what feels clunky or disjointed about the room as it stands, functionally and aesthetically. The design team works through the same drawings with the client, so the bar, the bench, and the controls sit beside the tile module rather than arriving later.
The firm accompanies clients to the stone yard for counter selections and to tile and plumbing fixture showrooms, so the tile you fall for gets checked against the wall that has to carry it. Clients see what the finished project will look like on a screen before work starts. Contractors are found and overseen, timelines run from design to completion, and the showrooms in Chevy Chase, Easton, and Ashburn serve as working rooms for those decisions.
The next step is a short list. Which zone is the wall in, what size tile are you drawn to, and does the plan need blocking or a niche. Bring that list to a consultation when the wall is a shower, or when the substrate behind it is a question rather than a fact.
Jennifer Gilmer Kitchen & Bath designs and installs custom baths across Washington, DC, Maryland, and Virginia, from the membrane detailing behind the wall to the last piece of trim, and the firm stays with a project from concept through installation. If you're weighing a shower rebuild or a full primary bath, bring your rough wall dimensions and the tile you've been circling to Jennifer Gilmer Kitchen & Bath for a conversation about how the room should go together.