.avif)

You're standing in the kitchen with painter's tape on the floor, comparing the cost of plywood and hardware with the price of a professionally installed cabinet plan. The room has an awkward corner, an appliance that won't fit a standard opening, and storage needs that stock boxes can't quite solve. You could build the cabinets yourself, but the question is whether you're prepared to manage design, joinery, finishing, tolerances, delivery, and installation as one connected project.
Custom cabinetry works best when it's treated as a design-led construction process, not a weekend woodworking project. The cabinet box must be rigid, the materials must suit a working kitchen, the layout must support the way your household cooks, and every piece must arrive ready to align with walls, floors, appliances, lighting, and trim. That's the standard we bring to projects at Jennifer Gilmer Kitchen & Bath across Washington DC, Maryland, and Virginia, with coordination from concept through installation.
Table of Contents
Why Custom Cabinets Are Worth Building Right
A stock cabinet fills an opening. A custom cabinet makes the opening useful.
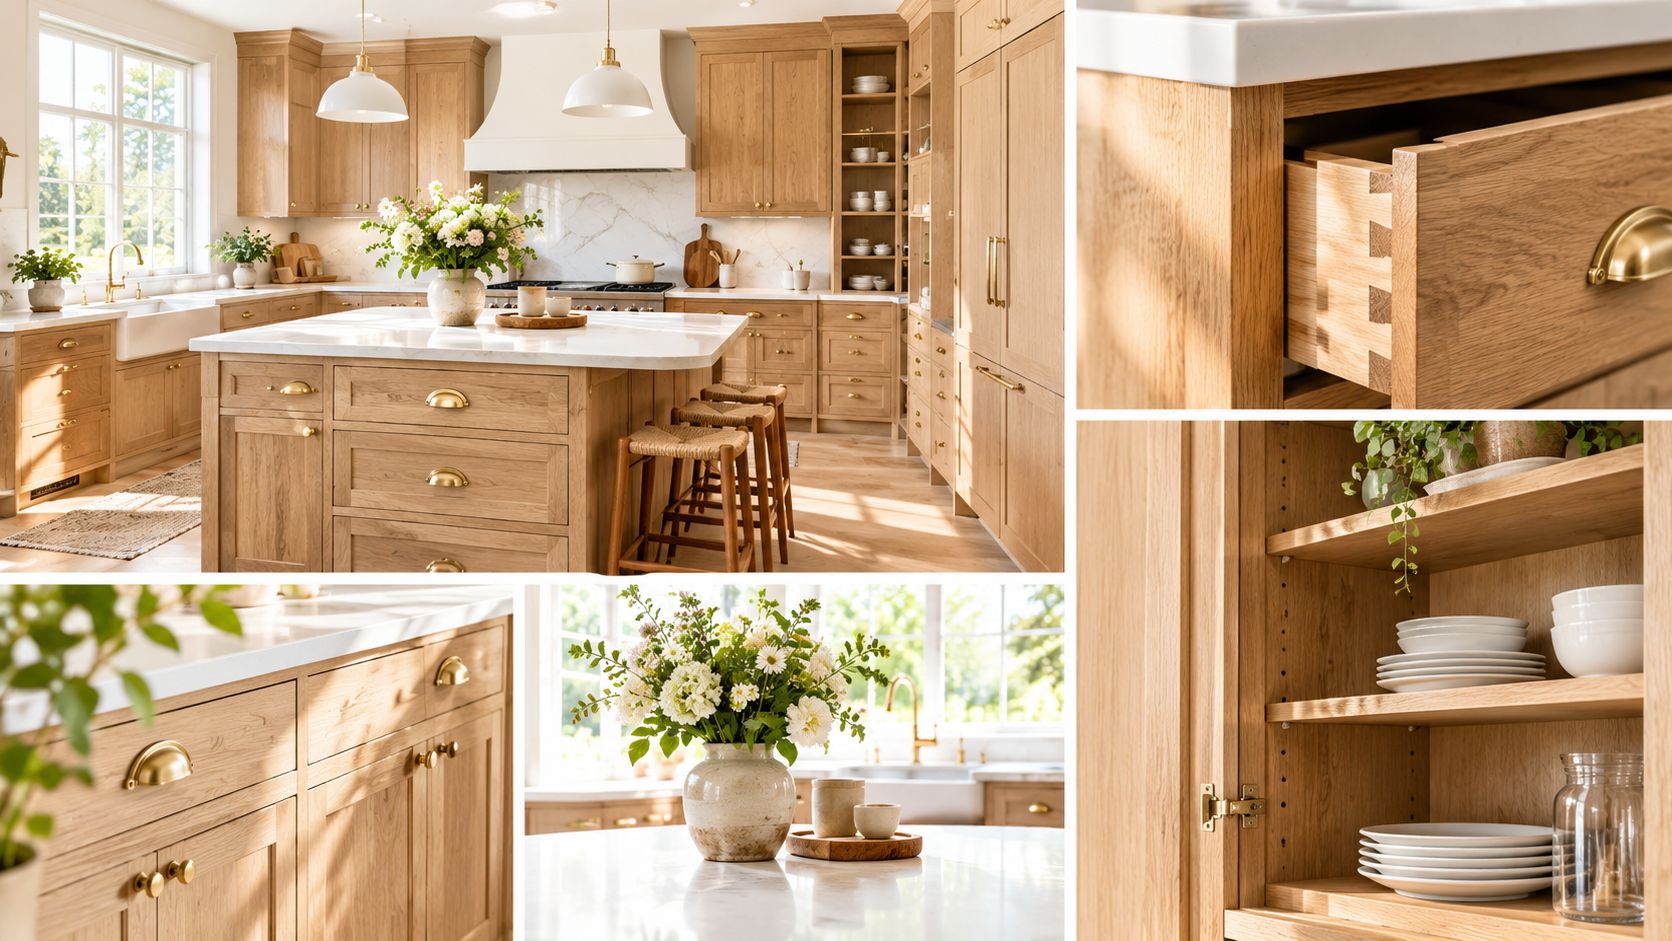
A cabinet built to spec can carry a narrow pullout beside a range, create a pantry around an irregular wall, conceal an appliance garage, or use the full height of a room instead of leaving an unhelpful strip of filler. That distinction matters in older Washington DC homes, Maryland waterfront properties, and Virginia kitchens where walls may not be square, ceilings may vary, and every inch of storage has a job.
The broader market reflects why homeowners continue to invest in this category. The global kitchen cabinets market was valued at USD 95.95 billion in 2026 and is projected to reach USD 124.42 billion by 2031, implying a 5.36% CAGR over that period, according to Mordor Intelligence's kitchen cabinets market analysis. The same source identifies North America as the largest market and Asia Pacific as the fastest-growing region, a useful reminder that custom cabinetry belongs to both established remodeling markets and rapidly expanding urban housing markets.
The value is in the decisions
Custom cabinetry also occupies a durable premium position. One industry report says custom cabinets represented about 40% of U.S. kitchen cabinet revenue in 2023, when the U.S. market was measured at USD 72.3 billion, as reported in this kitchen cabinet industry overview. The same overview reports that custom sales declined 2.6% in a down month while stock sales declined 13.8%, suggesting that buyers can continue to value custom layouts and long-term utility even when demand softens.
That doesn't mean custom is automatically the right choice. A homeowner with a simple, square room, flexible storage needs, and strong woodworking skills may save money by building selected components. DIY becomes less forgiving when the project includes a full kitchen, integrated appliances, painted cabinetry, complex moldings, or a tight installation schedule.
Practical rule: Build custom cabinets only after you've designed the kitchen they need to serve.
A professional process begins with lifestyle questions, not cabinet doors. Who cooks, where groceries are unloaded, whether baking supplies need to stay near the oven, and how often small appliances remain on the counter all influence the casework. Jennifer Gilmer Kitchen & Bath combines layout planning, material selection, storage detailing, and installation coordination for homeowners who want one team to carry those decisions through the remodel.
Planning Your Layout and Taking Precise Measurements
Begin with the room, not the cabinet catalog. Record windows, doors, ceiling changes, plumbing, electrical locations, heating registers, appliance dimensions, and any wall that isn't reliably plumb. Photograph corners and service points before demolition, then make a simple vision reference that separates must-haves from decorative preferences.
The layout should follow movement. NKBA guidance recommends that, in a kitchen with three work centers, the total of the three work-triangle travel distances be no more than 26 feet, with each leg measuring at least 4 feet and no more than 9 feet. The same NKBA kitchen planning guidelines recommend a work aisle of at least 42 inches for one cook and 48 inches for multiple cooks.
Measure the working zones
Map the kitchen around practical actions:
- Unloading: Place landing space and pantry storage where groceries enter the room.
- Preparation: Keep knives, boards, mixing bowls, and waste collection close to the primary work surface.
- Cooking: Allow room beside the range and plan drawers for pans and utensils.
- Cleaning: Coordinate the sink, dishwasher, dishes, and waste so the cleanup path doesn't cross the main cooking route.
- Special storage: Reserve exact locations for tray dividers, tall pantry cabinets, hidden appliances, and deep drawers.
Use inches and fractions of inches in the drawings. NKBA drafting standards specify that kitchen and bathroom plan dimensions should be written in inches and fractions, such as 124 1/4 inches, rather than switching between measurement systems or relying on informal notes. A professional kitchen layout planning guide can help translate those field conditions into a coherent plan.
Standard dimensions provide a starting framework, not a limitation. NKBA guidance identifies base cabinets as typically 30 inches high by 24 inches deep, with widths beginning at 6 inches and not exceeding 48 inches. Tall cabinets are typically 84, 90, or 96 inches high, including the toe-kick, with a 24-inch depth and widths from 12 inches to 36 inches, as shown in NKBA cabinetry casework guidance.
| Cabinet Type | Key Dimensions |
|---|---|
| Base cabinet | Typically 30 inches high by 24 inches deep |
| Tall cabinet | Typically 84, 90, or 96 inches high, including toe-kick |
| Tall cabinet width | 12 inches to 36 inches |
| Base cabinet width | 6 inches to 48 inches |
Turn the drawing into a build document
Your final plan should identify every cabinet, opening, filler, finished end, appliance panel, toe-kick, and lighting requirement. Label finished surfaces separately from hidden construction surfaces. Confirm appliance specifications before cutting, since an assumed clearance can force an entire run to move.
Use a laser measure where possible, but verify critical dimensions with a steel tape. Check the floor in multiple locations, mark stud positions, and document the highest point of the floor and the lowest obstruction on the wall. That information determines where the installation baseline begins and how much adjustment the cabinet run will need.
An overview video can be useful for visualizing the sequence before you commit to a cut list.
Choosing Materials Hardware and Finishes That Last
Material selection should begin with performance. Ask whether the material will remain stable, tolerate kitchen conditions, and support a healthy interior environment. Appearance still matters, but it should follow the room's workload, maintenance expectations, and design language.
Plywood is often a strong choice for cabinet boxes. Its layered construction provides rigidity, reliable screw-holding, and better resistance to occasional moisture than less stable sheet goods. Other engineered panels can perform well when their specifications, edge treatment, and exposure limits are understood. Particleboard can reduce cost, but damaged edges and prolonged moisture make it less forgiving during transport, installation, and daily use. Compare species, sheet goods, finishes, and hardware in this guide to the best kitchen cabinet materials before finalizing the specification.
Wood needs room to behave
Solid wood brings warmth to doors, face frames, and trim, but it moves across the grain. Acclimate lumber before fabrication, avoid cross-grain assemblies, and use floating panels, elongated screw holes, Figure-8 fasteners, Z-clips, or another slip method that allows expansion and contraction.
For furniture-grade work in conditioned interiors, target interior wood moisture content around 6% to 8%. Quality standards often accept roughly 6% to 9% for custom casework, according to this wood moisture guidance. Assemble before the lumber has reached a suitable condition and doors may swell, face frames may twist, and reveals may shift after installation.
Finish selection deserves the same scrutiny. Ask which adhesives, primers, paints, and sealers will be used, and request product documentation if indoor air quality is a concern. Pressed-wood products, adhesives, and coatings can affect the interior environment. Low-emission materials and adequate ventilation should be part of the specification, especially in a tightly enclosed kitchen.
Hardware determines the daily experience
Soft-close hinges, full-extension drawer slides, adjustable shelf pins, and properly rated pullouts improve frequently used storage. Match the hardware to the load. A heavy pantry pullout needs slides designed for that weight, rather than the hardware specified for a lightweight utensil drawer.
Hardware also affects the visual result. Brass, nickel, bronze, and painted finishes reflect light differently, while under-cabinet lighting can expose uneven edges or inconsistent paint that a dim room conceals. In a renovation property, references such as winter fix and flip opportunities can help balance visible design improvements with construction that holds up to daily use.
The right combination is rarely the least expensive material or the most elaborate finish. Choose components that suit the room's moisture, workload, cleaning routine, and visual direction. In the DC, Maryland, and Virginia area, DIY savings make sense when you can control material conditioning, accurate fabrication, and hardware installation. Hire a cabinet professional when those conditions, or the required finish quality, exceed your shop setup.
Building the Boxes Joinery and Finishing With Precision
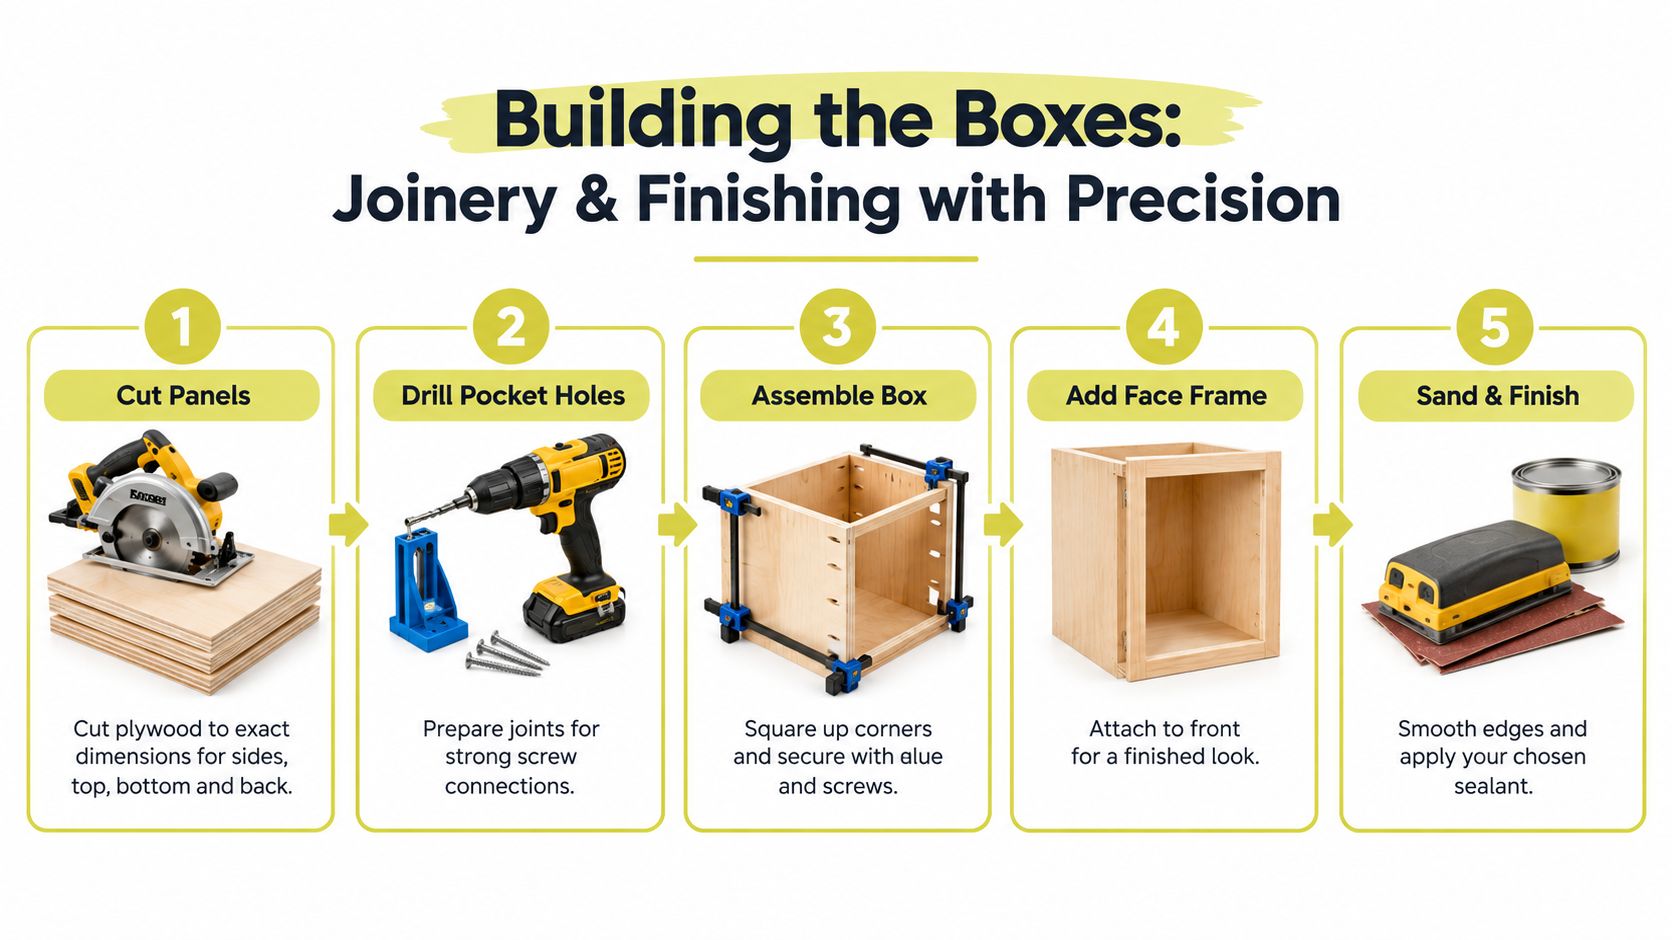
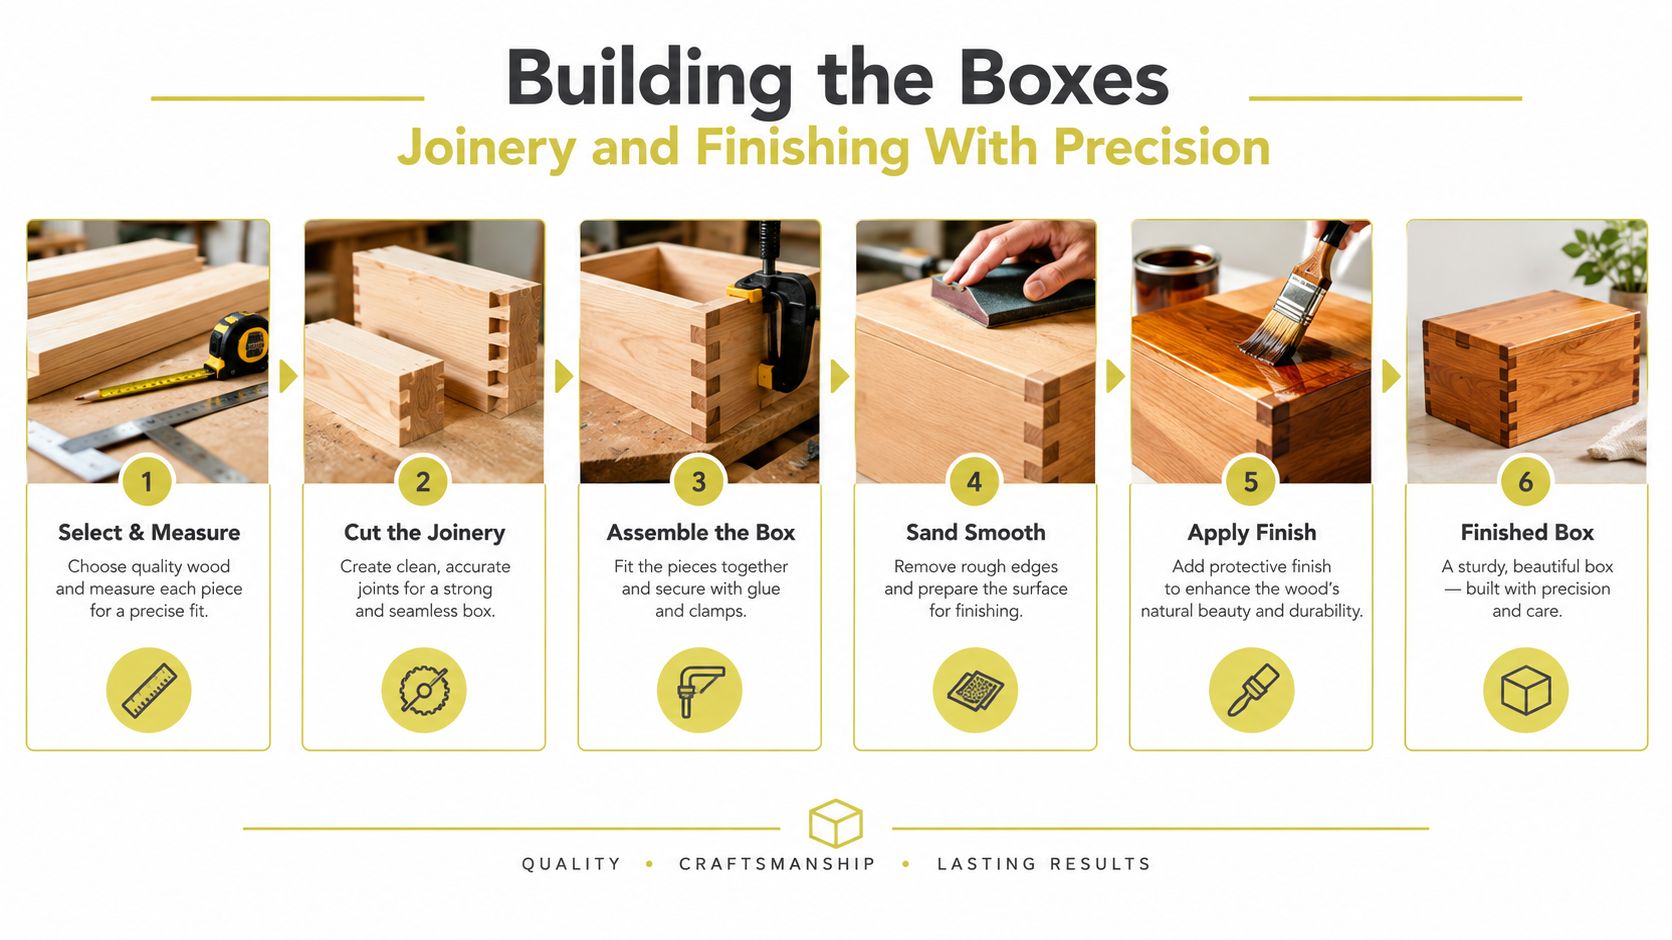
A cabinet box starts with an accurate cut list. Cut the sides, bottom, top, back, shelves, and any rails from stable sheet goods, then label each part immediately. A track saw or table saw can produce clean, repeatable cuts, while a sharp blade and a sacrificial surface help reduce tear-out on veneered plywood.
Build one test box before cutting the entire kitchen. That prototype confirms dimensions, joinery, shelf clearances, back placement, and the relationship between the box and the intended door or drawer front. It's far cheaper to correct one cabinet in the shop than to discover that every opening is slightly wrong after finishing.
Assemble for rigidity
Joinery can include dados, rabbets, confirmat screws, dowels, pocket screws, or a combination suited to the material and equipment. Glue alone isn't a structural strategy for every joint, and pocket holes require careful placement so screws don't break through finished surfaces. Dry-fit each assembly, check diagonals, then clamp and fasten while the box is square.
The back contributes more than appearance. A properly captured or securely attached back helps resist racking, especially in tall cabinets and wide base units. Add stretchers or other bracing where the design requires them, and fully enclose bottoms, sides, tops, and backs where performance specifications call for it.
ASTM and KCMA-style performance thinking prioritizes rigidity, moisture resistance, and load capacity rather than one universal panel thickness. The benchmark described in this cabinet construction reference includes shelves and bottoms that can sustain a 15 lb/ft² load for 7 days, doors and drawers that close without binding, and cabinet construction with appropriate toe space and enclosed components.
Craftsmanship check: If a cabinet looks finished but its corners rack, its exposed edges are unsealed, or its shelves sag under their intended load, it isn't finished.
Treat edges and faces deliberately
Ease sharp plywood edges, apply compatible edge banding, and seal exposed end grain and joints where moisture could enter. Sand between finish coats according to the coating manufacturer's directions, and keep dust away from wet surfaces. Painted cabinetry demands a controlled spray or brush process, careful curing, and protection during handling. For homeowners comparing application methods, a practical overview of spray painting kitchen cabinets in 2026 can help clarify the difference between a durable sprayed finish and an improvised site application.
Fit doors and drawers only after the boxes are stable and the finish has cured. Set hinges and slides with repeatable jigs, establish consistent reveals, and test every moving part through its full travel. A custom kitchen should feel quiet and precise, with no rubbing doors, drifting drawer fronts, or rough edge catching a sleeve.
Installing, Leveling and Aligning for a Precise Fit
Installation starts with the floor and wall, the conditions least willing to forgive error. Find the floor's high point, establish a level reference, and mark the mounting line before moving a cabinet into position. Remodeled homes often have patched walls, bowed studs, or tile transitions. Plan for controlled shimming instead of trying to correct those variations after the run is installed.
Base cabinets typically go in before countertops and finished end panels. Wall and tall cabinets need a sequence coordinated with appliances, fillers, and trim. Fasten cabinets to appropriate structural points, not drywall alone, and carry one continuous reference line across the run so the cabinets do not gradually drift out of alignment.
Control the reveals
Bring adjacent boxes together, clamp their face frames or front edges, predrill, and fasten without pulling either cabinet out of square. Support each cabinet across its full bearing area with shims, then conceal or trim them behind the toe-kick and finished panels. Check level, plumb, and square after every connection. Sink bases and tall pantries deserve extra attention because small errors show quickly in their larger uninterrupted faces.
Use 1/8 inch over 96 inches as a practical working limit for plumb and level, with door and drawer reveals typically held to a nominal 1/8 inch. These benchmarks guide the installation, but they do not correct a badly distorted wall. Depending on the condition, the fix may require scribing, wider fillers, adjusted panels, or work on the substrate.
Coordinate the final connections
Verify appliance clearances before permanently fastening the surrounding cabinets. Plan cable routes, lighting channels, ventilation, and outlet access before backs and panels close the work. Tall cabinetry also affects ceiling trim, refrigerator-door swing, passage widths, and sightlines from adjoining rooms, so review those relationships from the main entrances before final fastening.
Installation brings shop accuracy into a variable job site. In the Chevy Chase, Easton, and Ashburn service areas, Jennifer Gilmer Kitchen & Bath coordinates cabinet alignment with countertops, lighting, appliances, and trim through one documented design and installation plan. That coordination matters when dimensional precision, low-emission materials, and long-term durability all need to support the finished kitchen.
Budget Timeline and When to Call Jennifer Gilmer Kitchen & Bath
Cabinet budget depends on scope, room conditions, and finish expectations. DIY cabinet materials can cost about $2,000 to $8,000, as outlined in Angi's custom cabinet cost guide. Installed custom cabinets commonly run $500 to $1,200 per linear foot, or roughly $11,000 to $36,000 or more for an average kitchen, depending on size and complexity. Materials and installation represent different scopes, so compare them carefully.
DIY can make sense when you already own suitable tools, have a controlled workspace, and are building a straightforward layout. A small island, pantry insert, or short cabinet run may be a reasonable project if mistakes will not delay other trades. The apparent savings narrow once you account for delivery, finishing equipment, replacement material, and rework.
Professional design and installation become more valuable with irregular walls, integrated appliances, painted doors, tall storage, specialty hardware, tight reveals, or a fixed move-in date. These conditions require decisions that connect cabinet dimensions with appliances, electrical work, countertops, lighting, and architectural trim.
For broader remodeling context, review average kitchen remodel cost guidance, then judge the project by its full scope rather than cabinet price alone.
Use this checklist before choosing a path:
- Choose DIY selectively: Start with a limited project where measurements, access, and installation are forgiving.
- Hire for coordination: Use a professional when several trades must meet at exact cabinet locations.
- Ask about materials: Confirm sheet goods, finish systems, adhesives, edge treatment, and hardware ratings.
- Document the plan: Require elevations, dimensions, appliance specifications, and clear installation responsibilities.
- Visit a showroom: Review physical samples and working hardware for color, texture, movement, and function.
Jennifer Gilmer Kitchen & Bath provides custom and semi-custom cabinetry design, layout planning, material and hardware selection, integrated storage solutions, and installation coordination in Washington DC, Maryland, Virginia, and Delaware. Showrooms in Chevy Chase, Easton, and Ashburn allow homeowners to review cabinetry and finishes during planning. The Kitchen Bible offers an additional design reference.
Bring room measurements, appliance specifications, and a short list of daily storage frustrations to Jennifer Gilmer Kitchen & Bath for an informed starting conversation and an in-showroom or by-appointment consultation in the Washington DC, Maryland, or Virginia area.