.avif)

You've saved a folder full of kitchens you love. One has a generous island, another has beautifully integrated appliances, and a third has the exact cabinet color you've been trying to name. The difficult part is no longer finding inspiration. It's deciding what belongs in your home, what your budget can support, and which choice needs to happen first.
A successful kitchen remodeling checklist starts with daily life. How does your household cook, gather, store food, do homework, entertain, and move between rooms? From there, the process should follow a deliberate sequence, from existing conditions and layout planning to material specifications, procurement, construction milestones, and the final walkthrough.
That sequence matters because today's kitchen remodel is a coordinated project rather than a simple shopping list. Cabinets, appliances, countertops, plumbing, electrical work, lighting, flooring, inspections, and installation all depend on one another. A decision made late can affect several trades at once.
Jennifer Gilmer Kitchen & Bath works with homeowners throughout Washington, DC, Maryland, and Virginia, guiding projects from concept through installation. The firm's process brings together space planning, cabinetry, materials, lighting, appliance placement, and installation coordination so the finished kitchen reflects both the character of the home and the way its occupants live.
Table of Contents
1. Establish Your Vision and Lifestyle Priorities
Before anyone sketches an island or orders a cabinet sample, define what the kitchen needs to do. The most useful starting point isn't a style label such as modern, traditional, or transitional. It's a clear description of your household's habits.
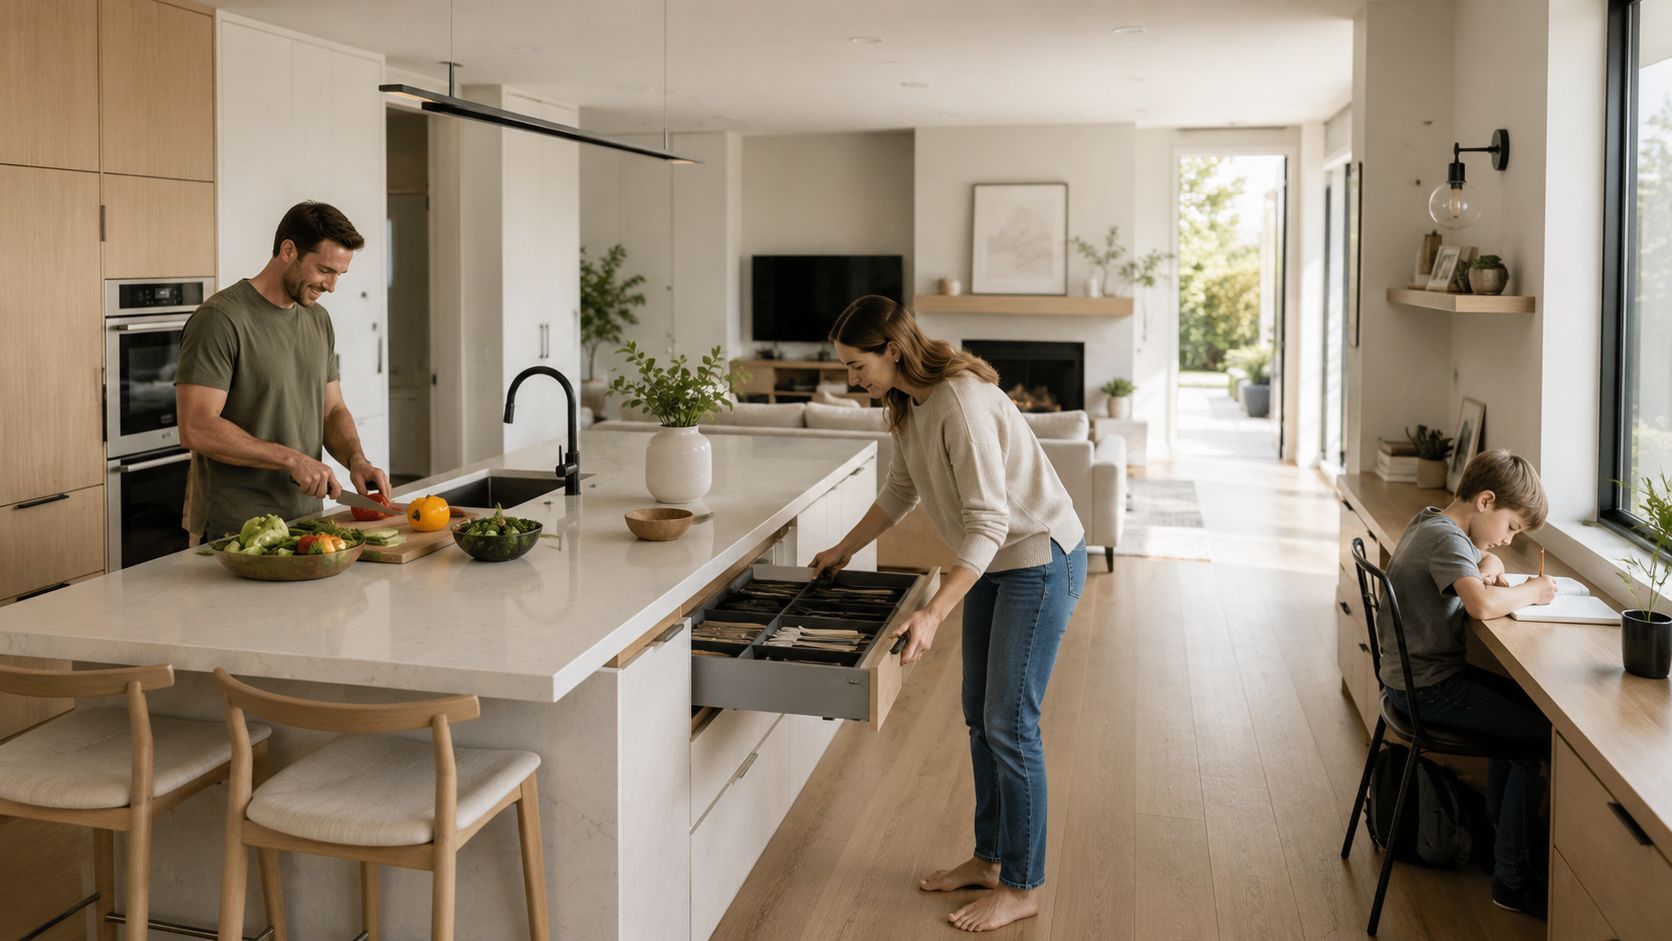
Do you cook most nights, prepare meals in batches, or rely on quick breakfasts? Does one person work at the range while another unloads the dishwasher? Do children study at the island? Does entertaining spill into the dining room, family room, or patio? These answers shape the layout, storage, appliance package, and relationship between the kitchen and adjacent spaces.
Spend a full week observing the existing room. Note when people collide, where groceries collect, which drawers are difficult to reach, and when the counter runs out of usable space. Take photographs of kitchens you admire, but identify the specific features behind your attraction. It might be a tall pantry, a discreet appliance garage, a generous landing area beside the range, or a sightline to the garden.
Turn preferences into design priorities
Household conversations are valuable at this stage. One person may care most about baking, while another wants better recycling storage or a quieter connection to the living area. Include foreseeable needs over the next 10–15 years, particularly if you expect to remain in the home.
Ask practical questions before aesthetic ones:
- Cooking rhythm: Do you prep and cook simultaneously, or do you complete tasks one at a time?
- Gathering style: Do guests sit at the island, circulate through the room, or move outdoors?
- Storage habits: Do you need room for sheet pans, specialty appliances, bulk groceries, or a large collection of cookware?
- Future flexibility: Should the kitchen accommodate changing mobility, growing children, or a different pattern of entertaining?
Practical rule: A beautiful finish can be changed later. An unsuitable layout affects every meal, cleanup, and gathering.
2. Set a Realistic Budget and Financing Strategy
A workable budget gives the design room to succeed. Start with the total project amount, then assign funds to cabinetry, installation, countertops, appliances, flooring, lighting, plumbing, electrical work, labor, permits, and related finishing. Leaving out a category doesn't remove its cost. It only makes the later surprise harder to absorb.
Independent kitchen planning guidance recommends reserving 15%–20% for unexpected costs, while another checklist recommends a 20% buffer and cautions against paying more than 10% upfront in milestone-based contracts. These recommendations reflect the number of cost centers involved in a remodel, particularly when demolition reveals older wiring, uneven floors, hidden plumbing conditions, or structural questions. Review the kitchen remodel financing options with your designer and lender before the project's selections become too detailed to adjust comfortably.
Kitchen spending has also made budget discipline more important. Houzz's 2024 U.S. Kitchen Trends Study reported that median spending on major kitchen remodels rose 22%, from $45,000 in mid-2022 to $55,000 in mid-2023, for projects replacing all cabinets and appliances. The study is summarized in this kitchen remodeling checklist reference.
Decide where the budget earns its place
Prioritize the elements you'll touch and use every day. Better storage, a sound layout, appropriate lighting, and durable cabinetry often matter more than an elaborate decorative detail. Material substitutions, a phased installation, or selected finishing work may help protect the priorities that affect daily use.
Get 2–3 contractor bids before committing, and compare the scope line by line rather than selecting on price alone. Confirm what each proposal includes, how changes are documented, and when payments are due. A lower figure may omit demolition, delivery, trim, permits, or installation details that another contractor has included.
3. Assess Existing Infrastructure and Building Conditions
A design drawing can't reveal everything behind the walls. Before finalizing a layout, establish what the home can support and which systems may need attention. Electrical capacity, plumbing locations, HVAC ducting, structural walls, floor conditions, and ventilation routes can all influence the design.
Older homes deserve particular care. Ask a qualified inspector, structural engineer, or experienced remodeling contractor to investigate conditions that aren't visible during a normal room visit. Potential hazardous materials, including asbestos or lead paint, should be addressed through appropriate professional evaluation rather than assumptions.
Look for existing electrical, plumbing, and HVAC plans in your home records or through local sources. Photograph visible outlets, switches, vents, supply lines, and utility locations before demolition. Those records won't replace field verification, but they give the design and construction teams useful context.
Treat constraints as design information
A sink that appears easy to relocate may sit above complicated plumbing. A wall that looks removable may carry structural loads or conceal ductwork. A range placed on a different wall may require a new ventilation path, additional electrical work, or changes to the ceiling and framing.
The practical response isn't to preserve every existing condition. It's to understand the cost and construction implications before the layout is locked. Jennifer Gilmer Kitchen & Bath can coordinate design decisions with the realities of the home, while the contractor and appropriate specialists verify construction requirements.
Build potential upgrades into the early budget conversation. Electrical service, plumbing, HVAC, flooring, and ventilation may become part of the project even when they weren't part of the original inspiration folder.
A reliable remodel begins with what the house can safely and comfortably support, not with a cabinet elevation alone.
Ask your contractor about common conditions in homes of your age and style in the Washington, DC, Maryland, and Virginia area. Local experience can help identify issues worth investigating before demolition rather than after a cabinet order has been placed.
4. Measure and Document Existing Space with Precision
Accurate measurements form the quiet infrastructure of a successful kitchen design. A professional measured drawing should capture wall lengths, ceiling height, doors, windows, trim, appliance openings, outlets, switches, plumbing, HVAC vents, and structural irregularities. Cabinetry and appliances are ordered from those dimensions, so a small error can become a visible installation problem.
DIY measurements can be useful for an initial conversation, but they shouldn't replace a professional field measure for a detailed remodel. Request digital plans in a format your designer can use, such as PDF or CAD, and keep labeled photographs with the drawings. Wide views explain how the room connects, while close-ups reveal corners, trim conditions, outlets, flooring transitions, and areas of damage.
Build one shared reference file
Walk through the completed measurements with your designer. Look for unusual wall angles, inconsistent ceiling heights, window casing that limits cabinet height, or doors that swing into valuable circulation. This review is where raw measurements become design intelligence.
Keep both digital and printed copies accessible through design and installation. Contractors, cabinet professionals, countertop fabricators, electricians, plumbers, and appliance installers should work from coordinated information rather than separate sketches.
A short video can help homeowners understand why field conditions matter before construction begins:
Photograph before walls close
Document the location of utilities again after demolition and before rough-ins are concealed. These photographs can support future repairs and make it easier to understand the construction history of the room. Label each image with its location and, where useful, a measurement from a fixed reference point.
5. Develop a Functional Floor Plan and Work-Zone Layout
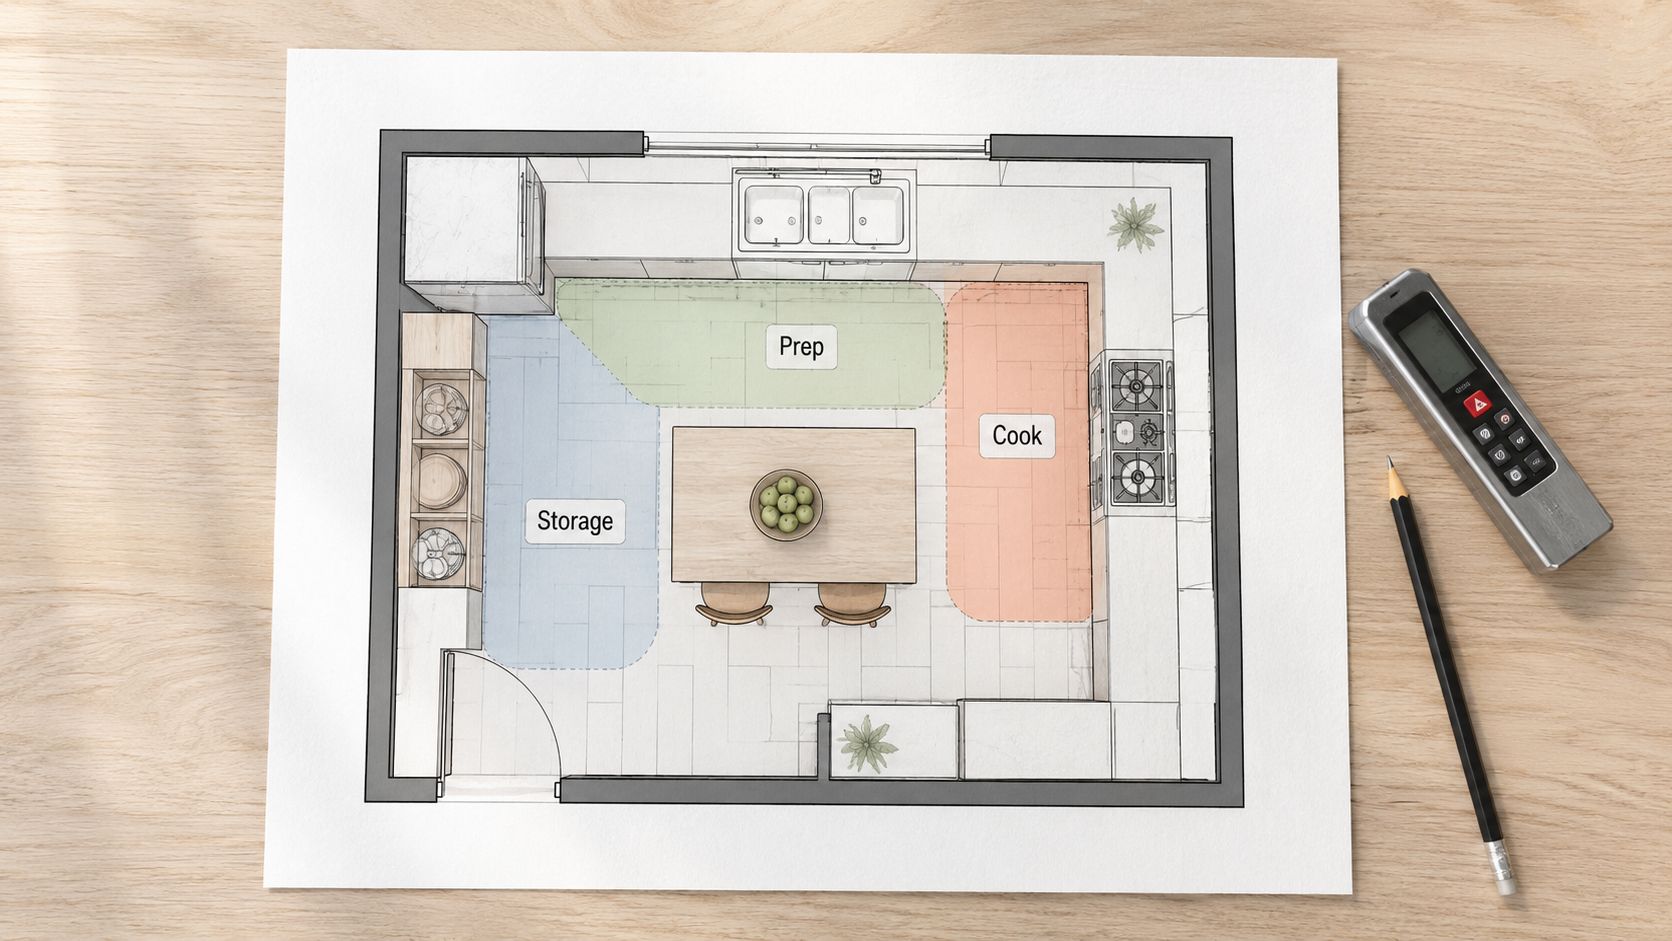
A kitchen layout should make the next task easy. Preparation, cooking, cleanup, storage, and serving each need a logical place, with enough counter surface and clearance to keep people from competing for the same area.
Start by testing several plan options rather than falling in love with the first drawing. An island may provide storage and seating, but it can also narrow circulation or interfere with appliance doors. A sink facing the family room may improve connection and visibility, while a sink positioned near the dishwasher and dish storage may make cleanup more efficient. The right answer depends on the household's priorities.
The National Kitchen & Bath Association guideline cited in the 2026 kitchen ROI report recommends a work aisle of at least 42 inches for one cook and at least 48 inches for multiple cooks. Treat those dimensions as a practical planning reference, then test the room with actual cabinet depths, appliance doors, seating, and traffic patterns.
Test the busiest moment
Walk through an ordinary breakfast and a demanding meal. Open the refrigerator while someone stands at the sink. Pull out a drawer while another person moves past the island. Check whether the range has a safe landing area and whether pantry storage is reachable from the preparation zone.
Include accessibility needs early, even if no one in the household currently requires an accommodation. Clear routes, comfortable reach ranges, and easy-to-operate hardware can support the kitchen's usefulness over time.
- Preparation zone: Place produce, knives, cutting boards, and waste within a comfortable working relationship.
- Cooking zone: Coordinate the range or cooktop with ventilation, heat-resistant landing space, and nearby cookware storage.
- Cleanup zone: Keep the sink, dishwasher, dish storage, and waste collection connected without placing them in the primary traffic path.
- Social zone: Decide whether seating supports conversation without crowding the work aisle.
For additional guidance, review how to plan a kitchen layout with your designer.
6. Select Cabinetry Style, Finish, and Hardware
Cabinetry establishes the visual rhythm of the room and determines how much of the kitchen's storage is usable. Choose among custom, semi-custom, and stock cabinetry according to the fit the room requires, the flexibility you want, the project timeline, and the available budget.
Custom cabinetry can address unusual wall conditions, specific storage needs, and carefully integrated appliances. Semi-custom cabinetry may offer useful dimensional and finish choices with a more defined product system. Stock cabinetry can work well when the room accommodates standard sizes and the priority is a simpler procurement path.
Specify the inside, not only the door
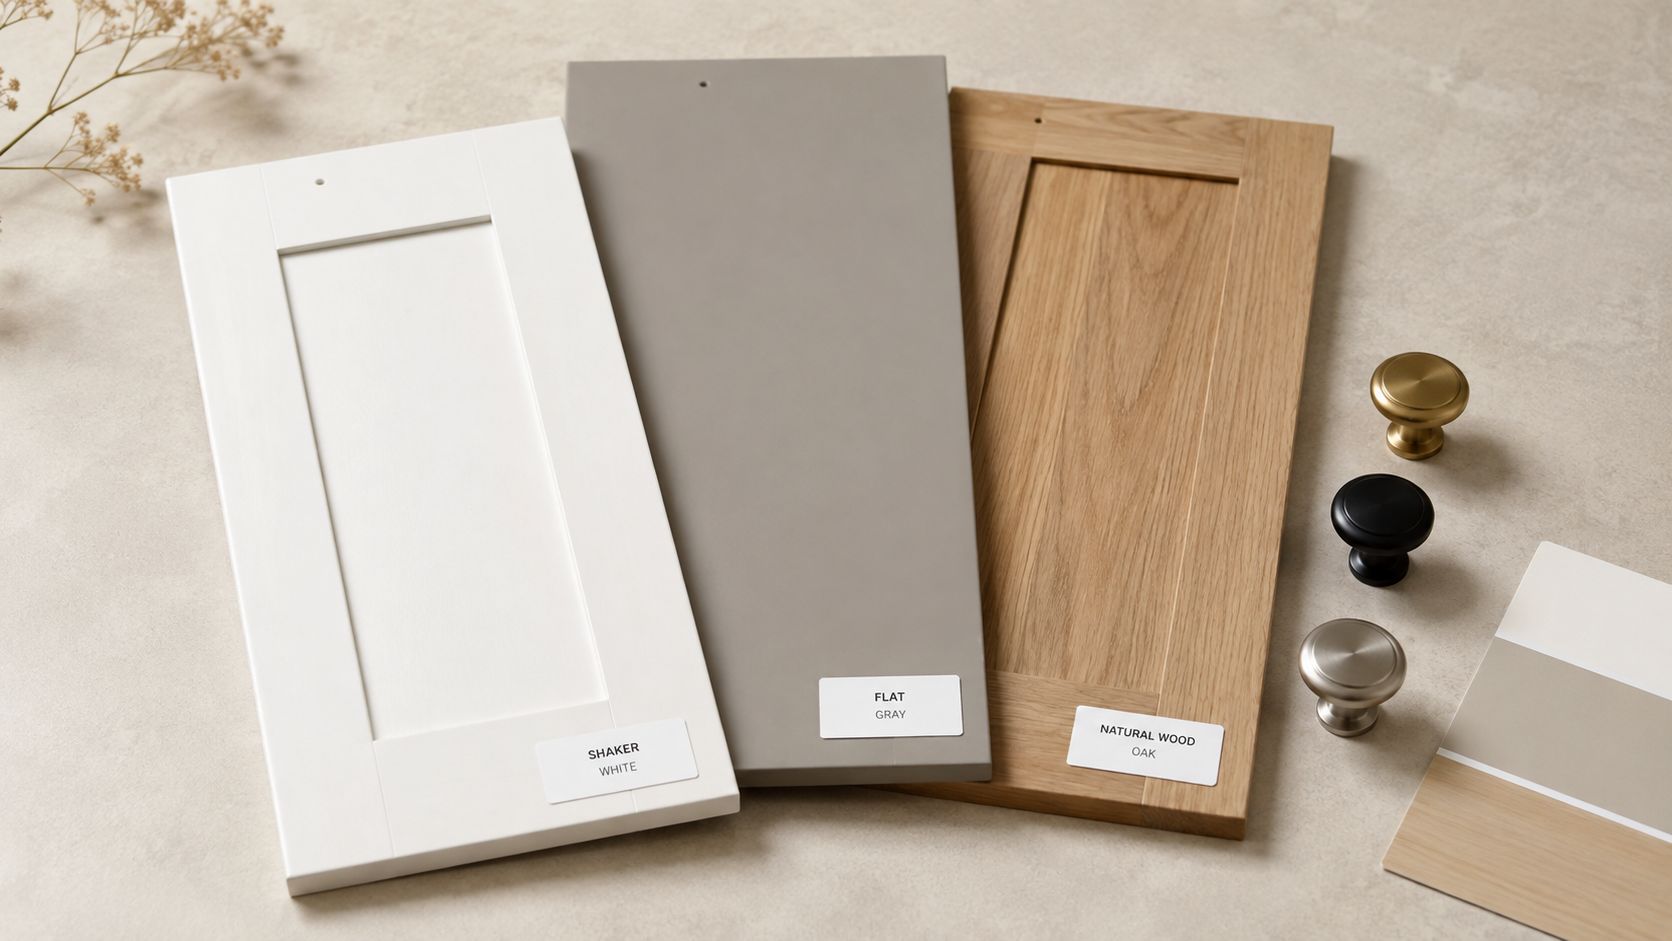
Visit a showroom and handle the doors, drawers, hinges, and storage accessories. A painted finish, stained wood, or natural oak can look very different under the light in your home, so request samples and view them near the floor, countertop, and backsplash selections.
Interior organization should follow the objects you own. Tall pantry storage, deep drawers for cookware, tray dividers, pullouts, and integrated waste storage may deliver more daily value than an ornate exterior detail. Consider maintenance. Some finishes show wear more readily or require particular care, while wood can develop a character that a perfectly uniform surface won't provide.
Hardware deserves early attention. Knob and pull placement affects ergonomics, door clearances, and the overall balance of the elevations. Ask about finish guarantees, warranties, and repair procedures for installation damage before approving the order. This guide to choosing kitchen cabinets can help organize that conversation.
7. Specify Countertops, Backsplash, and Surface Materials
Countertops and backsplashes need to be planned as one coordinated system. Their junctions occur at edges, windows, outlets, cabinet runs, and appliances, where small inconsistencies become highly visible. Review these surfaces alongside the cabinet finish and hardware, not as separate purchases.
Compare granite, quartz, solid surface, laminate, and wood based on heat exposure, staining, scratches, moisture, cleaning routines, and the aging you can accept. Natural stone may develop a patina that adds character. Another material may require less maintenance while showing wear more readily. Match the surface to how your household cooks, cleans, and uses the kitchen.
Request full-size samples when available. View them in natural and artificial light, near the cabinet samples and hardware already under consideration. Small samples can conceal movement, veining, undertones, and the way a backsplash pattern changes against cabinetry. A practical review at this stage can prevent an expensive mismatch after fabrication.
Resolve the details early
Confirm the edge profile, sink compatibility, backsplash height, and transitions around windows and outlets before finalizing the order. The 2025 Houzz study reported full backsplash coverage as the most popular choice at 67%, up 5 percentage points from the prior year, as noted in the National Kitchen & Bath Association's 2025 kitchen trends coverage.
That preference does not suit every kitchen. A full-height backsplash affects material quantities, outlet placement, lighting locations, cabinet details, and the room's visual scale, so make the decision with the elevations in front of you. Restrained tile can provide continuity, while an expressive slab can become the dominant surface and may require simpler choices elsewhere.
Write the specifications into the project schedule, including seam locations, slab direction, edge treatment, outlet cutouts, and sink details. Coordinate countertop templating after cabinetry installation. Install the backsplash after the countertops are set, so field dimensions guide the final cuts and transitions stay clean. Look at the completed surfaces during the final walkthrough for consistent joints, finished edges, and clean connections at appliances and walls.
8. Plan Lighting Design with Task, Ambient, and Accent Layers
A kitchen needs more than a decorative pendant over the island. Effective lighting supports preparation, cooking, cleaning, conversation, and the quieter moments when the room is used as part of the home's living space.
Begin with task lighting over counters, sinks, and cooking surfaces. Ambient lighting provides general illumination, while accent lighting can highlight cabinetry, shelving, architectural details, or a material that deserves attention. Under-cabinet lighting helps reduce shadows on work surfaces and should be planned before cabinet dimensions and electrical locations are finalized.
Coordinate light with material and mood
Use dimmers for ambient and accent layers so the room can shift from morning preparation to evening entertaining. LED fixtures can provide efficient illumination, but the color quality matters. Warm white light tends to support a comfortable residential atmosphere, while cooler light can feel more contemporary. Check how the chosen color temperature affects cabinet finishes, stone, tile, and metal hardware.
Showrooms and three-dimensional renderings can clarify what drawings sometimes leave abstract. Look at the relationship between fixture scale, ceiling height, island size, and sightlines into neighboring rooms. A pendant that looks balanced in isolation may feel too dominant once cabinetry and furniture are installed.
Design decision: Plan where the light falls before deciding what the fixture looks like.
Include switching zones in the electrical plan. Separate controls for task, ambient, and accent sources make the kitchen more adaptable and reduce the temptation to use every light at full brightness. Under-cabinet lighting is particularly difficult to retrofit cleanly, so resolve its wiring during design rather than after the backsplash has been installed.
9. Select and Specify Appliances Aligned with Your Cooking Habits
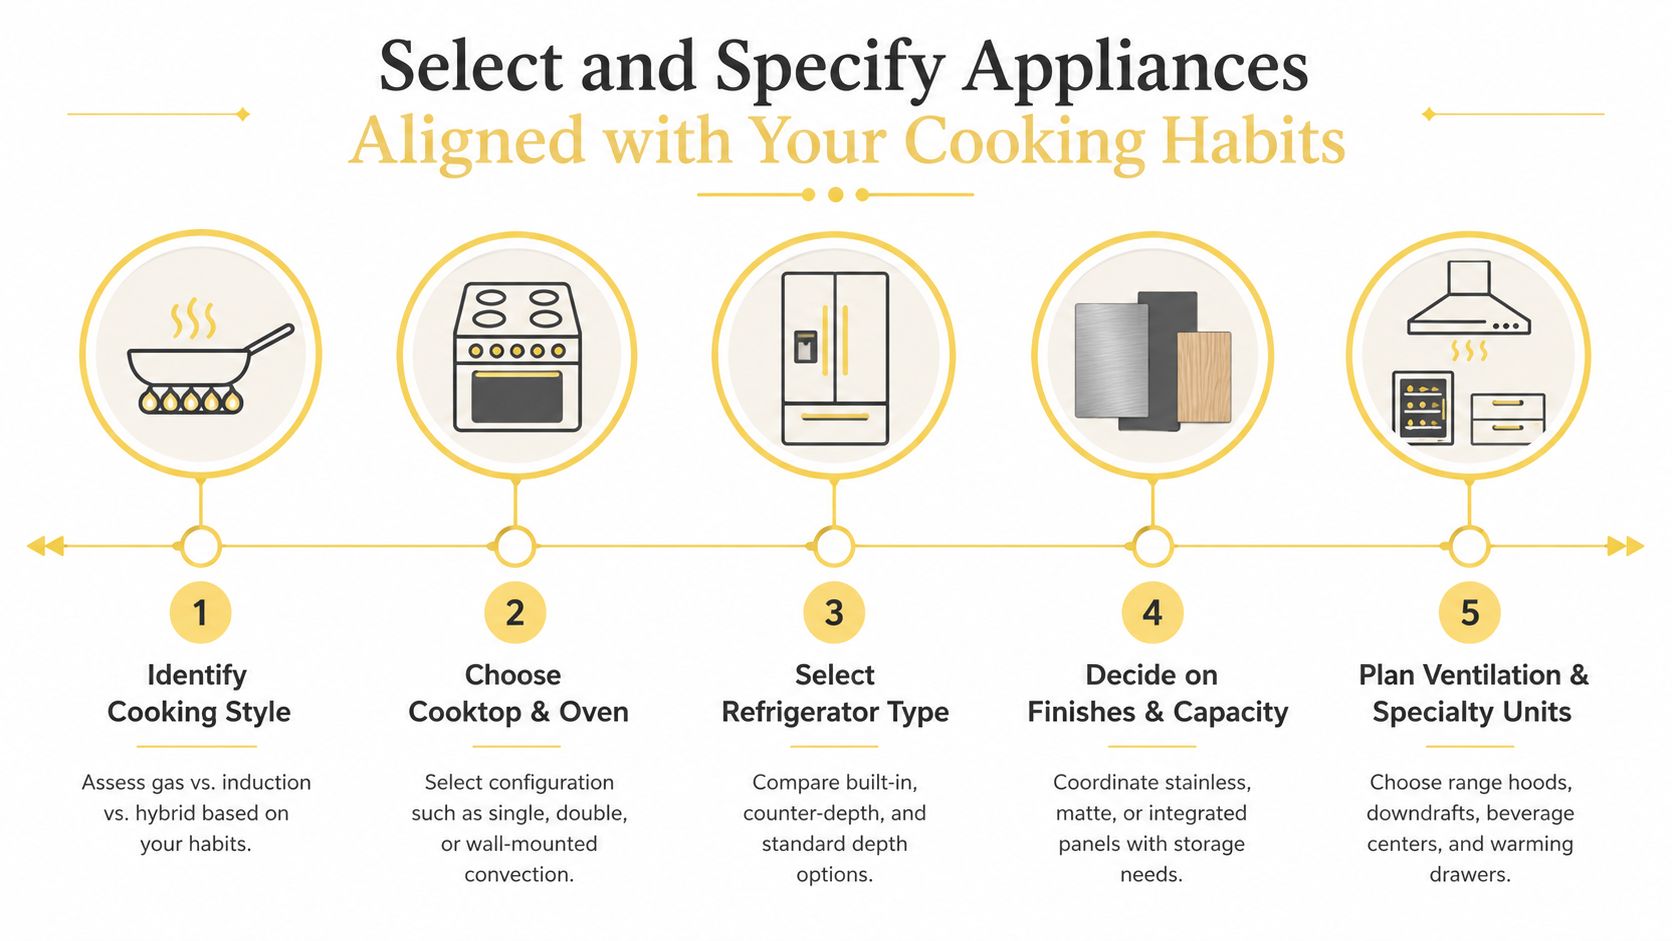
Appliances should support the way you cook and fit the layout's work zones. Choose gas, induction, or a hybrid surface according to your cooking habits, cookware, ventilation plan, and available utilities. Select a single oven, double oven, or wall-oven configuration based on how often you bake, roast, entertain, or prepare several dishes at once.
Refrigerator format affects circulation and storage. Built-in, counter-depth, and standard models vary in depth, door swing, panel requirements, and capacity. Specialty appliances, such as a beverage center or warming drawer, earn their space only when they solve a recurring household need. Otherwise, that cabinet space may serve you better as general storage.
Confirm every specification
Test appliances in a showroom or a friend's kitchen when possible. Open doors fully, inspect controls, check rack positions, and assess whether refrigerator shelves suit the food you regularly buy. Integrated or panel-ready models can create a quieter cabinetry wall, while stainless steel or matte finishes make the appliance a more visible design element.
Request energy guides and compare expected operating costs between premium and standard models. Allocate more of the budget to appliances that support frequent activities, rather than spending evenly across every product.
Ventilation must be coordinated before the layout is finalized. Confirm hood dimensions, duct routing, make-up air requirements, clearances, and power loads with the designer and contractor. The National Kitchen & Bath Association's 2025 report highlights concealed functional elements, multifunctional spaces, lighting, smart technology, healthier living, and indoor-outdoor connection as design priorities. Each goal depends on technical decisions being resolved early.
Appliance planning also benefits from professional coordination. The same report notes that 86% of homeowners hire professionals for kitchen projects. Use exact model numbers, not product names alone, and confirm appliance specifications before cabinetry enters production. This keeps opening sizes, panel details, electrical connections, ventilation, and installation milestones aligned through the final walkthrough.
10. Finalize Selections, Procurement, and Coordinate Installation
The final phase turns a collection of good ideas into an accountable construction plan. Create a master specification that records cabinet style, finish, hardware, interior accessories, countertop material, edge profile, backsplash, appliances, lighting, switches, flooring, paint, and specialty items. Attach physical samples wherever possible, and verify every model number, product code, and finish name with the vendor.
Procurement should follow the project's critical path. Cabinets are commonly ordered early because lead times are often 6–10 weeks, according to kitchen remodel checklist planning guidance. That timing affects appliance coordination, countertop templating, inspections, and the overall installation sequence.
Keep the project moving
Assign one point person to manage vendor communication and change decisions. Review and approve the specification before orders are placed, then record delivery dates and storage locations. Ask for an installation schedule that identifies demolition, rough-ins, inspections, flooring, cabinetry, countertop templating and installation, backsplash, appliances, hardware, and final corrections.
Before installation begins, attend a walkthrough to verify material quality and quantities. During construction, respond promptly to questions and document approved changes in writing. Delayed decisions can hold up several trades, particularly when one cabinet dimension or appliance specification affects the work that follows.
Prepare the household as carefully as the job site. Protect adjacent rooms, establish a temporary kitchen, plan for dust and noise, and decide how meals will work during construction. A post renovation cleaning guide can help organize the final transition from construction dust to daily use.
At the final walkthrough, open every door and drawer, test appliances, lighting, outlets, faucets, and ventilation, and inspect finish transitions. Record a punch list, then request written warranty information, maintenance instructions, and an orientation to the completed systems.
10-Point Kitchen Remodeling Checklist Comparison
| Step | Implementation complexity (🔄) | Resource requirements (⚡) | Expected outcomes (📊) | Ideal use cases (💡) | Key advantages (⭐) |
|---|---|---|---|---|---|
| Establish Your Vision and Lifestyle Priorities | Moderate 🔄, multiple meetings, introspection | Low–moderate: time, questionnaire, designer consults | 📊 Clear priorities that guide layout and selections | 💡 Early-stage projects; homeowners wanting tailored function | ⭐ Aligns design with daily life; reduces costly mismatches |
| Set a Realistic Budget and Financing Strategy | High 🔄, detailed breakdown & financing decisions | Moderate: quotes, lender discussions, contingency funds | 📊 Predictable costs, prioritized scope, contingency plan | 💡 Projects with fixed funds or complex financing needs | ⭐ Prevents scope creep; enables strategic trade-offs |
| Assess Existing Infrastructure and Building Conditions | High 🔄, technical inspections and structural review | High: inspectors, engineers, hazardous-material tests | 📊 Identifies constraints, cost implications, realistic timelines | 💡 Older homes or projects requiring structural/system changes | ⭐ Reduces demolition surprises; informs feasible designs |
| Measure and Document Existing Space with Precision | Low–Moderate 🔄, precise measurement work | Moderate: professional laser measurement, photos, CAD/PDF | 📊 Accurate plans for ordering cabinetry and appliances | 💡 All remodels before ordering or fabrication | ⭐ Minimizes fit issues and costly on-site adjustments |
| Develop a Functional Floor Plan and Work-Zone Layout | Moderate–High 🔄, iterative spatial design | Moderate: designer time, multiple layouts, possible structural input | 📊 Efficient workflow, improved traffic and zone organization | 💡 Kitchens with multi-user households or workflow issues | ⭐ Enhances functionality, safety, and home value |
| Select Cabinetry Style, Finish, and Hardware | Moderate 🔄, many aesthetic and functional choices | Moderate–high: showroom visits, samples, budget for custom vs stock | 📊 Cohesive aesthetic and optimized interior organization | 💡 Homeowners prioritizing appearance and storage solutions | ⭐ Sets kitchen character; improves long-term usability |
| Specify Countertops, Backsplash, and Surface Materials | Moderate 🔄, material trade-offs and coordination | Moderate: full-size samples, fabricator quotes, maintenance planning | 📊 Durable, coordinated surfaces with known maintenance needs | 💡 Projects focused on durability and visible finishes | ⭐ Major aesthetic impact; contributes to longevity/value |
| Plan Lighting Design: Task, Ambient, and Accent Layers | Moderate 🔄, electrical coordination and layering | Moderate: fixtures, dimmers, electrical work, design input | 📊 Balanced lighting that improves function and atmosphere | 💡 Kitchens used for cooking, entertaining, and multitasking | ⭐ Improves safety, energy efficiency, and ambiance control |
| Select and Specify Appliances Aligned with Your Cooking Habits | Moderate 🔄, technical specs and lead-time management | Moderate–high: showroom testing, research, budget for premium models | 📊 Appliances matched to habits, capacity, and aesthetics | 💡 Serious cooks, entertainers, or those with specific preferences | ⭐ Enhances performance, efficiency, and user satisfaction |
| Finalize Selections, Procurement, and Coordinate Installation | High 🔄, intensive coordination and sequencing | High: master spec, vendor coordination, project manager, storage | 📊 Smooth installation, fewer delays, documented warranties | 💡 Full remodels with multiple trades and long lead times | ⭐ Ensures execution fidelity, quality control, and accountability |
Bring Every Decision to a Confident Finish
The best kitchen remodels follow a clear sequence. First, define the life the kitchen must support. Then confirm the home's conditions, test the layout, select cabinetry and materials, coordinate appliances and lighting, and document every detail before installation begins.
That order protects both the design and the budget. It prevents a countertop decision from ignoring cabinet dimensions, an appliance purchase from dictating an unsuitable layout, or a beautiful island from compromising circulation. It also gives the construction team a shared reference for what should be delivered, installed, inspected, and completed.
Scope deserves particular attention. Current trend coverage suggests that many homeowners are choosing gradual updates rather than complete overhauls. Nearly 40% of projects are cabinet refreshes, while 25% are full gut renovations, according to 2025 kitchen remodeling trend coverage. That distinction matters when temporary kitchen access, budget pressure, or schedule risk makes a phased approach more practical.
A staged remodel can begin with the changes that improve function most directly. Cabinet refreshes, countertop updates, lighting improvements, and appliance replacement may deliver a meaningful lift without requiring every wall and utility to move at once. A full gut remodel may be the right answer when the layout, systems, and structure all prevent the kitchen from working, but it deserves a more detailed plan and greater tolerance for construction complexity.
Resale goals can also influence the scope. The 2025 Zonda Cost vs. Value data cited by Rate.com's kitchen remodel ROI resource reports an average minor kitchen remodel cost of $28,458, an estimated resale value of $32,141, and 112.9% cost recouped. Those figures aren't a promise for an individual home, but they illustrate why a targeted refresh can be a sensible option when resale impact matters.
National resale data also show that return varies sharply by scope. A minor kitchen remodel around the $28,000 range can recoup roughly 96% nationally, while a major midrange remodel may recoup about 38% and a major upscale remodel about 35%, as summarized by national kitchen renovation ROI data. Use that information as one budgeting consideration, not as a substitute for designing a kitchen you can live with.
Daily satisfaction remains central. In the NAR/NARI 2019 Remodeling Impact Report, a complete kitchen renovation received a perfect Joy Score of 10. The report also found that 93% of respondents had a greater desire to be at home after the project and 95% reported an increased sense of enjoyment when at home, as documented by the NARI remodeling impact report. The practical lesson is straightforward. Prioritize the layout flow, storage access, task lighting, and work surfaces that improve ordinary days, not only the details that photograph well.
Carry this checklist into every designer and contractor conversation. Mark decisions as approved, confirm dependencies, record changes, and keep samples and specifications together. Continue using it through delivery, installation, the punch list, warranty review, and maintenance orientation. A well-designed kitchen doesn't end when the cabinets are installed. It ends when the household understands how the room works and every agreed detail has been accounted for.
For homeowners in Washington, DC, Maryland, and Virginia, Jennifer Gilmer Kitchen & Bath offers consultation spaces in Chevy Chase, Easton, and Ashburn, where you can review cabinetry, materials, finishes, and design possibilities with a team that supports projects from concept through installation. The firm also serves Delaware and works with homeowners who need a full-service path through layout planning, selections, procurement, and construction coordination.
Jennifer Gilmer Kitchen & Bath can help turn your kitchen remodeling checklist into a coordinated plan, from the first layout conversation through material selections, procurement, installation, and final walkthrough. Visit Jennifer Gilmer Kitchen & Bath to explore the firm's showrooms and schedule a consultation in Chevy Chase, Easton, or Ashburn.