.avif)

The most popular advice about an affordable bathroom remodel is also the least useful: replace a few inexpensive items and expect the room to feel entirely new. A bathroom doesn't become considered because every material is cheap. It feels finished when the existing layout is respected, the visible elements relate to one another, and the work that protects daily comfort is handled properly.
The better approach is sequential. Preserve what's sound. Spend where function and craftsmanship matter. Coordinate the finishes so modest updates look deliberate rather than temporary. Paint, hardware, and accessories may be reasonable DIY projects. Lighting, faucets, flooring, storage, and cabinetry benefit from more careful selection. Electrical work, plumbing, waterproofing, and installation coordination deserve professional attention.
That distinction is central to the way Jennifer Gilmer Kitchen & Bath approaches bathroom remodeling in Washington DC, Maryland, Virginia, and Delaware. The firm helps homeowners develop a plan, make selections in its showrooms, and coordinate a project from concept through installation. A useful outside perspective on keeping scope focused appears in this Western Bathroom Renovations 2026 guide, but the most successful budget decisions always begin with the individual room.
These ten affordable bathroom remodel ideas can help you decide where to begin.
Table of Contents
1. Reface Existing Cabinetry
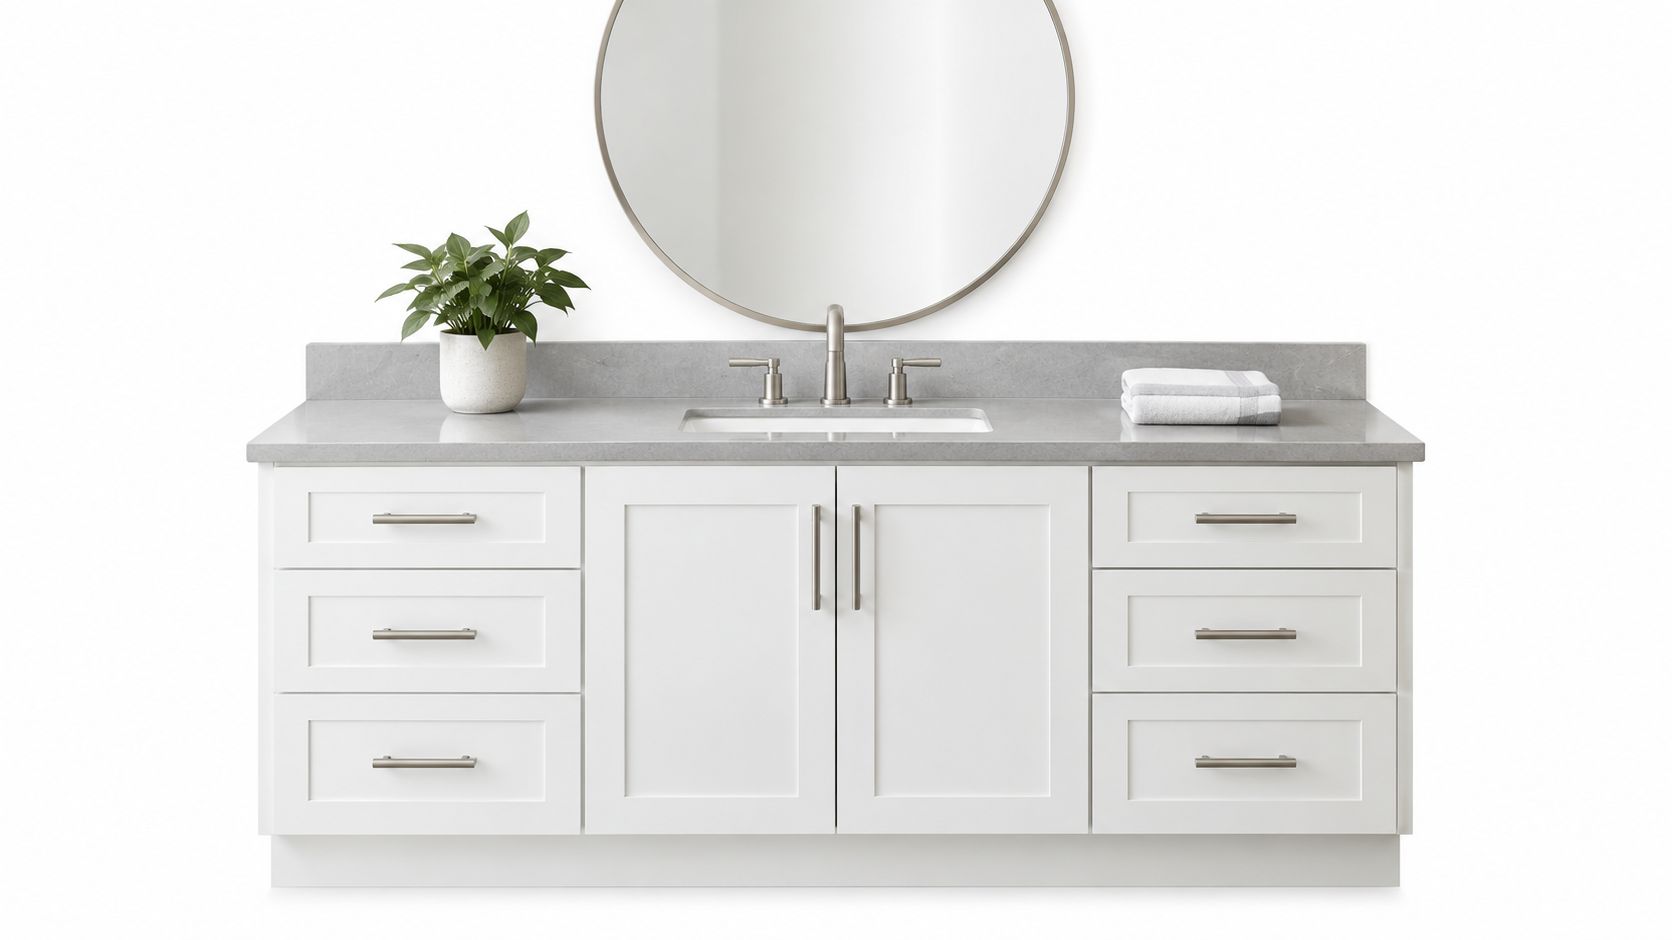
A well-built vanity rarely needs to be discarded just because its doors look dated. Refacing keeps the cabinet box, footprint, and existing layout in place while changing the doors, drawer fronts, finish, and hardware. That means less disruption and more budget available for the elements you touch every day, such as the countertop, faucet, or lighting.
A solid 1990s vanity can take on a completely different character with contemporary door profiles, a refined paint color, and brushed nickel pulls. The same principle works in a kitchen, where honey oak cabinetry may be updated with white Shaker doors while the original work triangle remains intact. The room feels more current because the visual language has changed, not because every component has been removed.
Spend strategically: If the cabinet structure is square, dry, and functional, replace the parts you see and use rather than paying to rebuild what already works.
Jennifer Gilmer Kitchen & Bath can help coordinate door styles, finishes, and hardware so the vanity relates to the mirror, countertop, flooring, and adjacent rooms. Soft-close hinges and drawer mechanisms are worthwhile details because they improve the daily experience without changing the room's footprint.
Pair refaced cabinetry with fresh paint or a restrained backsplash. A designer can also help determine whether the chosen door style belongs with the home's architecture. Refacing isn't the right answer for water-damaged boxes, awkward storage, or a vanity that blocks circulation, but it's often the most intelligent choice for a sound cabinet in an otherwise serviceable bathroom.
2. Use Paint and Finish Changes Strategically
Paint is inexpensive only when the preparation is good. A fresh, moisture-resistant coating on the walls, trim, and ceiling can shift the atmosphere of a bathroom, but peeling paint, uneven patches, and yellowed caulk will undermine the result. Clean the surfaces, repair small imperfections, and use a bathroom-appropriate product that can tolerate humidity.
A dated 2000s bathroom might respond to soft greige walls, matte black hardware, and a mirror trimmed in brushed chrome. A small powder room can take a deeper direction, with navy walls, crisp white trim, and aged brass fixtures that feel purposeful rather than old-fashioned. The key is coordination. A collection of unrelated finishes looks like a series of replacements, while a limited palette reads as design.
Choose the quiet details carefully
Changing caulk is a small task with an outsized effect. White or clear silicone generally looks cleaner than discolored original caulk, provided the joint is properly prepared and the product is suitable for wet areas. New hardware, a mirror, or a light fixture can complete the change without touching the plumbing or floor plan.
Use an accent wall when the room needs depth, but don't force pattern into every surface. In a compact bath, one considered color often has more presence than several competing treatments.
This is a practical DIY-friendly update, though homeowners should be realistic about the condition of the walls. If moisture damage, recurring mildew, or failed tile joints point to a ventilation or waterproofing problem, paint alone is only a temporary cover. The finish should respond to the room's condition, not conceal it.
3. Make Lighting a Primary Design Investment
A single overhead fixture can make even a carefully chosen bathroom feel flat. Good lighting combines ambient illumination for the room, task lighting at the vanity, and accent light where it adds depth. You don't need to replace every fixture at once, but you do need to decide what the room should help you do.
In a small guest bath, replacing one central ceiling fixture with recessed or semi-flush lighting and adding sconces at the mirror can make the vanity feel more composed. In a primary bath, warm-toned LED sconces and dimmer switches can replace the harsh effect of vintage fluorescent lighting while giving the room flexibility from morning preparation to evening use.
For detailed guidance on positioning and layering, Jennifer Gilmer Kitchen & Bath's bathroom lighting design advice is a useful companion to the selection process.
Layer light instead of simply adding more
Sconces are most effective when they illuminate the face from both sides rather than casting a strong shadow from above. A common design placement is approximately 60 to 66 inches from the floor, while 2700K LED light creates a warmer, more residential quality than a cold blue-white bulb. These are starting points, not rules. Mirror height, ceiling height, and the user's needs still govern the final placement.
- Ambient light: Use recessed or semi-flush fixtures where wall space is limited.
- Task light: Place sconces at the vanity so grooming doesn't rely on a ceiling fixture.
- Accent light: Consider under-cabinet illumination to highlight a backsplash or floating vanity.
- Control: Add dimmers so the same room can feel practical and relaxed.
Electrical changes should be coordinated with a qualified professional. A lighting plan made before paint, mirrors, and tile are installed prevents expensive patching later.
4. Select a Countertop Material That Earns Its Place
The countertop is a small bathroom's visual anchor, but it doesn't need to be marble to feel substantial. Engineered quartz, laminate, solid surface, and cultured marble can all be appropriate, depending on the room, the vanity, and the level of maintenance a household expects.
Engineered quartz offers a consistent stone-like appearance and is practical for homeowners who want resistance to everyday staining and scratching. A soft gray slab can suggest honed natural stone without making the entire room depend on a luxury material. Quality laminate has also improved considerably. A warm white surface with subtle texture can coordinate beautifully with refaced cabinetry in a guest bath.
Compare the material with the room, not only the sample
View samples under the bathroom's actual lighting. A countertop that looks warm in a showroom may appear cool beneath LED fixtures, and the backsplash can either reinforce or fight the surface. The best countertop choices for bathrooms should be evaluated alongside the sink, faucet, mirror, and cabinet finish.
A cultured marble top can suit a traditional vanity and provide a durable, familiar appearance. Laminate can be sensible where budget and easy maintenance matter most, but its edges and seams require careful detailing. Porous materials need appropriate sealing, and any countertop should be fabricated and installed so water doesn't collect at the wall or sink.
Ask about edge profiles and thickness options. A restrained edge and well-proportioned thickness can make an accessible material feel intentional. The wrong place to economize is fabrication. A less expensive surface installed accurately will serve the room better than a premium slab with poor support or careless seams.
5. Try DIY-Friendly Backsplash and Wall Treatments
A backsplash gives homeowners a manageable place to introduce color, pattern, or texture without committing to a complete renovation. In a powder room, peel-and-stick geometric tile can create a graphic moment behind the vanity. In a guest bath, white subway tile with dark grout can provide definition while remaining familiar. Removable botanical wallpaper can add personality where permanent tile isn't necessary.
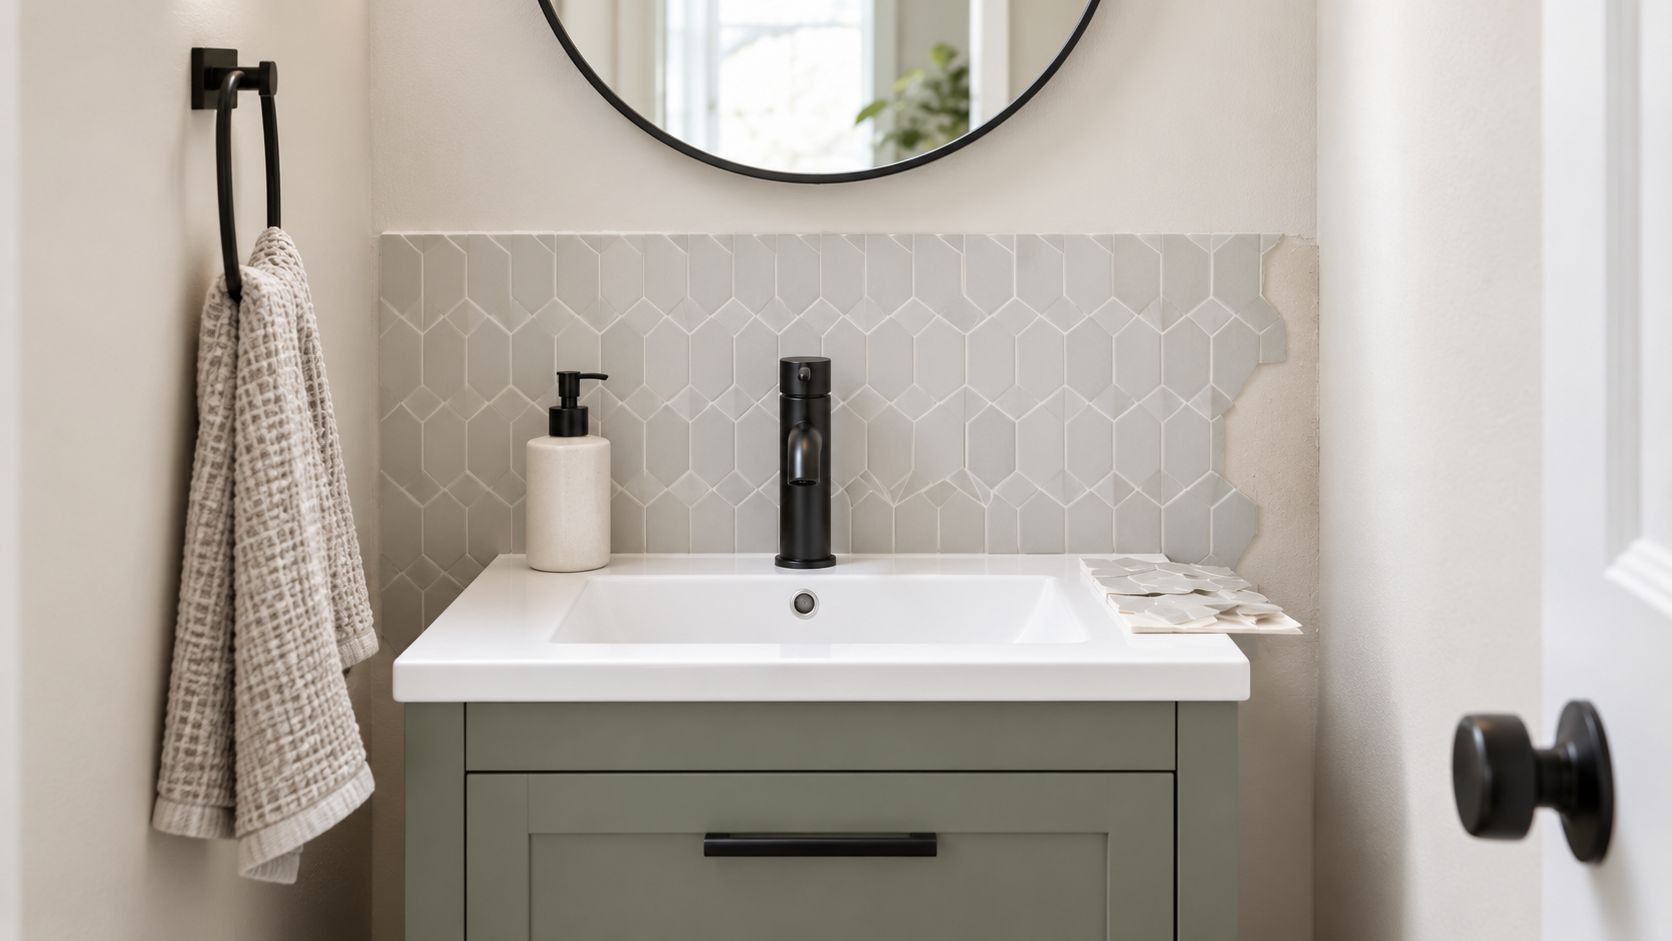
DIY installation works best when the wall is smooth, clean, and dry. Peel-and-stick products won't correct an uneven surface, and adhesive can fail in a humid room if ventilation is poor. Test a small area before covering the entire wall, especially when the pattern has a directional repeat.
Let the pattern serve the architecture
Grout color changes the character of tile. A pale grout can soften a small pattern, while contrasting grout emphasizes every joint. Test both before committing. Timeless formats, such as simple subway or moderately scaled ceramic tile, usually remain more adaptable than a highly specific trend.
A backsplash should make the vanity feel connected to the room, not compete with every other finish.
If you prefer professional installation, request clear estimates because labor can vary by substrate, pattern, and preparation. Keep the work away from wet areas unless the chosen material and installation method are suitable for that exposure. The following video offers visual inspiration for approachable wall treatments.
Adequate ventilation matters during and after adhesive or paint application. In any bathroom, the most attractive wall treatment is one that remains secure and easy to maintain.
6. Replace the Mirror and Lighting Fixture Together
A dated mirror often occupies the largest uninterrupted visual area in a bathroom, which makes it one of the first things people notice. Replacing it can change the vanity without replacing the cabinet, countertop, or sink. The effect becomes stronger when the light fixture is selected at the same time.
A framed mirror in brushed walnut paired with simple sconces can give a guest bathroom a more grounded, residential feel. In a primary bath, a larger frameless mirror with contemporary fixtures can make the grooming area feel more generous while keeping the overall renovation modest.
Balance scale, proportion, and finish
For a standard vanity, a mirror around 30 to 40 inches wide may be a useful starting point, though the wall, faucet position, and adjacent clearances should determine the final size. Sconces are often mounted approximately 60 to 66 inches from the floor for flattering task light. A backlit mirror can combine illumination and reflection, but it still needs to suit the room's electrical plan.
A finish mismatch can make otherwise good selections feel accidental. Brushed nickel, oil-rubbed bronze, and chrome may each work individually, but mixing them without a clear hierarchy can create visual noise. Coordinate the mirror frame and light fixture with the faucet, cabinet hardware, and countertop undertones.
Choose fixtures that feel substantial in the hand. A very thin frame or flimsy light fixture can make the entire vanity appear less considered. This is a place where a modest number of well-proportioned pieces will usually outperform a larger collection of inexpensive replacements.
7. Update Hardware and Accessories Selectively
Hardware is the jewelry of a bathroom, but a room doesn't need a complete new collection to look more finished. Start with the pieces people see and touch most often, such as vanity pulls, cabinet knobs, faucet handles, and towel bars. Replacing original brass hardware with coordinated brushed nickel can unify an older bathroom without changing its cabinetry.
A vanity with plain ceramic knobs may gain a more current character from simple metal pulls that relate to new mirror sconces. In another room, repeating one finish across the towel bar, faucet, and cabinet hardware can make existing tile feel deliberately retained.
Practical rule: Measure the existing hole spacing before ordering replacement pulls. Matching the dimensions keeps the project simple and avoids drilling new holes in the cabinet fronts.
Keep the scale quiet
Oversized hardware can overwhelm a small vanity. Proportional pulls tend to look more refined, especially when the countertop, mirror, and backsplash already provide visual interest. The finish should complement the tile and countertop rather than attempting to match every element exactly.
Don't overlook the accessories. Soap dispensers, toothbrush holders, wastebaskets, and towel hooks occupy the foreground of daily life. Coordinated choices reinforce the room's direction, while a collection of unrelated plastic pieces can undo an otherwise careful update.
Quality still matters at this scale. Hardware that wears quickly, loosens, or feels light in the hand won't deliver lasting value. If the budget is tight, update the most visible pieces first and leave secondary accessories for a later phase.
8. Choose Durable Flooring for the Conditions
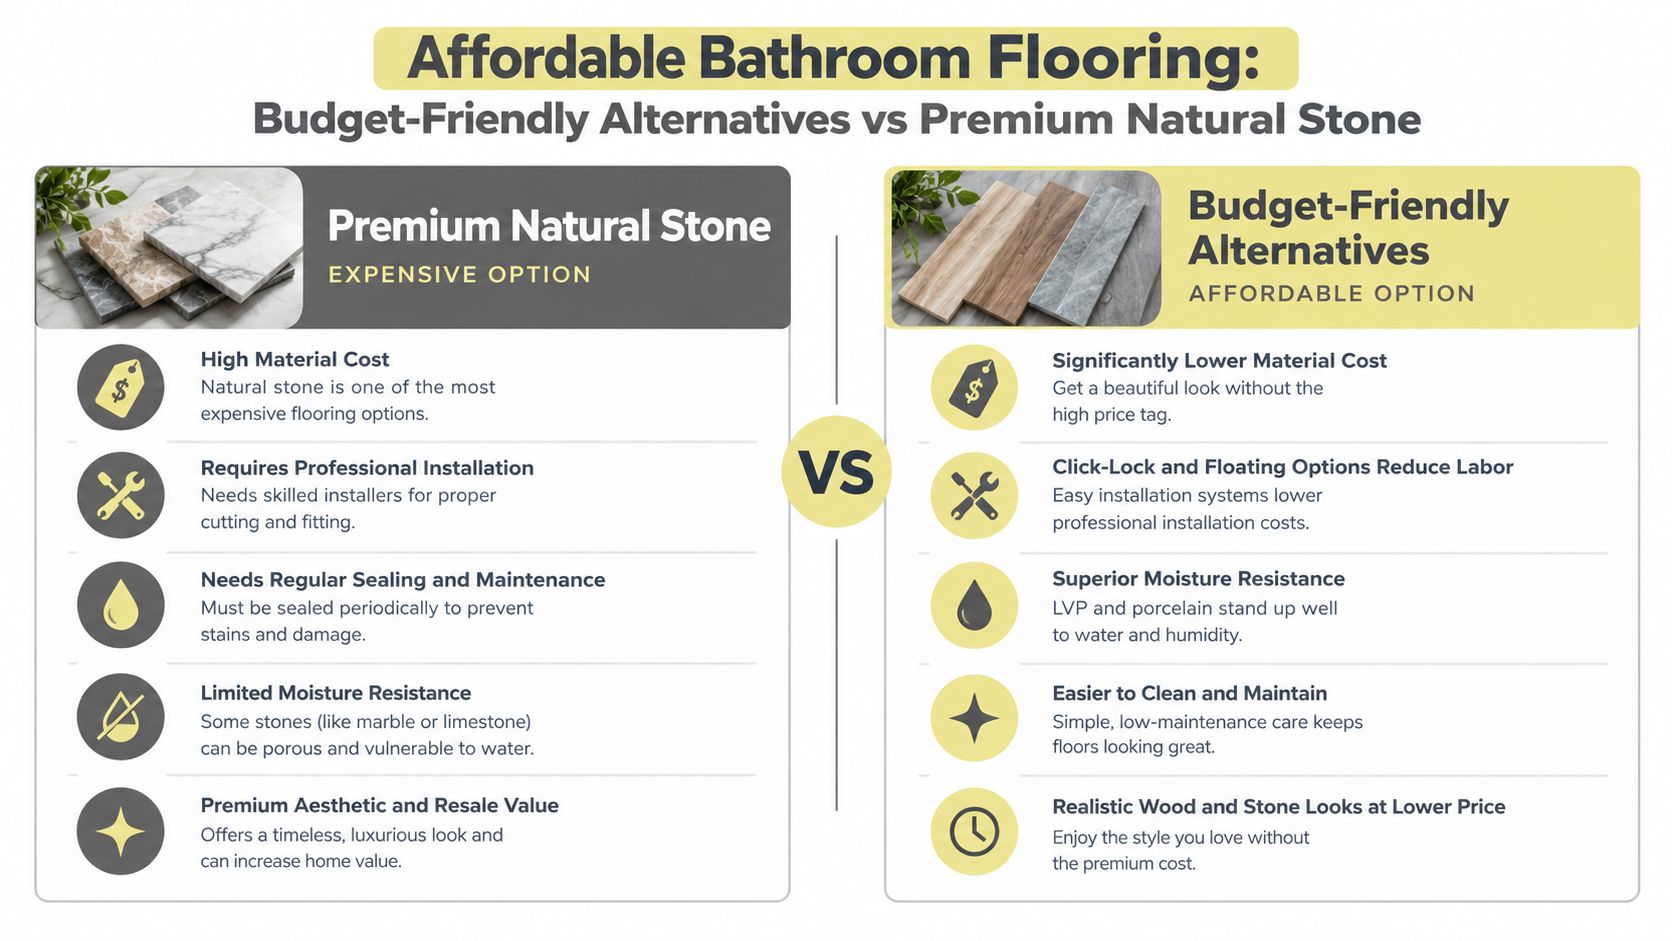
Bathroom flooring has to tolerate water, temperature changes, cleaning, and constant foot traffic. Luxury vinyl plank, porcelain tile, and quality ceramic tile can offer convincing wood, stone, or terrazzo appearances without the maintenance demands of some natural materials.
Luxury vinyl plank can bring warmth to a primary bath where dated sheet flooring makes the room feel cold. A large-format porcelain tile in soft gray can give a guest bathroom a quieter, stone-inspired appearance while reducing the number of grout lines that require cleaning. The right choice depends on the substrate, the room's moisture exposure, and the installation method.
Don't economize on preparation
Porcelain generally offers greater durability than ceramic, which can justify its additional material cost in a heavily used room. Large-format tiles, including 12 by 24 inches or larger, can look contemporary and reduce grout maintenance, but they demand a suitably level substrate and careful layout.
- Moisture control: Use a solid, moisture-resistant underlayment appropriate to the flooring system.
- Slip resistance: Choose a surface that supports safe footing, especially for older adults and multigenerational households.
- Comfort: Radiant heating can be considered in colder climates when the floor is already being replaced.
- Installation: Poorly prepared flooring can lead to movement, cracked grout, or moisture damage.
A flooring update is not the right place for a purely cosmetic shortcut. If the existing floor is sound and the room's main issue is appearance, a focused refresh may be enough. If tiles are loose, the subfloor is damaged, or water has reached the structure, professional assessment should come before a new finish.
9. Improve Space Planning and Storage
Storage can make a bathroom feel more luxurious than a costly decorative finish. Before buying baskets or shelves, identify what creates friction. Are daily products buried beneath the sink? Does the vanity counter collect every item because there's no accessible drawer? Does the door swing into the one clear place where a towel could hang?
A floating shelf above the toilet can provide storage and display space in a small powder room without changing the walls. In a primary bath, under-sink pull-out organizers can make toiletries easier to reach and keep the counter clear. A recessed medicine cabinet can preserve wall space while adding storage where a standard mirror would otherwise go.
Jennifer Gilmer Kitchen & Bath's guidance on bathroom storage solutions reflects an important principle: storage should be planned around the way people use the room, not added as an afterthought.
Start with circulation
The National Kitchen & Bath Association recommends at least 30 inches of clear floor space in front of fixtures and a 30-inch by 48-inch clear floor area centered at each fixture in its bathroom planning guidelines. These dimensions make a useful design reference because better circulation may improve the room more than a costly decorative feature.
Use drawer dividers for frequently used items and reserve higher or less accessible storage for occasional products. Floating shelves work best in pairs or grouped arrangements, while over-the-door organizers may be more suitable for a guest bath than a primary suite. Keep displayed items intentional. Attractive containers and a few useful accessories will read as composition, not clutter.
10. Update Fixtures and Choose the Faucet Carefully
Faucets are among the most frequently used elements in a bathroom, so their quality affects both appearance and experience. A contemporary single-handle faucet can simplify operation and give a dated vanity a cleaner profile. A matte-black model can modernize a primary bath, while a coordinated faucet and towel bar can make a guest bath feel complete without replacing the vanity.
Older fixtures may also lack the ergonomic details and water-saving features available in newer models. Look for reliable construction, smooth handle movement, and finishes that suit the hardware already in place. Matte finishes and oil-rubbed bronze tend to disguise fingerprints more effectively than polished chrome, though the best finish is the one that belongs with the room's larger palette.
Check compatibility before purchasing
A new faucet must work with the existing sink configuration. Confirm the number and spacing of holes, the faucet height, the basin shape, and the clearance to the mirror or backsplash. A vessel sink may require a taller faucet, while a standard vanity may not accommodate the reach of a large model.
Water-efficient aerators can reduce water use without making the faucet feel weak, but performance varies by product. Don't choose based on appearance alone. A budget faucet that fails, drips, or looks worn within a short time can cost more in replacement and labor than a better-specified option.
Coordinate the faucet with the cabinet hardware, mirror, and lighting. Replacing one fixture can be a focused update, but it should still look as though it belongs to the room.
10-Point Comparison: Affordable Bathroom Remodel Ideas
| Item | Implementation Complexity (🔄) | Resources & Timeline (⚡) | Expected Outcomes (📊) | Ideal Use Cases (💡) | Key Advantages (⭐) |
|---|---|---|---|---|---|
| Refacing Existing Cabinetry | Moderate, carpentry and veneer work; limited demolition | Medium cost and labor; completion often in weeks | Strong visual refresh; layout and storage largely unchanged | Structurally sound original cabinets; want major aesthetic change without full replacement | Cost-effective alternative to full replacement; faster, less waste |
| Strategic Use of Paint and Finish Changes | Low, painting and finish swaps; minimal trade skills | Very low cost; rapid (days) | Immediate visual shift; temporary if materials are dated | Small budgets; testing color direction; paired with minor updates | Lowest-cost, highest-immediacy impact; flexible to change |
| Upgrading Lighting as a Primary Design Investment | Moderate, electrical planning; licensed electrician required for many changes | Moderate cost; short–medium timeline; LED savings long-term | High impact on perception, function, and ambiance | Spaces with poor lighting or aging finishes to conceal | High ROI; improves safety, usability, and perceived quality |
| Affordable Countertop Material Selection | Low–Moderate, templating and installation steps | Medium materials cost (engineered quartz/laminate); moderate lead time | Durable, practical surface with strong visual contribution | Budget-conscious upgrades that need durable countertops | Good balance of durability and appearance; lower maintenance than stone |
| DIY-Friendly Backsplash and Wall Treatments | Low, many peel-and-stick/temporary options; skill-scalable | Low material cost; often weekend projects | Noticeable focal point; variable longevity depending on method | Renters, DIYers, small powder rooms, quick style updates | Low cost, easy to change, high visual interest for little investment |
| Mirror and Lighting Fixture Replacement | Low, mirror swap easy; fixture swap may need electrical | Low cost; quick turnaround | Immediate visual polish; larger mirror increases perceived space | Bathrooms with dated vanity area or inadequate task lighting | Highly visible improvement for modest investment; enhances grooming |
| Selective Hardware and Accessory Updates | Very low, straightforward swaps with basic tools | Minimal cost and time | Cohesive, finished look; does not alter function | When tightening design details or coordinating finishes | Cheapest updates with high perceived value; reversible |
| Strategic Flooring Updates with Durable Materials | Moderate–High, subfloor prep; professional install recommended | Medium cost; longer install time if structural prep needed | Durable, moisture-resistant surface; major aesthetic upgrade | High-traffic or moisture-prone bathrooms needing longevity | Long-lasting, realistic looks (LVP/porcelain); safer and easier to maintain |
| Thoughtful Space Planning and Storage Solutions | Low–Moderate, planning-led; some carpentry for custom inserts | Low to medium cost; quick to moderate timeline | Significant functional improvement; reduces clutter | Small bathrooms, storage-challenged layouts, maximize usability | High functional ROI with modest spend; many DIY-friendly options |
| Fixture Updates and Faucet Selection | Low, plumbing swap often straightforward; may need plumber | Low–medium cost; quick install | Improved ergonomics, water efficiency, and finish quality | Dated or inefficient fixtures where performance and look matter | Enhances daily experience and reduces water use; visible quality boost |
Spend Where the Bathroom Works Hardest
An affordable bathroom remodel is not one project type. It may be a powder room refresh, a vanity and lighting update, a safer primary bath, or a carefully phased renovation that preserves the existing shower and plumbing. The right scope depends on what is sound, what is failing, and what the household needs from the room.
Cost data reinforces why scope matters. A 2026 bathroom remodeling cost guide reports that a refresh involving paint, fixtures, and plumbing can remain below $5,000, while a typical bathroom remodel often falls around $12,000 to $16,500, depending on size and finish level. The same source lists half-bath remodels from about $1,200 to $15,000 and full bathrooms from $3,500 to $20,000. These wide ranges aren't contradictions. They show how strongly plumbing changes, material selections, room size, and labor affect the final result.
A practical plan starts with preservation. Keep the plumbing locations when they work. Retain a sound vanity, tub, or floor when its condition allows. Put the visible budget into the pieces that improve the room's daily experience, such as lighting at the mirror, a faucet that operates well, storage that reduces clutter, and flooring that handles moisture safely.
Resale value also argues for thoughtful restraint rather than indiscriminate cutting. One 2024 cost and value summary reports a midrange bathroom remodel averaging about $25,251, with approximately $18,613 recouped at resale, or roughly 74% ROI. Another version places the remodel at $26,138, with $20,910 in added resale value, or approximately 80% ROI. The Pacific region reached around 91%, while New England was close to 90.5%. Labor can account for 40% to 65% of a project, which helps explain why preserving the layout is such a powerful budget decision.
Phase the work around real needs
Begin with storage and circulation, then coordinate the visible finishes. A vanity that functions well may only need new doors, hardware, and lighting. A room with poor ventilation needs more than a coat of paint. For bathrooms up to 100 square feet, the Home Ventilating Institute recommends 1 CFM per square foot, with a 50 CFM minimum for smaller rooms. For larger baths, its bathroom ventilation guidance recommends adding 50 CFM for a toilet, shower, or tub, and 100 CFM for a jetted tub. It also advises that fans run for 20 minutes after use.
Accessibility deserves the same practical attention. Houzz reported in its 2025 bathroom trends study that grab bars appeared in 61% of renovated bathrooms, nonslip flooring in 55%, low-curb showers in 52%, and extra lighting in 31%. Wet rooms reached 16% of renovated bathrooms, up 3 percentage points year over year. These figures point to a broader design lesson. Better lighting, slip-resistant surfaces, and easier shower access can future-proof a room without turning every affordable remodel into a luxury gut renovation.
For homeowners planning accessibility-conscious work, NKBA guidance calls for an open turning area at least 5 feet in diameter, 4 feet of clear space in front of fixtures, and doorways 3 feet wide, with an outward-swinging bathroom door and lever handle. Its safe bathroom guidance also describes a threshold-free shower at least 4 feet square with a 36-inch-wide opening. Not every existing room can meet every dimension, but the principles help prioritize the changes that materially improve use.
Jennifer Gilmer Kitchen & Bath serves homeowners throughout Washington DC, Maryland, Virginia, and Delaware. Bring measurements, photographs, and a short list of frustrations to a showroom consultation in Chevy Chase, Easton, or Ashburn. The team can help determine what to preserve, where professional planning adds value, and how to coordinate selections and installation from concept through completion. A considered bathroom doesn't require every upgrade at once. It requires the right decisions in the right order.
Jennifer Gilmer Kitchen & Bath offers bathroom design, material selection, cabinetry planning, and installation coordination for homeowners throughout Washington DC, Maryland, Virginia, and Delaware. Visit Jennifer Gilmer Kitchen & Bath to explore the firm's showrooms and arrange a consultation for your affordable bathroom remodel.