

You're standing at the counter with a cutting board balanced beside the sink, waiting for someone to close the dishwasher so you can reach the refrigerator. The cabinets look tired, but the daily frustration isn't really the finish. It's the way everything competes for the same small patch of floor.
Learning how to remodel a small kitchen starts with separating storage problems from layout problems. A better pantry may solve the first. Moving an appliance may solve the second. Neither automatically calls for a larger room, and neither should begin with ordering cabinets.
Table of Contents
Clearance Numbers Every Small Kitchen Plan Starts With
A small kitchen passes its first test on paper: can people move through it, work at the counter and open appliances without blocking one another? Check the clearances before choosing finishes or adding an island. The NKBA Kitchen Planning Guidelines provide the core aisle and work-triangle benchmarks below.
Kitchen clearance benchmarks for small rooms
| Clearance | Benchmark | Where it is measured |
|---|---|---|
| Passageway | 36 inches minimum | Between facing counter fronts, tall cabinets or appliances |
| One-cook work aisle | 42 inches minimum | Between facing counter fronts, tall cabinets or appliances |
| Multi-cook work aisle | 48 inches | Between facing counter fronts, tall cabinets or appliances |
| Total work triangle travel | 26 feet maximum | Sum of the three legs between work centers |
| Individual work triangle leg | 4 to 9 feet | Each leg measured separately |
NKBA's educational guidance on kitchen design explains work-and-passage dimensions and how an open appliance affects standing room. Use these figures as planning benchmarks, not substitutes for local code or an individualized accessibility review.
Measure the space you actually stand in
Measure aisle widths between facing counter fronts, tall cabinetry and appliances, rather than from wall to wall. Include projecting refrigerator doors, counter overhangs and appliance handles where they reduce the usable space. A floor plan can look roomy and still leave too little clearance where people need to pass.
A passageway and a work aisle serve different purposes. The passageway carries household traffic; the work aisle needs room for someone to stand at the counter and use an appliance. If the main route cuts behind the person preparing food, consider whether a peninsula, pantry wall or appliance move could redirect traffic before expanding the room. The functional return may be greater than the added floor area.
Practical rule: If an aisle works only when every door is closed, the plan needs another look.
Before adding seating or storage in the center of the room, check these kitchen island clearance considerations. Compare each sketch with the benchmarks, including the space needed to use appliances, before settling on finishes.
How to Plan a Small Kitchen Layout Step by Step
Start with a tape measure, graph paper and the specification sheets for appliances you're considering. Keep a separate list of current frustrations: where groceries pile up, which drawer won't open fully, and where another person interrupts cooking. Those observations make the measured drawing useful.
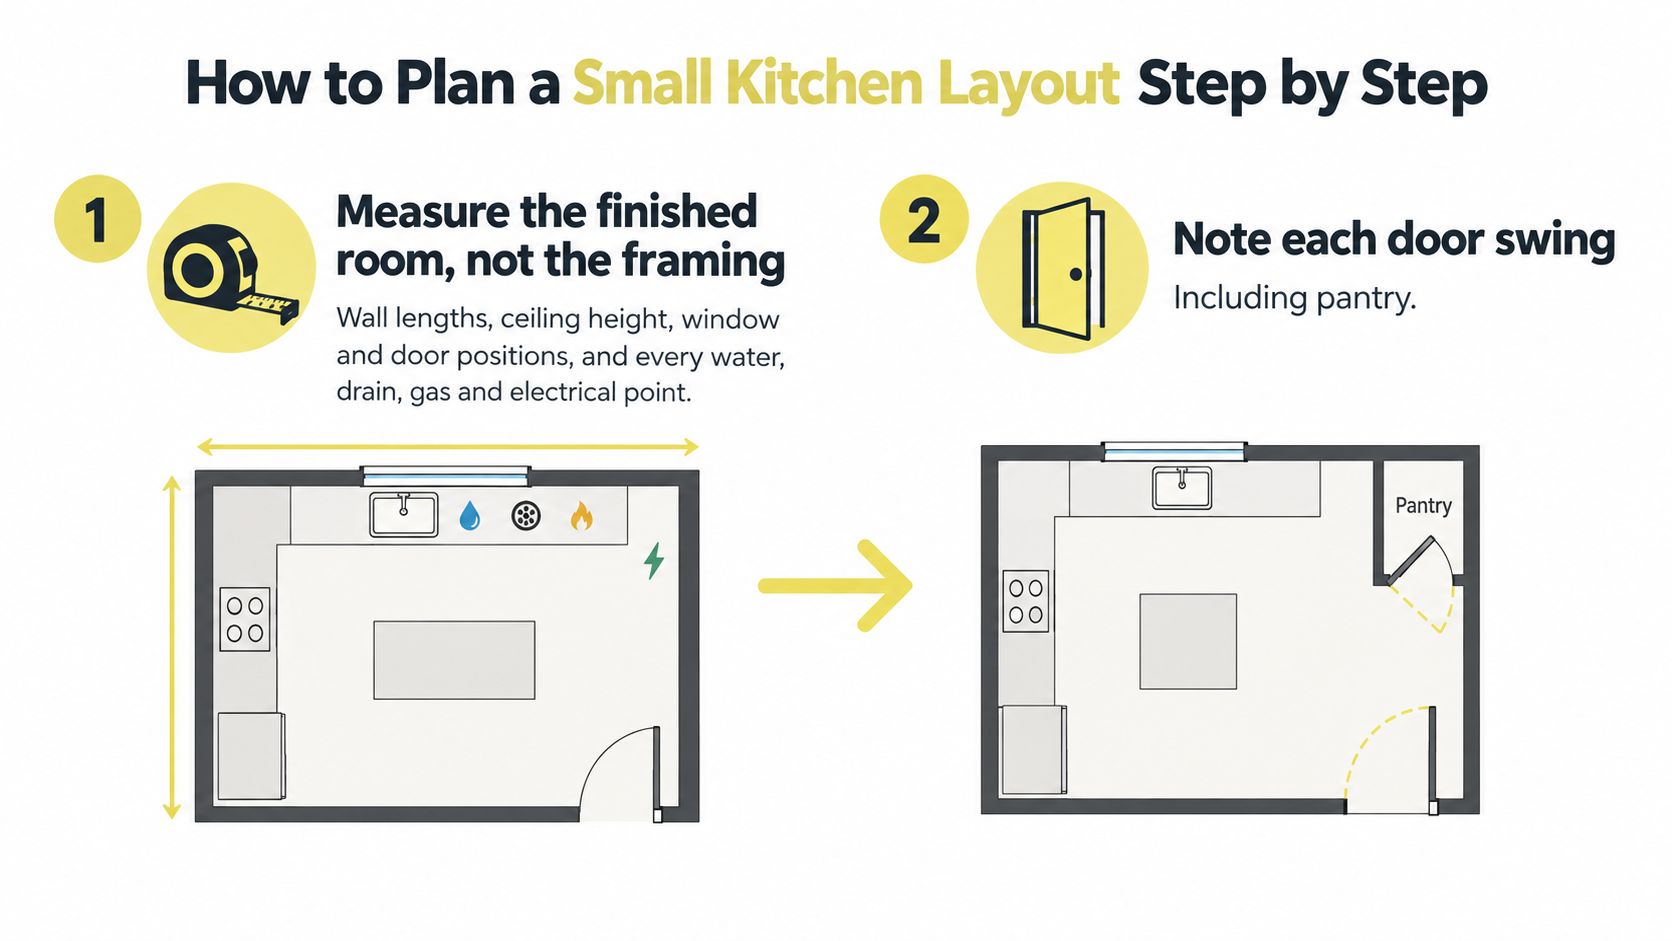
The first measurements should capture both the room and the doors that affect it.
Build the drawing around everyday movement
Measure the finished room, not the framing. Record wall lengths, ceiling height, window positions and door openings. Locate every water, drain, gas and electrical point, noting anything concealed that a contractor must verify.
Mark every door swing. Include pantry, basement and adjoining-room doors, not just cabinet doors. A door outside the kitchen can still interrupt its main work zone.
Draw the fixed elements to scale. Place cabinets, appliances and the sink on graph paper or in a planning app, using actual appliance specifications rather than a generic symbol. Show handles and required installation space so the drawing doesn't promise room the finished kitchen won't have.
Open everything on paper. Trace the refrigerator, dishwasher, oven, pantry and trash pull-out in their open positions. Check adjacent handles and walls as well as the aisle, because a drawer that catches a range handle is still a failed detail.
Place the work centers. Follow the route from refrigeration to cleaning and preparation, then cooking. Use the clearance card to check travel and protect a preparation surface that isn't also the household's main passage.
Make the island earn its place. Test the primary work zone with appliance doors open and someone standing where cooking takes place. If it fails, try a shallow peninsula, wall storage or a narrow rolling cart instead of shrinking the aisle.
Have the draft reviewed locally. Ask the appropriate professionals to check building, electrical, ventilation, plumbing and accessibility requirements. Planning guidance helps organize the room, but it doesn't establish whether a particular installation is permitted.
Let the failed sketch improve the next one
Consider a hypothetical, not a completed client project: a 9-by-11-foot galley with the refrigerator at one end and the range opposite. A proposed island leaves only 34 inches at the range in the open-door test. The next sketch removes it, explores a 15-inch-deep peninsula at the perimeter and relocates the refrigerator to the doorway wall, targeting a 44-inch aisle.
Those illustrative dimensions don't prove the revised plan works. The designer still needs to verify cabinet runs, appliance projections and the peninsula's location on the scaled drawing. The useful lesson is that moving a bulky appliance and changing the storage location can be more productive than repeatedly trimming an island.
The acceptance test is practical: can someone load the dishwasher, open the oven and reach the refrigerator without forcing a person passing through into the cooking route?
If the existing layout passes and you're considering a lighter update instead, Tony Painting's kitchen refresh ideas for Dublin homeowners offers a separate resource for exploring refresh options. Keep that cosmetic decision distinct from correcting a layout that doesn't work.
Expand, Reconfigure, or Keep the Footprint
A small kitchen can feel crowded because storage is poorly placed, not because the room is too small. Before choosing finishes or adding floor area, test the plan with appliance doors open and the main route in use. A peninsula, pantry wall, or appliance move may solve the problem with less disruption than expansion.
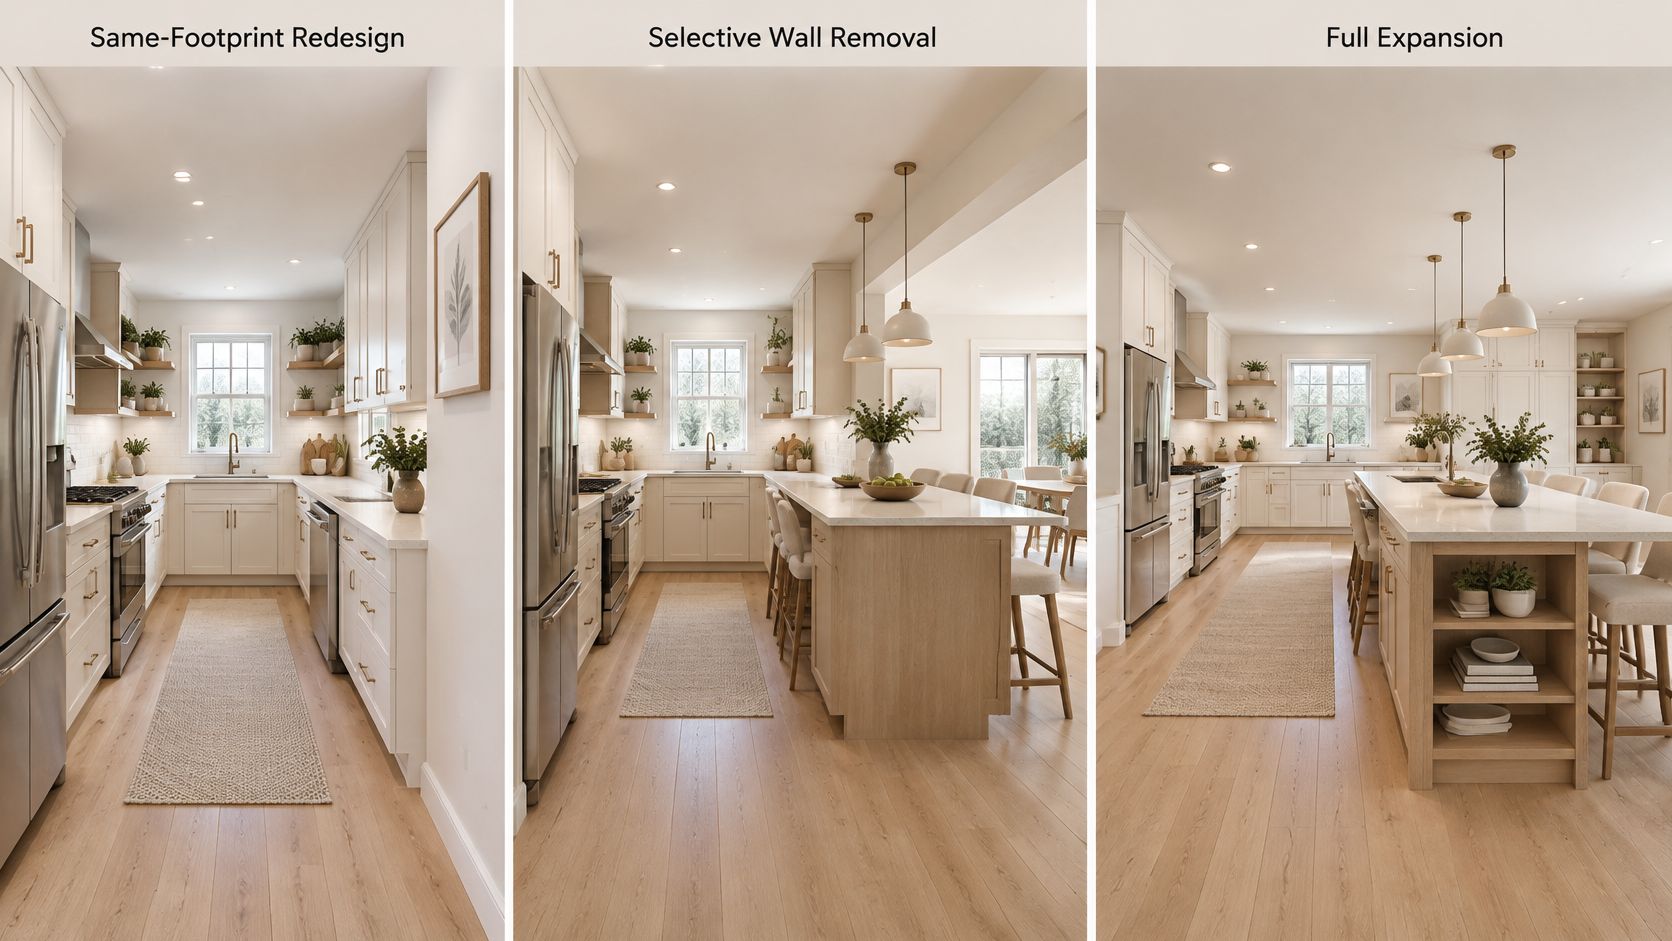
Three paths for a small kitchen remodel
| Option | Storage gained | Circulation | Structural work | Dining room impact | Best fit |
|---|---|---|---|---|---|
| Same-footprint redesign | Pantry cabinet, full-height units and drawers | Usually unchanged unless fixtures move | Low to moderate; utilities may move | None | Storage is the problem and walls are fixed |
| Selective wall removal | Wider counter, peninsula or shallow island where clearances permit | Can improve the work zone | Moderate; depends on structure and utilities | Possible | Counter space is lacking and the wall can be removed |
| Full expansion | Greatest potential gain, including pantry or island space | More flexibility, not an automatic improvement | High; permitting and a longer construction scope | Possible loss of dining space | Reconfiguration cannot accommodate household needs |
The options differ in more than square footage. A same-footprint plan can add storage without taking space from the dining room. Removing part of a wall may create room for a peninsula, while a full expansion brings a larger construction scope and may reduce dining space. Confirm that any proposed counter or island leaves usable circulation before treating the added area as a benefit.
Houzz's reporting on kitchen remodeling trends reports that 35% of renovating homeowners enlarged the footprint, 29% took space from a dining room, and 13% of renovated kitchens remained under 100 square feet. Expansion is one option, but those figures also show that compact kitchens remain part of renovation work.
Compare functional return, not just area
For an older Washington, DC-area home, weigh usable storage, uninterrupted counter space, clear passage and the dining function you might give up. A pantry wall or relocated refrigerator can improve the working area without changing the room's boundaries. Added floor area earns its place only if the household can use it.
Ask the contractor about permitting dependencies and utility relocation. Discuss resale implications with a local real-estate professional rather than assuming a larger kitchen guarantees a return. Stultz Plumbing services for builders offers a plumbing-scope reference, though it is not a local contractor recommendation.
Keep the footprint when storage is the main shortcoming and moving walls is costly. Consider selective wall removal after structural review if it creates useful counter space and the circulation still works. Expand only when the household's needs remain unmet after reconfiguration.
Storage Solutions That Work Harder in Compact Rooms
Storage planning should begin with the objects, not the cabinet catalogue. Set out your cookware, food containers, small appliances and pantry staples, then decide where each belongs. A cabinet provides useful capacity only when you can reach its contents and use them nearby.
Full-height cabinetry is a strong starting point where it suits the room's proportions. Reserve its highest storage for occasional serving pieces rather than everyday dishes. The visual trade-off matters: a concentrated tall-storage wall may feel more composed than tall units scattered around every corner.
Give each cabinet a job
A tall, narrow pantry or pull-out pantry can consolidate food that would otherwise occupy several unrelated cupboards. Custom pantry cabinetry is worth considering for an awkward alcove, but specify the interior around what you buy. Deep storage without a clear retrieval strategy can become another place to lose ingredients.
For base cabinetry, favor drawers where they make pots, pans and small appliances easier to retrieve. Compare corner pull-outs with the alternative of simplifying the corner and improving the adjacent drawers. More hardware isn't automatically more useful storage.
Upper cabinets commonly start around 12 inches deep, with base cabinets around 24 inches, but those are starting dimensions, not a prescription for every wall. Shallower uppers may suit a constrained reach; appliance specifications and countertop design should determine the final arrangement.
Explore these cabinet storage solutions with your inventory in hand. Evaluate the interior arrangement as carefully as the door style.
A smaller cabinet beside the task can be more useful than a larger cabinet across the room.
Protect the work surface and future access
An island is optional. A continuous perimeter counter may support preparation better than an extra cabinet in the middle of the room. Likewise, an appliance garage makes sense only when its closed door doesn't conceal counter space you need for cooking.
Reserve open shelves for everyday objects you're comfortable keeping visible. They're a display decision as well as a storage decision.
- Reachable hardware: Place frequently used storage where you can open it comfortably.
- Appliance landing space: Preserve a convenient surface beside the refrigerator and oven.
- Clear routes: Don't let a pull-out become a barrier across the main path.
- Adaptable pulls: Choose hardware that can be changed if grip or mobility needs evolve.
Check every storage choice against the work zone it serves. If retrieving the contents interrupts someone else's task, reconsider its location.
Lighting, Ventilation and Appliances That Fit the Footprint
A hood that blocks a cabinet door or a refrigerator that narrows the walkway can undermine a small kitchen plan. Check clearances and how each choice functions before choosing finishes. Lighting, ventilation and appliance dimensions all affect cabinet placement, so resolve them before the cabinet order is finalized.
Separate ambient light, which illuminates the room, from task light, which illuminates the counter. Accent lighting inside a glass-front cabinet can add depth, but it cannot replace clear light over the cutting board.
Pair each system with a space decision
| System | Reference or consideration | Space decision |
|---|---|---|
| Lighting | Houzz data reported by Houston Agent Magazine discusses lighting choices among surveyed renovators | Coordinate ceiling and under-cabinet fixtures with the work surfaces |
| Ventilation | Building America cites the ASHRAE 62.2 benchmark of 100 cubic feet per minute for intermittent kitchen exhaust | Plan hood coverage, duct routing and replacement air |
| Refrigerator-freezer | Compare usable capacity, exterior dimensions and door swing for the household's needs | Preserve cabinet space and a clear route when the door opens |
| Appliances | The Department of Energy's kitchen appliance guide offers guidance for comparing appliance efficiency | Check model specifications alongside footprint and door operation |
The Building America's kitchen ventilation guidance presents the 100-cfm benchmark as a reference, not a universal hood specification. Where feasible, extending the hood wider and deeper than the cooking surface can improve capture. Confirm the hood and duct plan with the appropriate professional; choosing a powerful hood alone does not resolve capture or installation requirements.
Resolve the details before cabinetry
Position task lighting so your body does not block the light at the counter. Check fixture placement beneath upper cabinets, glare, switching and the countertop finish. Reflective surfaces still need comfortable, useful illumination.
Settle hood dimensions, mounting position, duct route and replacement-air approach before finalizing nearby cabinets. In a tight room, a duct route that takes space from storage may change which hood or cabinet arrangement makes sense. Check that the refrigerator door can open without obstructing the main route, and that its location leaves a practical place to set groceries down.
Size the refrigerator around the household's shopping habits, not an aspirational pantry. If drinking-water filtration is part of the plan, this resource on sizing a tankless reverse osmosis system can help frame equipment choices. Verify that the selected system fits the sink cabinet while leaving room for plumbing, service access and stored items.
Budgeting and Timeline From First Sketch to Installation
A small kitchen can stay within its existing footprint and still require custom cabinets, relocated utilities or extensive installation work. Start the budget with the work the room needs, then compare it with broad spending benchmarks. Clearances and functional return should decide whether a change is worth funding. Expanding the room may add more cost than moving an appliance, adding a peninsula or creating a pantry wall.
U.S. kitchen remodel median spending benchmarks
| Project type | Median spend | Year-over-year change |
|---|---|---|
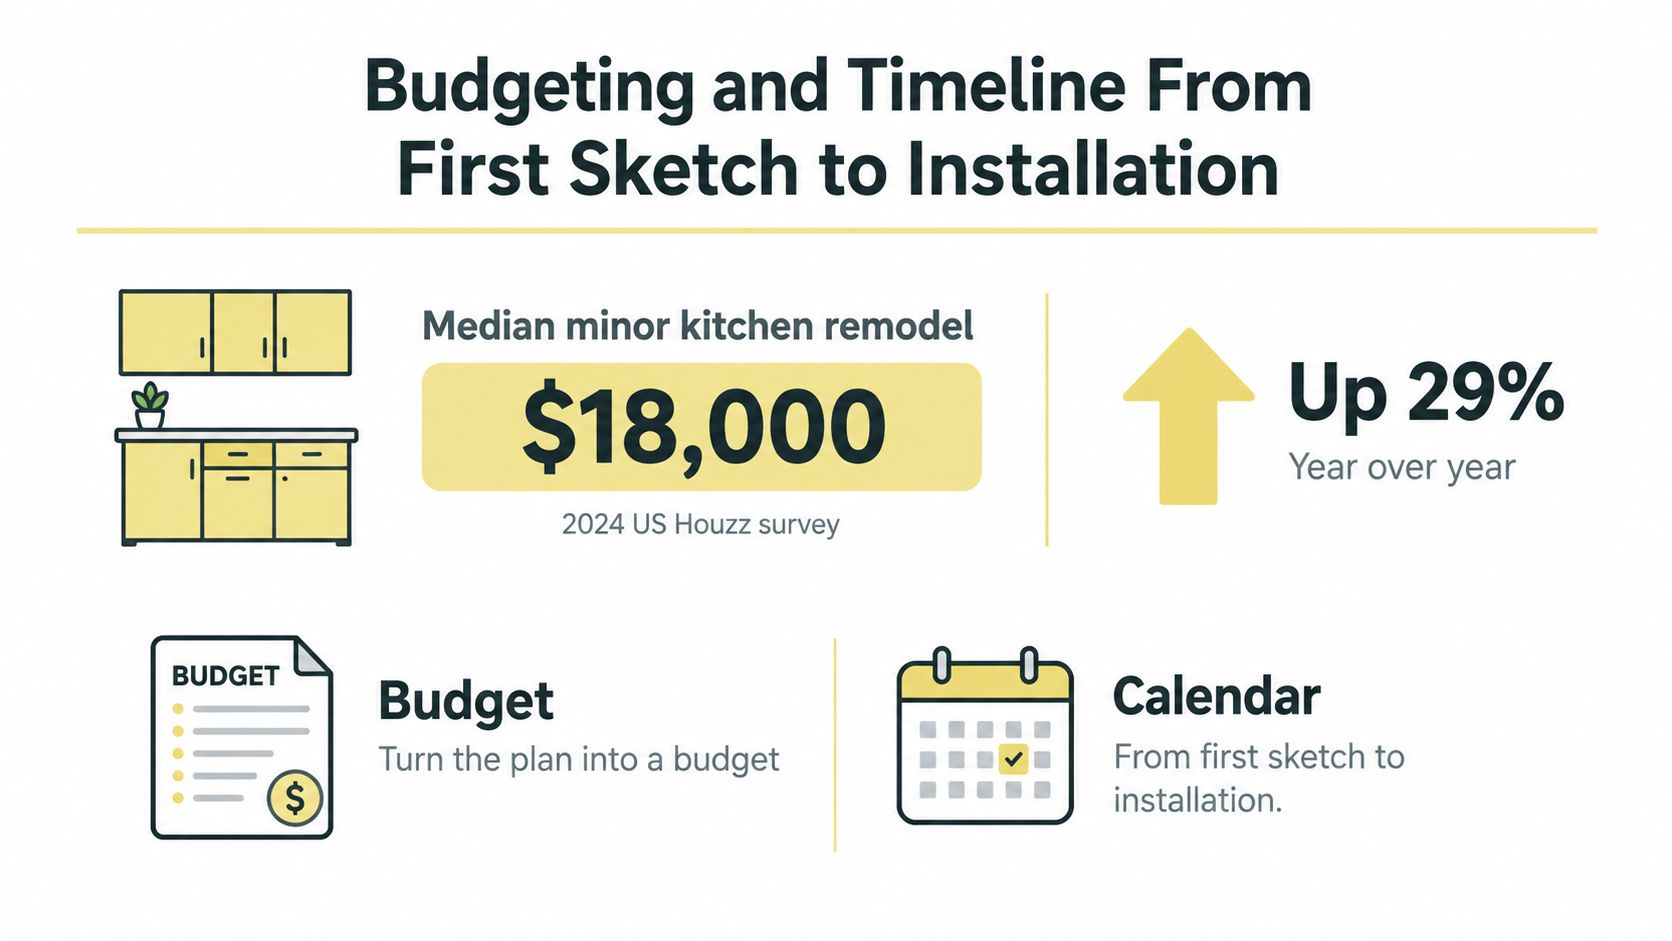
| Minor kitchen remodel, US, 2024 | $18,000 | Up 29% |
| Major kitchen remodel, US, 2024 | $55,000 | Up 22% |
The national medians and annual changes come from the 2024 U.S. Houzz Kitchen Trends Study release. The release also reports 45% choosing fully custom cabinetry and 35% choosing semi-custom. These figures provide national context, not a price quote for a compact room or a local estimate. The actual scope, materials and site conditions determine what your project will cost.
The minor-remodel benchmark offers a visual reference for budgeting and duration.
Build the allowance around scope
Break out cabinetry, installation, countertops, appliances, finishes and utility work. Check whether each proposal includes demolition, wall repair, delivery, disposal and final connections. Two estimates that look similar may cover different work.
Discuss a 10% to 15% contingency with your contractor for concealed conditions, especially in an older house. Treat it as an allowance to assess against the property and scope, not as a survey finding or a guarantee that every discovery will fit within it.
Before signing: Ask which unknowns remain, who will investigate them and how changes will be approved.
Put decisions on the calendar
Build the schedule around construction dependencies, not an assumed completion date. Late selections can delay ordering and installation, so assign decision dates as well as work milestones.
- Concept and measurement: Confirm priorities, existing conditions and preliminary scope.
- Layout and selections: Coordinate cabinetry, appliances, materials and lighting.
- Preconstruction: Freeze the measured plan, verify appliance cut sheets, locate utilities and issue a written selection schedule.
- Rough-in and surfaces: Complete plumbing and electrical work, then coordinate wall repair and flooring with installation.
- Cabinetry through completion: Install cabinets, template and fit countertops, connect appliances, fit hardware and test the room.
Use the NKBA planning guidance reproduced by IVO Cabinets to check the documented plan. Before countertop templating, test drawers and doors against nearby handles and appliance swings.
Custom cabinetry lead times can set the pace. Ask suppliers for confirmed dates, then review what affects a kitchen remodel timeline. Request a schedule that names your decision deadlines, not only the installer's milestones.
Booking a Consultation Before You Order Cabinets
A productive consultation begins with evidence of how the room works today. You don't need a finished design, but you should be ready to explain what fails during an ordinary meal, where storage falls short and which compromises you're willing to make.
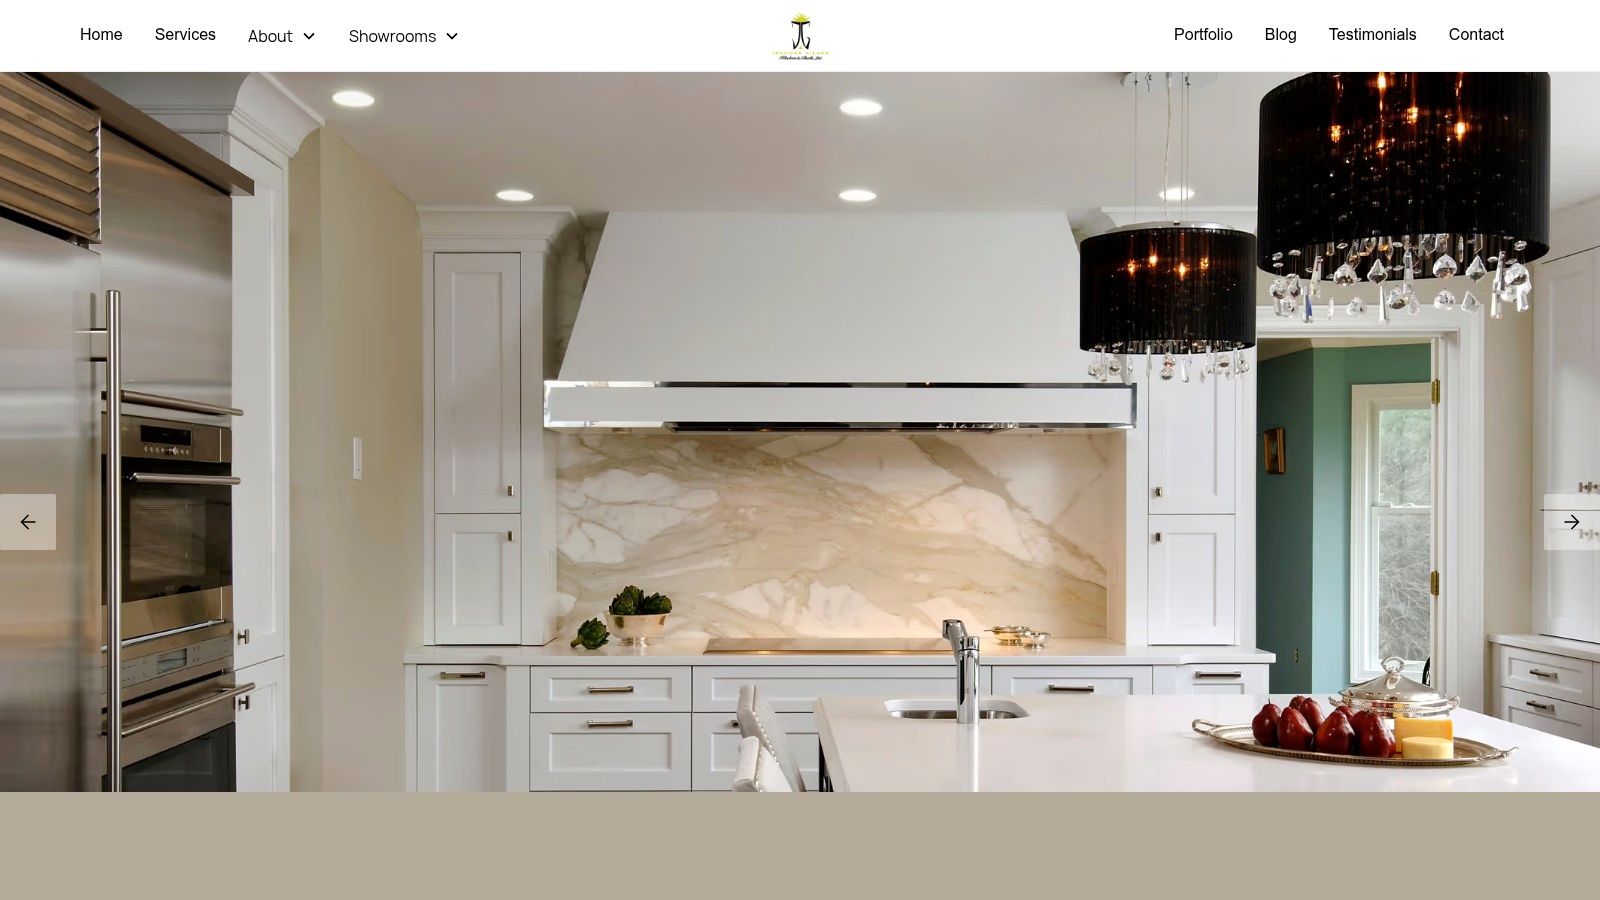
Jennifer Gilmer Kitchen & Bath serves Washington, DC, Maryland and Virginia, and also works in Delaware, with showrooms in Chevy Chase, Maryland; Easton, Maryland; and Ashburn, Virginia. In-showroom and by-appointment consultations let clients examine cabinetry and material samples while discussing a project from concept through installation, including layout planning, custom pantry cabinetry, lighting, appliances and installation coordination.
The design team includes Jennifer Gilmer, CKD; Nancy McCarren, AIA, LEED AP; and Marie-Josée Parisi.
Bring enough detail to make decisions
- Measured sketch: Include openings, utilities and the door swings you've identified.
- Clearance card: Bring the passageway and work-aisle benchmarks.
- Room photographs: Photograph each wall, including views from the doorway.
- Appliance list: Note what stays, what changes and any models under consideration.
- Budget range: State a comfortable target and the limit you don't want to exceed.
- Ranked must-haves: Separate necessary improvements from preferences.
Use the showroom conversation to compare real materials with the practical requirements of your room.
Book once you've checked the passageway, single-cook and multiple-cook benchmarks against your sketch. Do it before ordering cabinets or appliances, while the plan can still change without an expensive commitment.
Jennifer Gilmer Kitchen & Bath offers measured layout planning, custom and semi-custom cabinetry, and coordination from concept through installation for compact kitchens. Visit Jennifer Gilmer Kitchen & Bath to arrange a consultation, and bring your sketch, appliance list and priorities so the conversation starts with what your kitchen needs to do.