.avif)

You've saved tile samples, bookmarked vanities, and perhaps even chosen the sconces. Then you look at the existing bathroom and realize the key decisions come earlier: where people move, how water leaves the room, what happens behind the tile, and whether the space will still serve your household years from now. A successful step-by-step bathroom remodel treats those questions as design work, not construction surprises.
A cosmetic refresh can be relatively contained. A primary bath with a revised layout, custom cabinetry, accessibility features, and carefully coordinated finishes is a different undertaking. The difference isn't the number of selections. It's the sequence that connects them.
Table of Contents
Redefining the Remodeling Timeline
A homeowner may begin with a modest wish list: replace the tub, improve storage, install better lighting, and make the shower easier to use. During an initial consultation, the conversation often reveals a larger opportunity. The vanity may be blocking the best circulation path. The shower may occupy valuable floor area without offering comfortable entry. The exhaust fan may be venting poorly, while the finishes conceal aging plumbing or previous water damage.
That's why an experienced design team doesn't start with demolition. The project begins by understanding how the room functions, documenting existing conditions, developing the layout, and making selections that can be coordinated before the first wall is opened. Jennifer Gilmer Kitchen & Bath offers consultation spaces in Chevy Chase, Easton, and Ashburn, where clients can examine cabinetry, surfaces, hardware, and plumbing products in a setting suited to deliberate decisions.
A refresh and a full renovation are different projects
A limited update may preserve the existing plumbing locations and focus on paint, lighting, mirrors, hardware, or replacement fixtures. A full renovation can involve framing, electrical work, plumbing relocation, custom cabinetry, waterproofing, ventilation, tile, glass, inspections, and final adjustment. Each additional layer creates dependencies, so the schedule must account for design development, product availability, permits, construction, and review.
A small bathroom remodel may take about two weeks, while a gut renovation with layout changes or features such as a steam shower may require six to ten weeks of construction, sometimes longer (USA Today's bathroom renovation timeline guidance). Those are construction windows, not necessarily the full client experience from first conversation to completion.
Practical rule: The more the project changes the room's structure and mechanical systems, the earlier the design decisions need to be made.
Sequence protects the experience
The strongest process separates decisions into a sensible order:
- Discovery: Identify what feels cramped, inefficient, difficult to maintain, or unsafe.
- Design: Resolve layout, storage, lighting, accessibility, cabinetry, and technical requirements.
- Selections: Confirm products, finishes, tile, plumbing trim, glass, mirrors, and hardware.
- Preconstruction: Finalize scope, permits, ordering, site protection, and the construction calendar.
- Construction: Complete demolition, rough-ins, inspections, waterproofing, finishes, and installation.
- Handover: Test every system, complete the punch list, and review care requirements.
The Jennifer Gilmer Kitchen & Bath bathroom remodel timeline offers a useful framework for understanding how those phases fit together. Homeowners comparing planning approaches may also benefit from this resource on avoiding remodel delays with CS1 Real Interiors, particularly when several trades and custom selections must align.
The timeline isn't an administrative detail. It's part of the design. A thoughtful sequence gives the team time to resolve conflicts before they become expensive changes, and it gives the homeowner a clearer understanding of what will happen inside the home.
Space Planning and Accessibility Integration
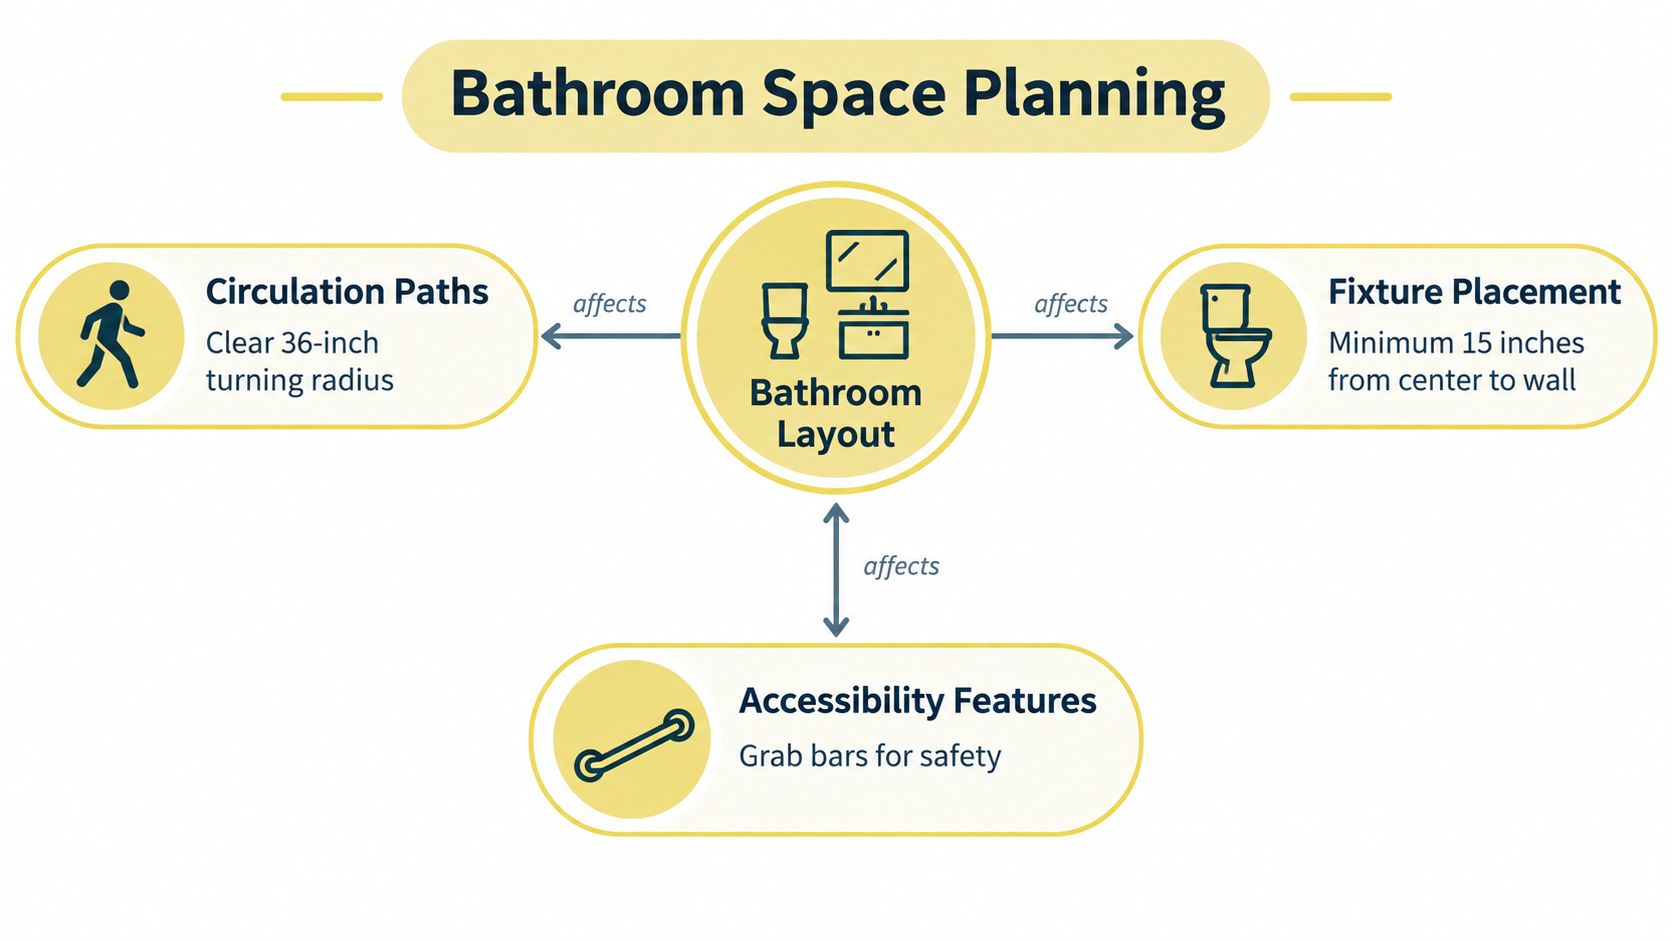
The room should work on paper before it's opened in person. Start with a measured plan showing walls, windows, doors, plumbing locations, electrical points, ceiling height, cabinetry depth, and the direction of every door swing. Then draw the movement paths from entry to vanity, toilet, shower, and storage.
That exercise often exposes the difference between a room that technically fits its fixtures and one that feels calm. A freestanding tub may look appealing in isolation, but it can narrow the route to the shower. A deep vanity can provide generous storage while making the door swing awkward. A curbless shower can improve access, but it also requires careful floor structure, drainage, waterproofing, and glass planning.
Resolve movement before materials
Accessible planning begins with circulation, not with a grab bar added at the end. The U.S. Access Board identifies an entry at least 36 inches wide and unobstructed clear floor space of 30 inches by 48 inches for fixtures and maneuvering (U.S. Access Board bathing room guidance). Common planning guidance for a wheelchair user also uses a 60-inch turning diameter as a practical benchmark.
These dimensions don't require an institutional appearance. They can support a quieter composition, with a wider shower entry, a floating vanity, concealed storage, and carefully placed lighting. The key is to draw the clearances early, before cabinetry, plumbing, and tile patterns make the plan difficult to revise.
For an accessible or future-friendly bathroom, additional guidance identifies 30 inches by 48 inches of clear floor space and a 60-inch diameter turning area. A room of about 7-1/2 by 7-1/2 feet may be needed once the sink, storage cabinet, toilet, and shower are accounted for (Home Depot accessibility guidance). These are planning references, not substitutes for project-specific code review.
Design for changing needs
Accessibility may address aging in place, a temporary injury, multigenerational living, or simple comfort. In 2025, 68% of homeowners said special needs were part of their bathroom projects, up 4 percentage points year over year, and wet rooms appeared in 16% of renovated bathrooms, or 1 in 6 projects (2025 U.S. Houzz Bathroom Trends Study).
That shift changes the design conversation. Plan blocking for future grab bars while walls are open. Consider a handheld shower, a built-in bench, slip-conscious flooring, reachable storage, and a curb-free shower where the structure allows it. Nancy McCarren, AIA, LEED AP, approaches these decisions as part of the room's architecture, not as accessories applied after the visual concept is complete.
A professional remodeler can also verify whether the proposed clearances meet applicable local requirements. In the Washington, DC, Maryland, and Virginia area, that early coordination matters because the plan must balance the homeowner's goals with the existing house, jurisdictional requirements, and the practical realities of construction.
Budgeting for Quality and Scope
A bathroom budget becomes more useful when it describes scope rather than promising a generic price per square foot. The same room can have very different costs depending on whether the plumbing stays in place, whether walls or floors require repair, whether cabinetry is custom, and how much labor the tile design demands.
Recent spending data illustrates that variation. The 2025 Houzz U.S. Bathroom Trends Study reports a $13,000 national median spend for all bathroom renovations in 2024, down from $15,000 in 2023. During that period, major bathroom remodels rose from $21,000 to $22,000, while bathrooms of 100 square feet or more held at a $25,000 median spend. Smaller bathrooms under 100 square feet moved to $17,000, a 13% increase, and the top 10% of projects reached $60,000 (2025 Houzz U.S. Bathroom Trends Study PDF).
Those figures aren't a quote for a particular home. They show why scope and finish level matter more than room size alone.
Read the numbers in context
Another view of the market shows how sharply project outcomes can vary. Houzz reported that median bathroom remodel spend rose 50% from $9,000 in 2021 to $13,500 in 2022, then reached $15,000 in 2023. HIRI's 2025 Project Decision Study found average bathroom remodeling spending at $12,061, with a median of $7,800 (HomeAdvisor bathroom remodeling cost overview).
The difference between average and median is useful. A smaller group of expansive, highly specified projects can pull the average upward, while the median describes the midpoint of the projects measured. Neither number captures your home's conditions, local labor, permit requirements, or design ambitions.
Put money where failure is expensive
A design-led budget gives priority to the elements that are difficult to replace later:
- Water management: Waterproofing, shower construction, drainage, and properly sealed transitions protect the framing and adjacent rooms.
- Ventilation: A correctly selected and routed exhaust system limits moisture exposure.
- Cabinetry: Well-designed vanity storage improves daily use and allows the room to remain orderly.
- Plumbing valves: Serviceable, durable valves and trim support long-term maintenance.
- Lighting and electrical: Layered lighting and safe electrical planning affect both comfort and function.
- Installation labor: Complex tile patterns, niches, slab materials, and detailed transitions depend on skilled execution.
A cheaper finish doesn't always create savings if it requires difficult maintenance or has to be replaced after a concealed failure. Conversely, the most expensive material isn't automatically the right choice. The better question is whether the material suits the room's moisture, cleaning routine, tactile requirements, and visual language.
Jennifer Gilmer Kitchen & Bath can coordinate layout, cabinetry, finish selections, and installation planning as one connected process. That approach helps clients see where an allowance supports the design and where a revision in scope may protect the more important work behind the walls.
Site Logistics and Rough-In Mechanics
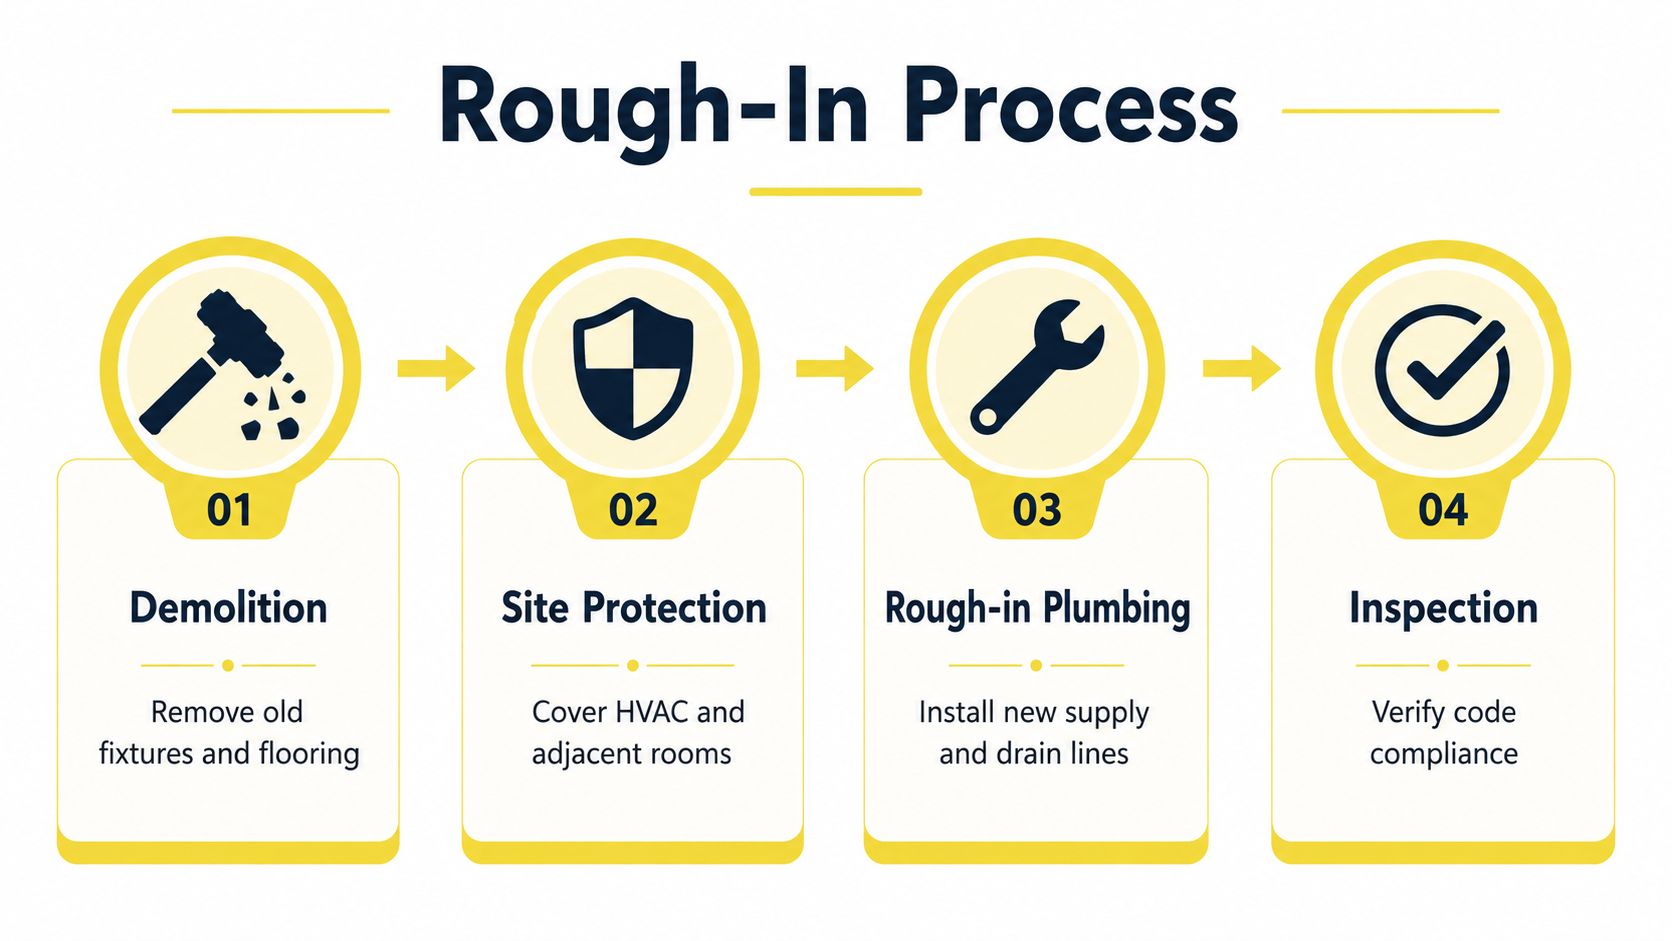
Once the plan and selections are established, the bathroom becomes a managed work site. The first responsibility is to protect the rest of the home. A clear route for workers, sealed openings, protected flooring, and a defined location for debris reduce the impact on adjacent rooms.
Lowe's recommends planning before shopping, preparing a detailed budget, reviewing local building regulations early, arranging a temporary bathroom plan, protecting nearby rooms, securing material storage, and designating a debris area (Lowe's bathroom remodel planning guidance). Those practical arrangements influence the client experience as much as the visible finishes do.
Demolition should reveal, not destroy
Careful demolition removes finishes while preserving information about the existing house. The crew should look for soft framing, staining, uneven subfloors, outdated wiring, poor previous repairs, and plumbing conditions that weren't visible during the initial walkthrough. Unexpected findings can change the scope, so they should be documented and discussed before the team closes the walls again.
Storage is part of site planning, especially when cabinetry, tile, plumbing fixtures, and glass are arriving at different stages. A practical guide to storing belongings while renovating can help homeowners decide what should stay in the house, what needs protection, and what should be moved away from the construction route.
Rough-ins establish the room's performance
Plumbing rough-in sets the locations and elevations for the toilet, vanity, shower controls, tub filler, and drains. Electrical rough-in establishes the requirements for lighting, outlets, heated floors, ventilation, mirrors, and specialty equipment. These decisions should be checked against the final cabinetry and fixture specifications, not interpreted from a general product photograph.
Ventilation deserves its own review. Expert guidance commonly specifies exhausting bath air outdoors, sizing the fan at about 1 CFM per square foot of bathroom floor area with a minimum of 50 CFM, and running it for 20 to 30 minutes after bathing (Holmes bathroom watertightness guidance). A fan that is undersized or routed incorrectly can leave the room vulnerable to persistent moisture. The same industry summary reports that budget overruns of 30% to 50% are common when moisture and planning errors create rework.
The Jennifer Gilmer Kitchen & Bath bathroom ventilation requirements resource provides a useful reference while the mechanical plan is being developed. Inspections should occur before insulation, wallboard, and tile conceal the work.
The quiet systems behind the walls determine whether the room remains comfortable long after the selections stop feeling new.
Material Selection and Waterproofing Protocols
Material selection is more precise when you can handle the products. A tile's surface texture, edge, variation, and scale are difficult to judge from a screen. The same applies to cabinet finishes, stone samples, faucet proportions, grout color, and the weight of a hardware pull.
A showroom visit gives the design team and homeowner a shared vocabulary. Marie-Josée Parisi might compare a porcelain field tile with a natural stone accent, then test how the palette works beside the selected cabinetry and metal finish. The goal isn't to fill the room with expensive materials. It's to choose a coherent set of surfaces that can tolerate humidity, cleaning, and everyday contact without losing their character.
Waterproof before you tile
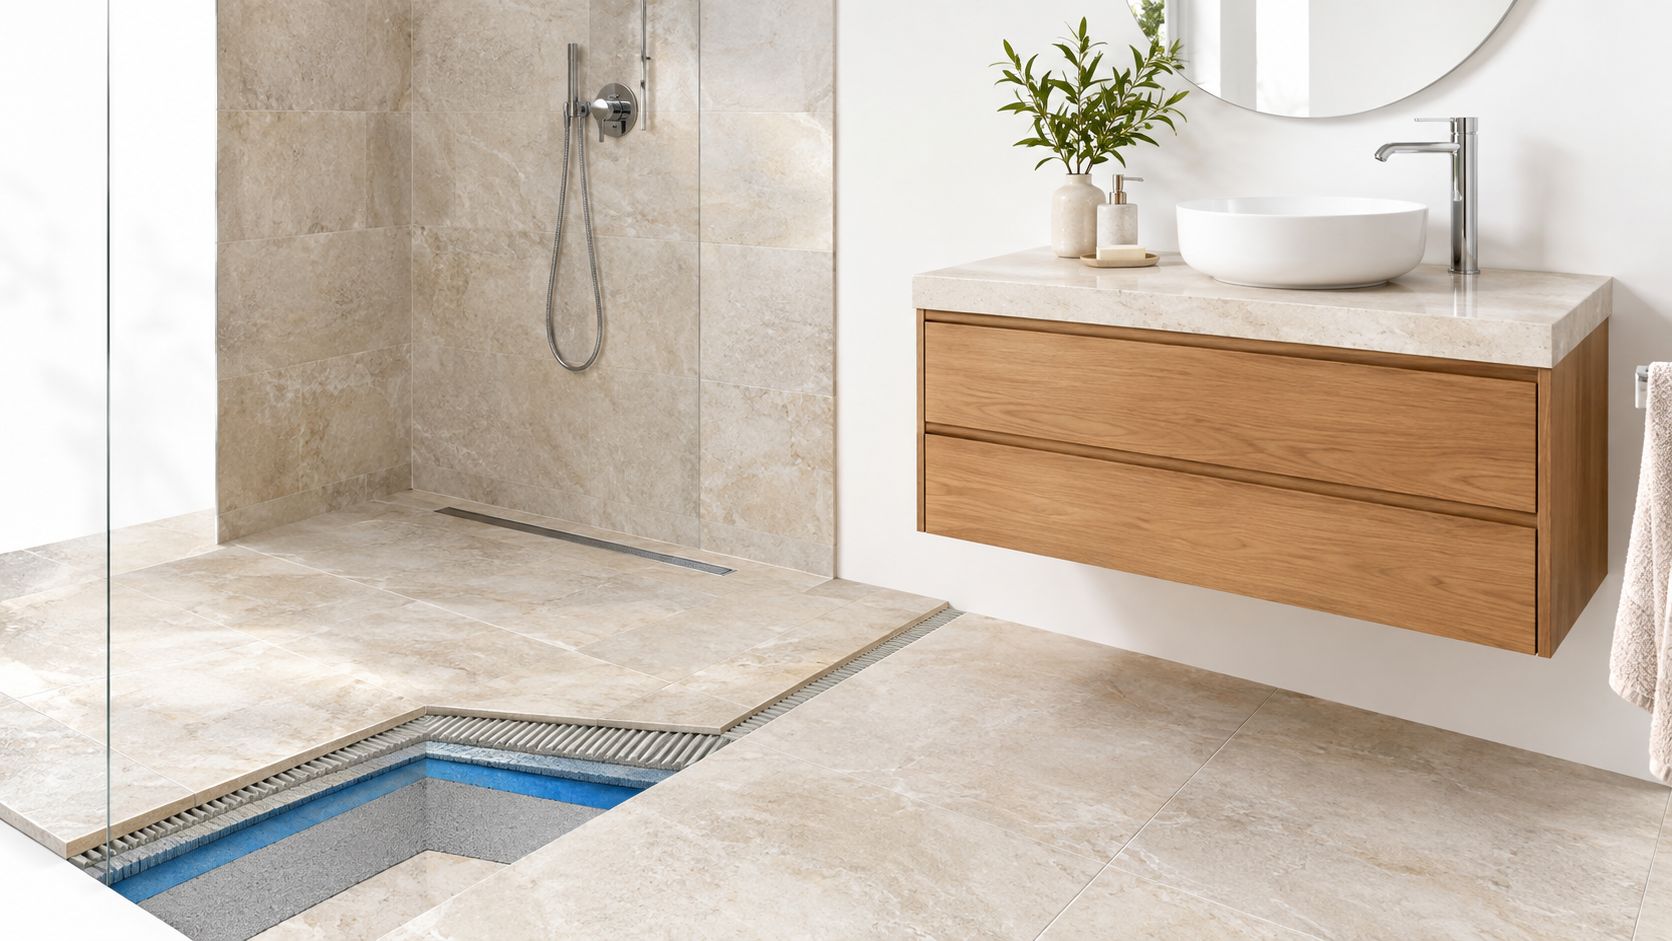
Tile and grout are not the waterproofing system. In wet areas, the shower needs continuous protection across the pan, curb, corners, wall-to-floor transitions, and the plane behind the tile. Cement board and a vapor barrier in damp shower or tub areas are also part of the build-up, as described in The Home Depot's bathroom remodeling guidance.
A practical benchmark is to flood-test the shower base for 24 hours before tiling, allowing the team to identify leaks before the finish materials conceal the problem (bathroom waterproofing guidance from Omni Home Ideas). The test should be treated as part of the installation sequence, not as an optional reassurance.
The porcelain tile for shower guide can help homeowners consider one material option in relation to maintenance, surface behavior, and the overall palette. Large-format tile may reduce grout joints, but it still requires a substrate that is flat, properly prepared, and suitable for the selected product.
A bathroom's hot water demand also deserves coordination with the home's existing systems. Homeowners researching hot water systems Caroline Springs can see how plumbing specialists frame system choices, even though local conditions and project requirements will determine the appropriate solution for a home in the Washington, DC, Maryland, or Virginia area.
Here's a visual reference for the relationship between floor construction, waterproofing, and tile installation:
The finished palette should be judged alongside the hidden assembly. A beautiful stone selection can't compensate for an untested shower pan, and a quiet neutral scheme won't remain serene if poor ventilation damages the surrounding materials.
Final Inspections and the Completed Space
The final phase begins before the last box is unpacked. Fixtures should be installed according to the approved specifications, cabinet doors and drawers should operate without interference, mirrors and hardware should align with the elevations, and the glass enclosure should meet the finished conditions of the room.
A proper walkthrough is more than a visual glance. Test the shower controls, drains, toilet, faucets, lighting, outlets, heated elements, and exhaust fan. Check water pressure and drainage. Open every drawer, inspect cabinet reveals, examine caulk and grout transitions, and confirm that doors don't strike fixtures or hardware.
Build the punch list carefully
A useful punch list separates cosmetic adjustments from functional corrections:
- Mechanical checks: Confirm that water flows correctly, drains clear, fixtures operate, and ventilation exhausts as intended.
- Cabinetry review: Test hinges, drawer slides, organizers, hardware, and clearances at every opening.
- Finish inspection: Review tile alignment, grout consistency, stone edges, paint, caulk, mirrors, lighting, and glass.
- Documentation: Keep product information, care instructions, warranties, and records of any approved changes.
The room should be cleaned with products appropriate to its surfaces, not treated as if every stone, metal, tile, or cabinet finish has the same maintenance requirements. Ask which surfaces need sealing, which cleaners should be avoided, and how the exhaust fan should be used after bathing.
For clients working with Jennifer Gilmer Kitchen & Bath, the completed space represents the end of a coordinated process that can run from concept through installation. That continuity matters because the final room reflects decisions made at every earlier stage, from the first circulation study to the concealed waterproofing details.
A well-designed bathroom doesn't call attention to its mechanics. It feels generous when the plan is efficient, comfortable when the clearances are right, and settled because the materials belong together. In the Washington, DC, Maryland, and Virginia area, that level of refinement begins with treating the remodel as an integrated design and construction project rather than a sequence of disconnected purchases.
Jennifer Gilmer Kitchen & Bath brings together bathroom design, space planning, cabinetry, material selection, and installation coordination for homeowners in Washington, DC, Maryland, and Virginia. Visit Jennifer Gilmer Kitchen & Bath to explore the firm's work and arrange a consultation for a bathroom remodel planned around how you live.